Team Task Management with Kanban
To work with the Kanban board, create a new project or open an existing project and click the Tasks tab.

In project management, Kanban is a method for visualizing tasks and controlling the flow of work. Tasks are divided into categories that are displayed as columns on a board. Status and responsibilities are always clearly visible. In classic Kanban, tasks are not scheduled, but in InLoox you can create project tasks with or without a deadline.
How a Kanban Board Is Structured
A Kanban board is read from left to right:
- On the far left are always the unfinished tasks or the backlog.
- On the far right are always the completed tasks.
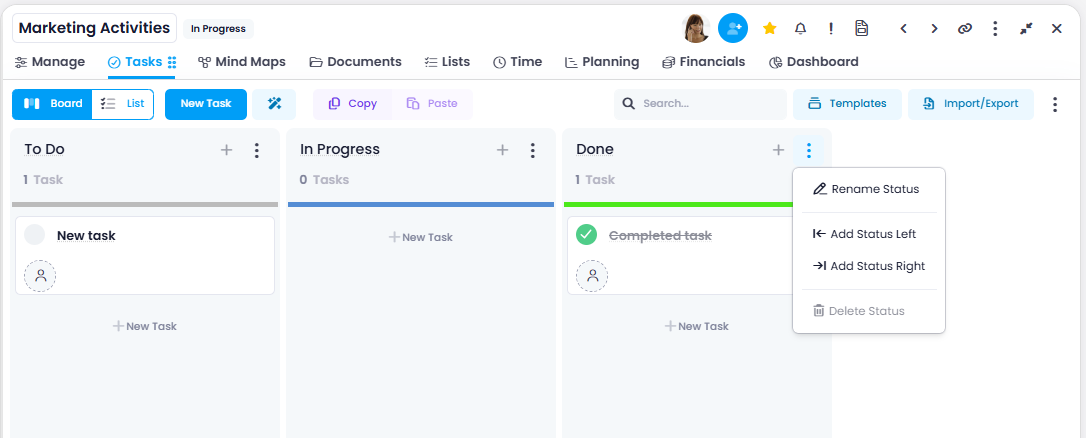
By default, InLoox provides four columns:
- To Do — Tasks that have not been started yet.
- Blocked — Tasks that are currently blocked.
- In Progress — Tasks currently being worked on.
- Done — Completed tasks.
Change, Add, and Delete Status (Kanban Columns)
You can customize the number and naming of the columns to suit the way you work.
- Click the three-dot menu on the right side of a status. Here you have the option to rename the status, add a new status to the left or right of it, or delete the status. Alternatively, you can click directly on the status name to rename it.
- You can change the order of the Kanban columns — using drag and drop you can easily move a column to the left or right.
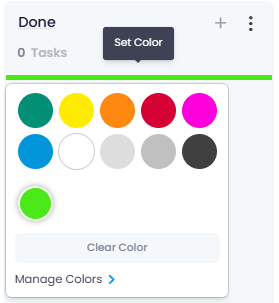
- To change the color of a status, click on the color bar and select a new color from the color palette. You can also add custom colors — click Manage Colors and either use the color picker to select the desired color or enter a hex code.
New Tasks
Click the New Task button to create a new task. By default, it appears in the leftmost column. Alternatively, you can click New Task directly within a specific column to create the task there right away.
You can also use the AI assistant to create tasks (available in InLoox Enterprise and InLoox Enterprise Plus only).

Changing the Status of a Task
You can drag tasks to another column to change their status and color assignment. For example, when a team member starts working on a task, they can drag it from the To Do column to the In Progress column. This way, all team members can see who is currently working on what. Once you drag the task to the far right column, it is considered complete.
- Overdue tasks are marked with a red start and/or end date.

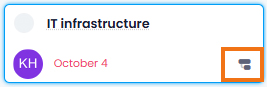
- If a task is added to a planning element in the Gantt chart, the Gantt icon appears in the Kanban task card. The task automatically receives the start and end dates of the planning element. These dates are also displayed on the Kanban task card.
- For particularly large tasks whose planned effort reaches or exceeds two working days, a blue warning flash appears.

- If you color-code your tasks, the color is also displayed in the Kanban task card under the resource.

No matter how you name and arrange the columns — in InLoox, the tasks in the leftmost column are always listed as uncompleted and the tasks in the rightmost column are always listed as completed.
Adjustments to the Kanban board are always visible for the entire project. If you want to define a Kanban structure for all projects in the database, the InLoox administrator must configure this in the InLoox Account Settings.
Select Multiple Tasks
You can select multiple task cards on the Kanban board at once to perform bulk actions on them.
- Hold Ctrl or Shift and click a task card — the selected card is highlighted with a blue border.
- Click additional cards to add them to the selection.
- A command bar appears at the bottom of the screen with the available bulk actions.
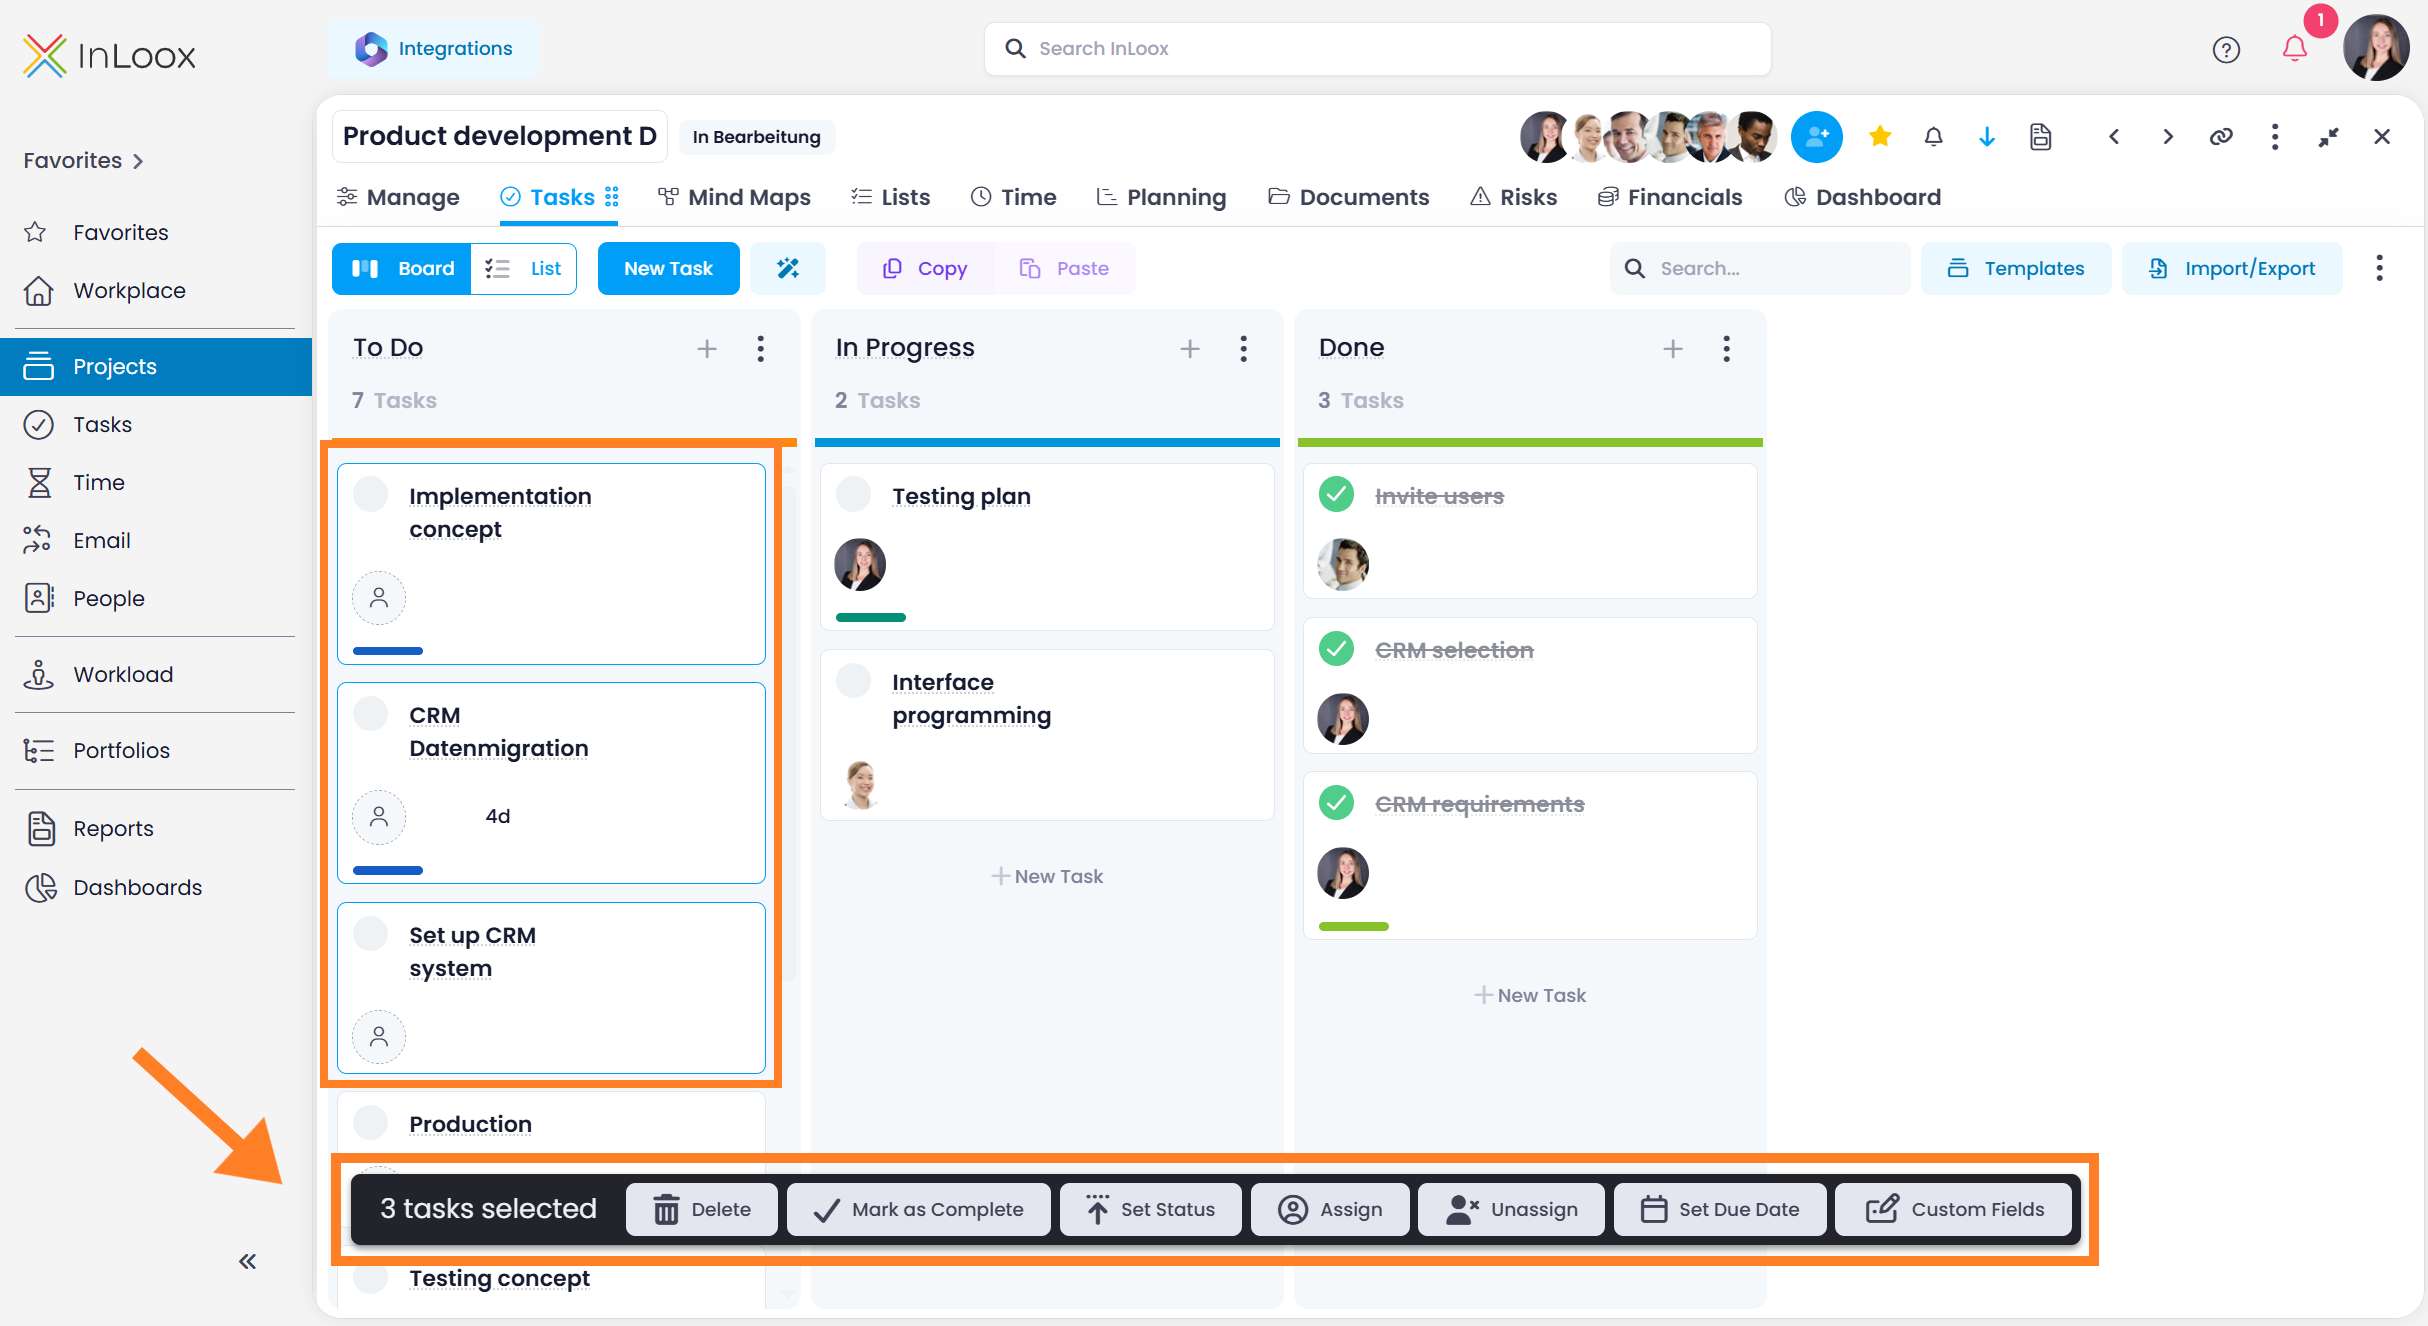
The following bulk actions are available when multiple Kanban cards are selected:
- Delete
- Mark as complete
- Set status
- Assign a resource
- Remove assignment
- Set a due date
- Edit custom fields
To deselect all cards, click on an empty area of the board.