Enable Windows Authentication (Single Sign-On) for InLoox Self-Hosted
Windows Authentication lets your users sign in to InLoox Self-Hosted with their existing Windows account (Single Sign-On). Once enabled, users link their Windows account in InLoox and can then authenticate without entering a separate InLoox user name and password.
This guide is only relevant for InLoox Self-Hosted.
You must have local administrator permissions on the server to configure Internet Information Services (IIS). Windows Authentication must be installed as an IIS role feature on the server.
Enable Windows Authentication in IIS
- Open Internet Information Services (IIS) Manager.
- In the Connections panel, expand Sites and select the InLoox site.
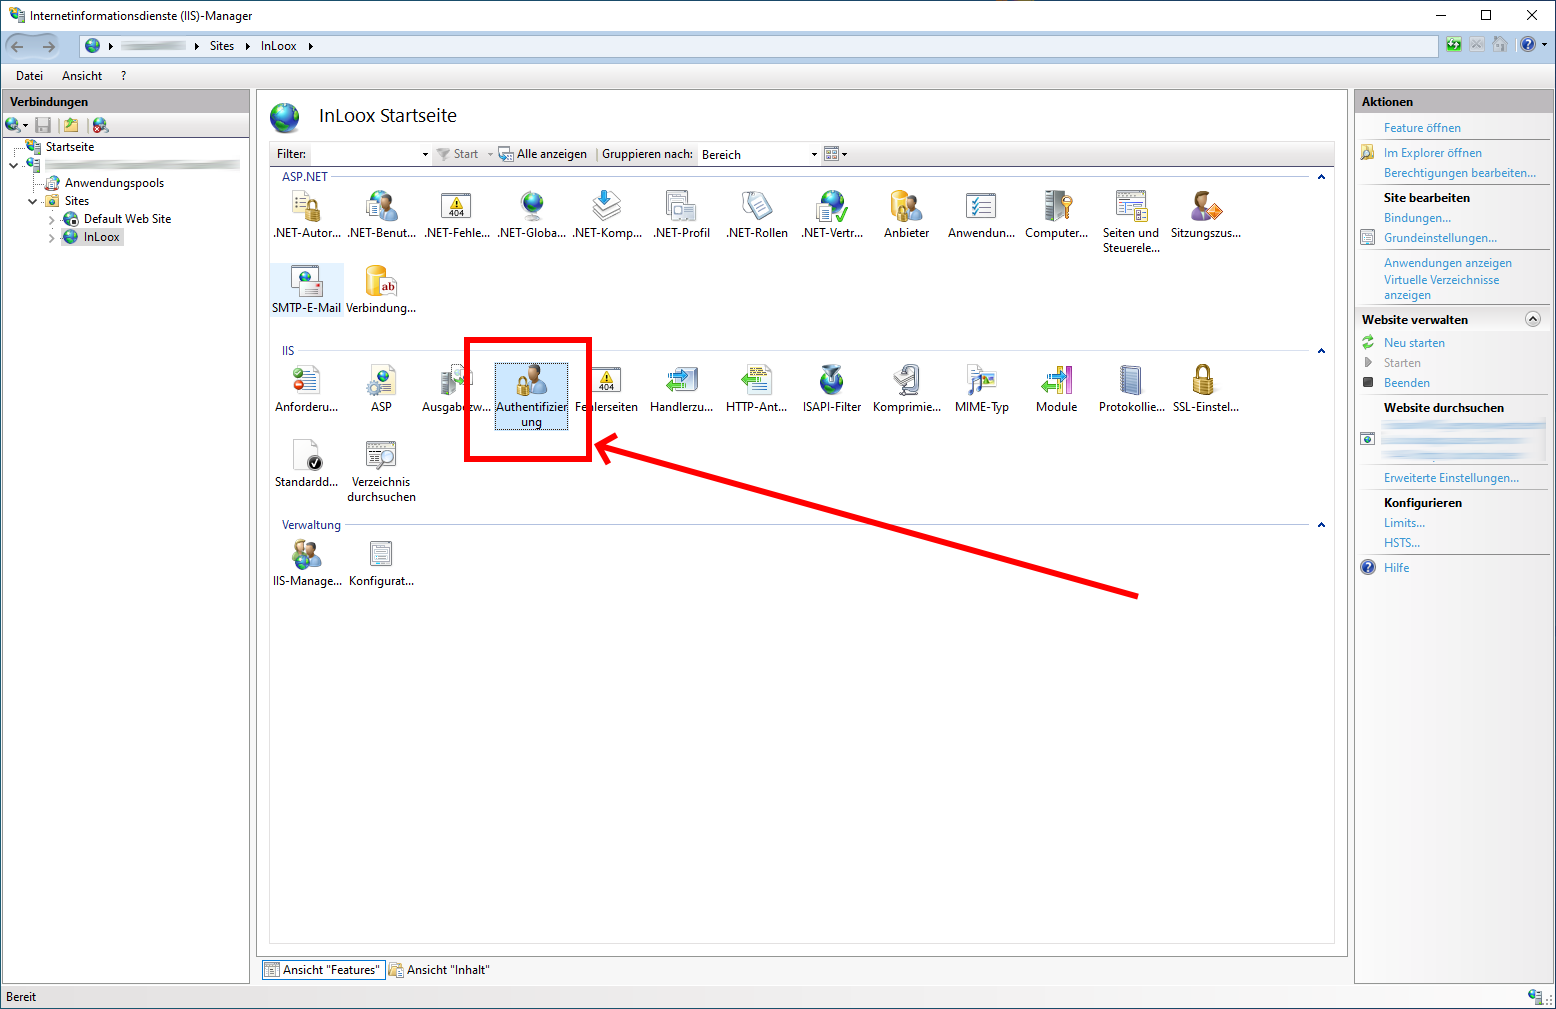
- In the IIS section of the InLoox start page, open Authentication.
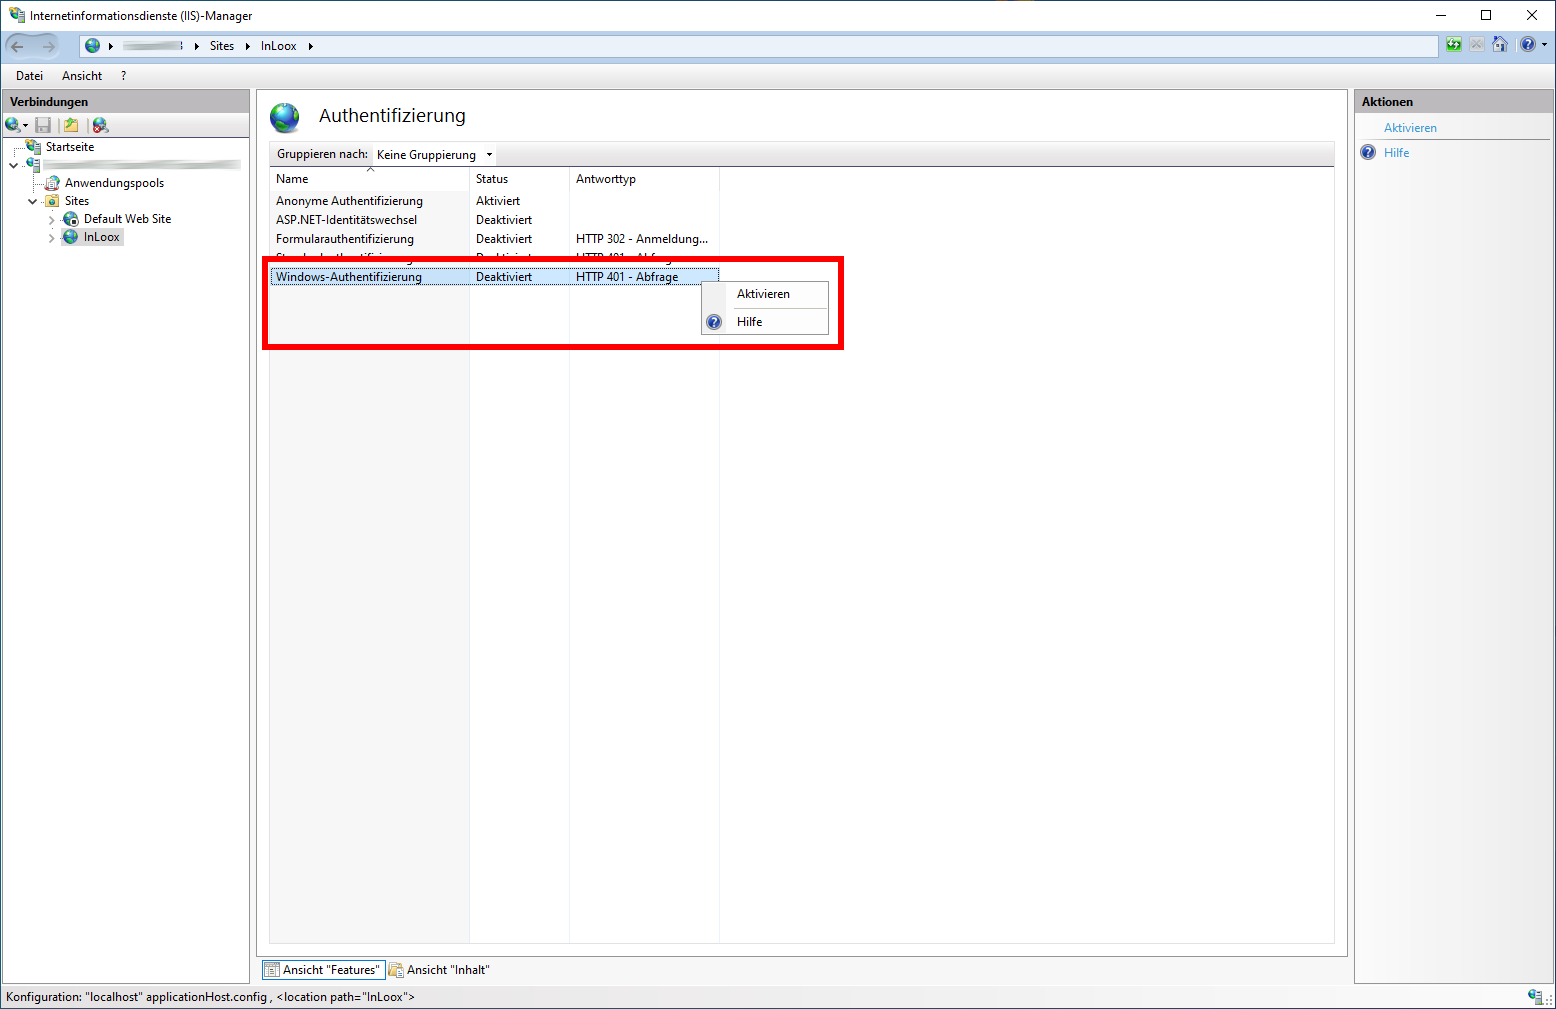
- In the list of authentication methods, right-click Windows Authentication and select Enable.
Restart the Website
After enabling Windows Authentication, restart the InLoox website for the change to take effect.
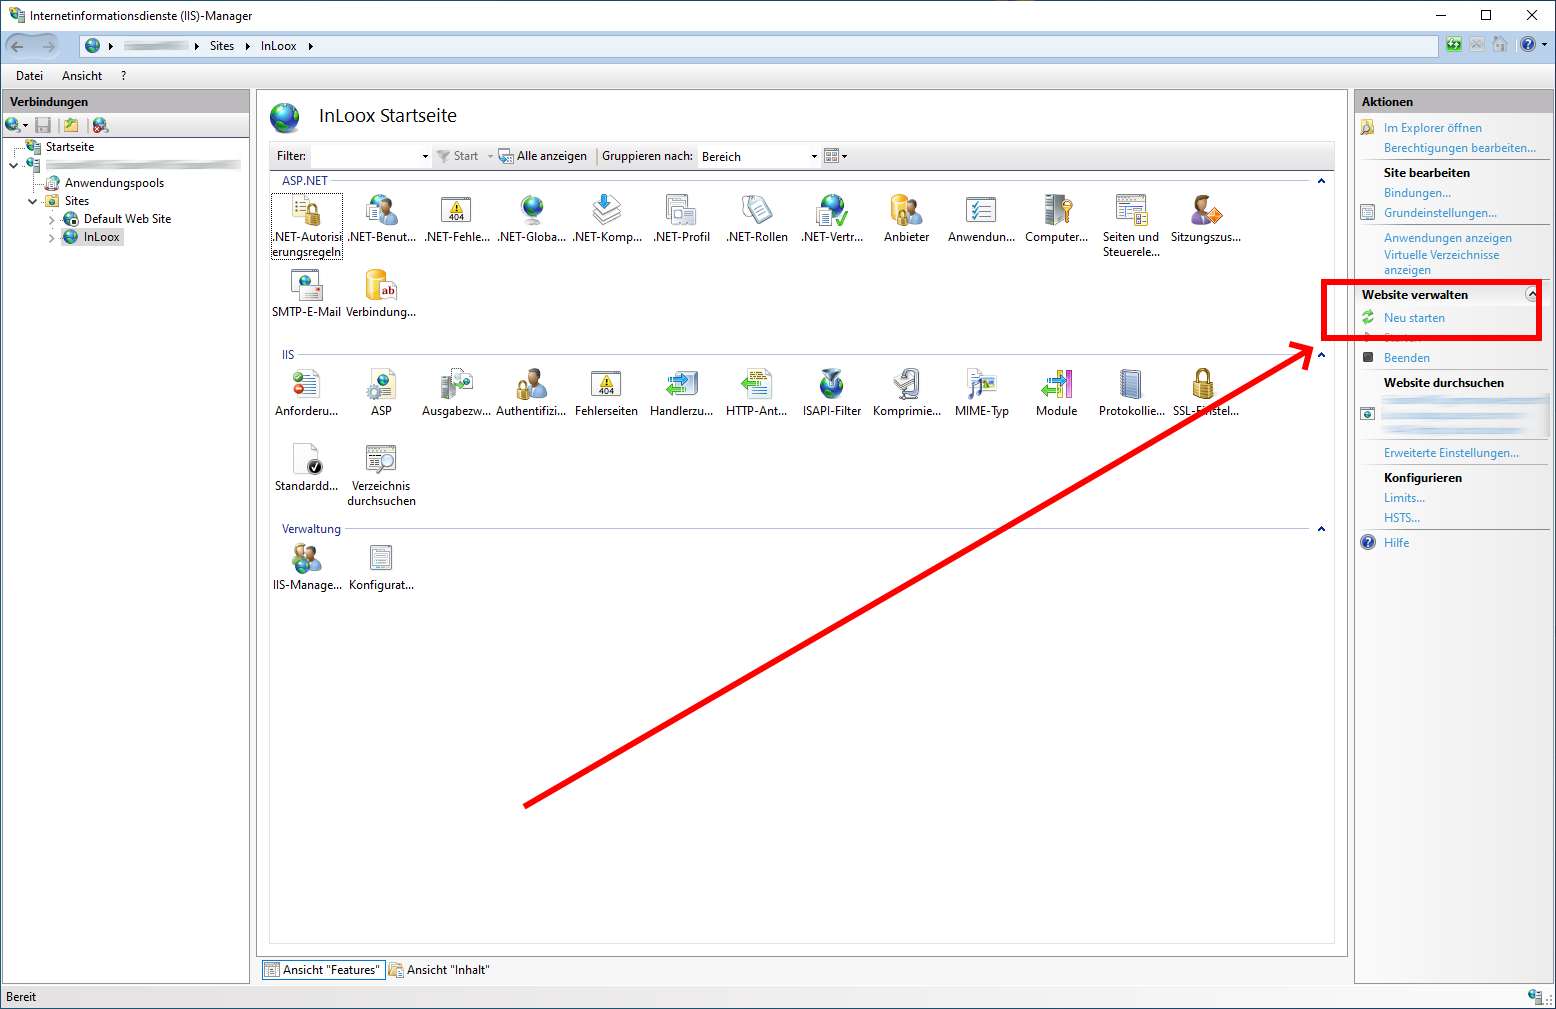
- Return to the InLoox start page in IIS Manager.
- In the Actions panel on the right, under Manage Website, click Restart.
Restarting the site in IIS briefly interrupts access to the Web App. Signed-in users may need to reload the page after the restart completes.
Link a Windows Account in InLoox
Each user connects their Windows account to their InLoox profile once. After linking, the Windows account can be used to sign in.
- In the InLoox Web App, open My Profile > Settings.
- Scroll to the Linked Accounts section.
- Under Single Sign-On, click Connect Microsoft account to link the active Windows login.
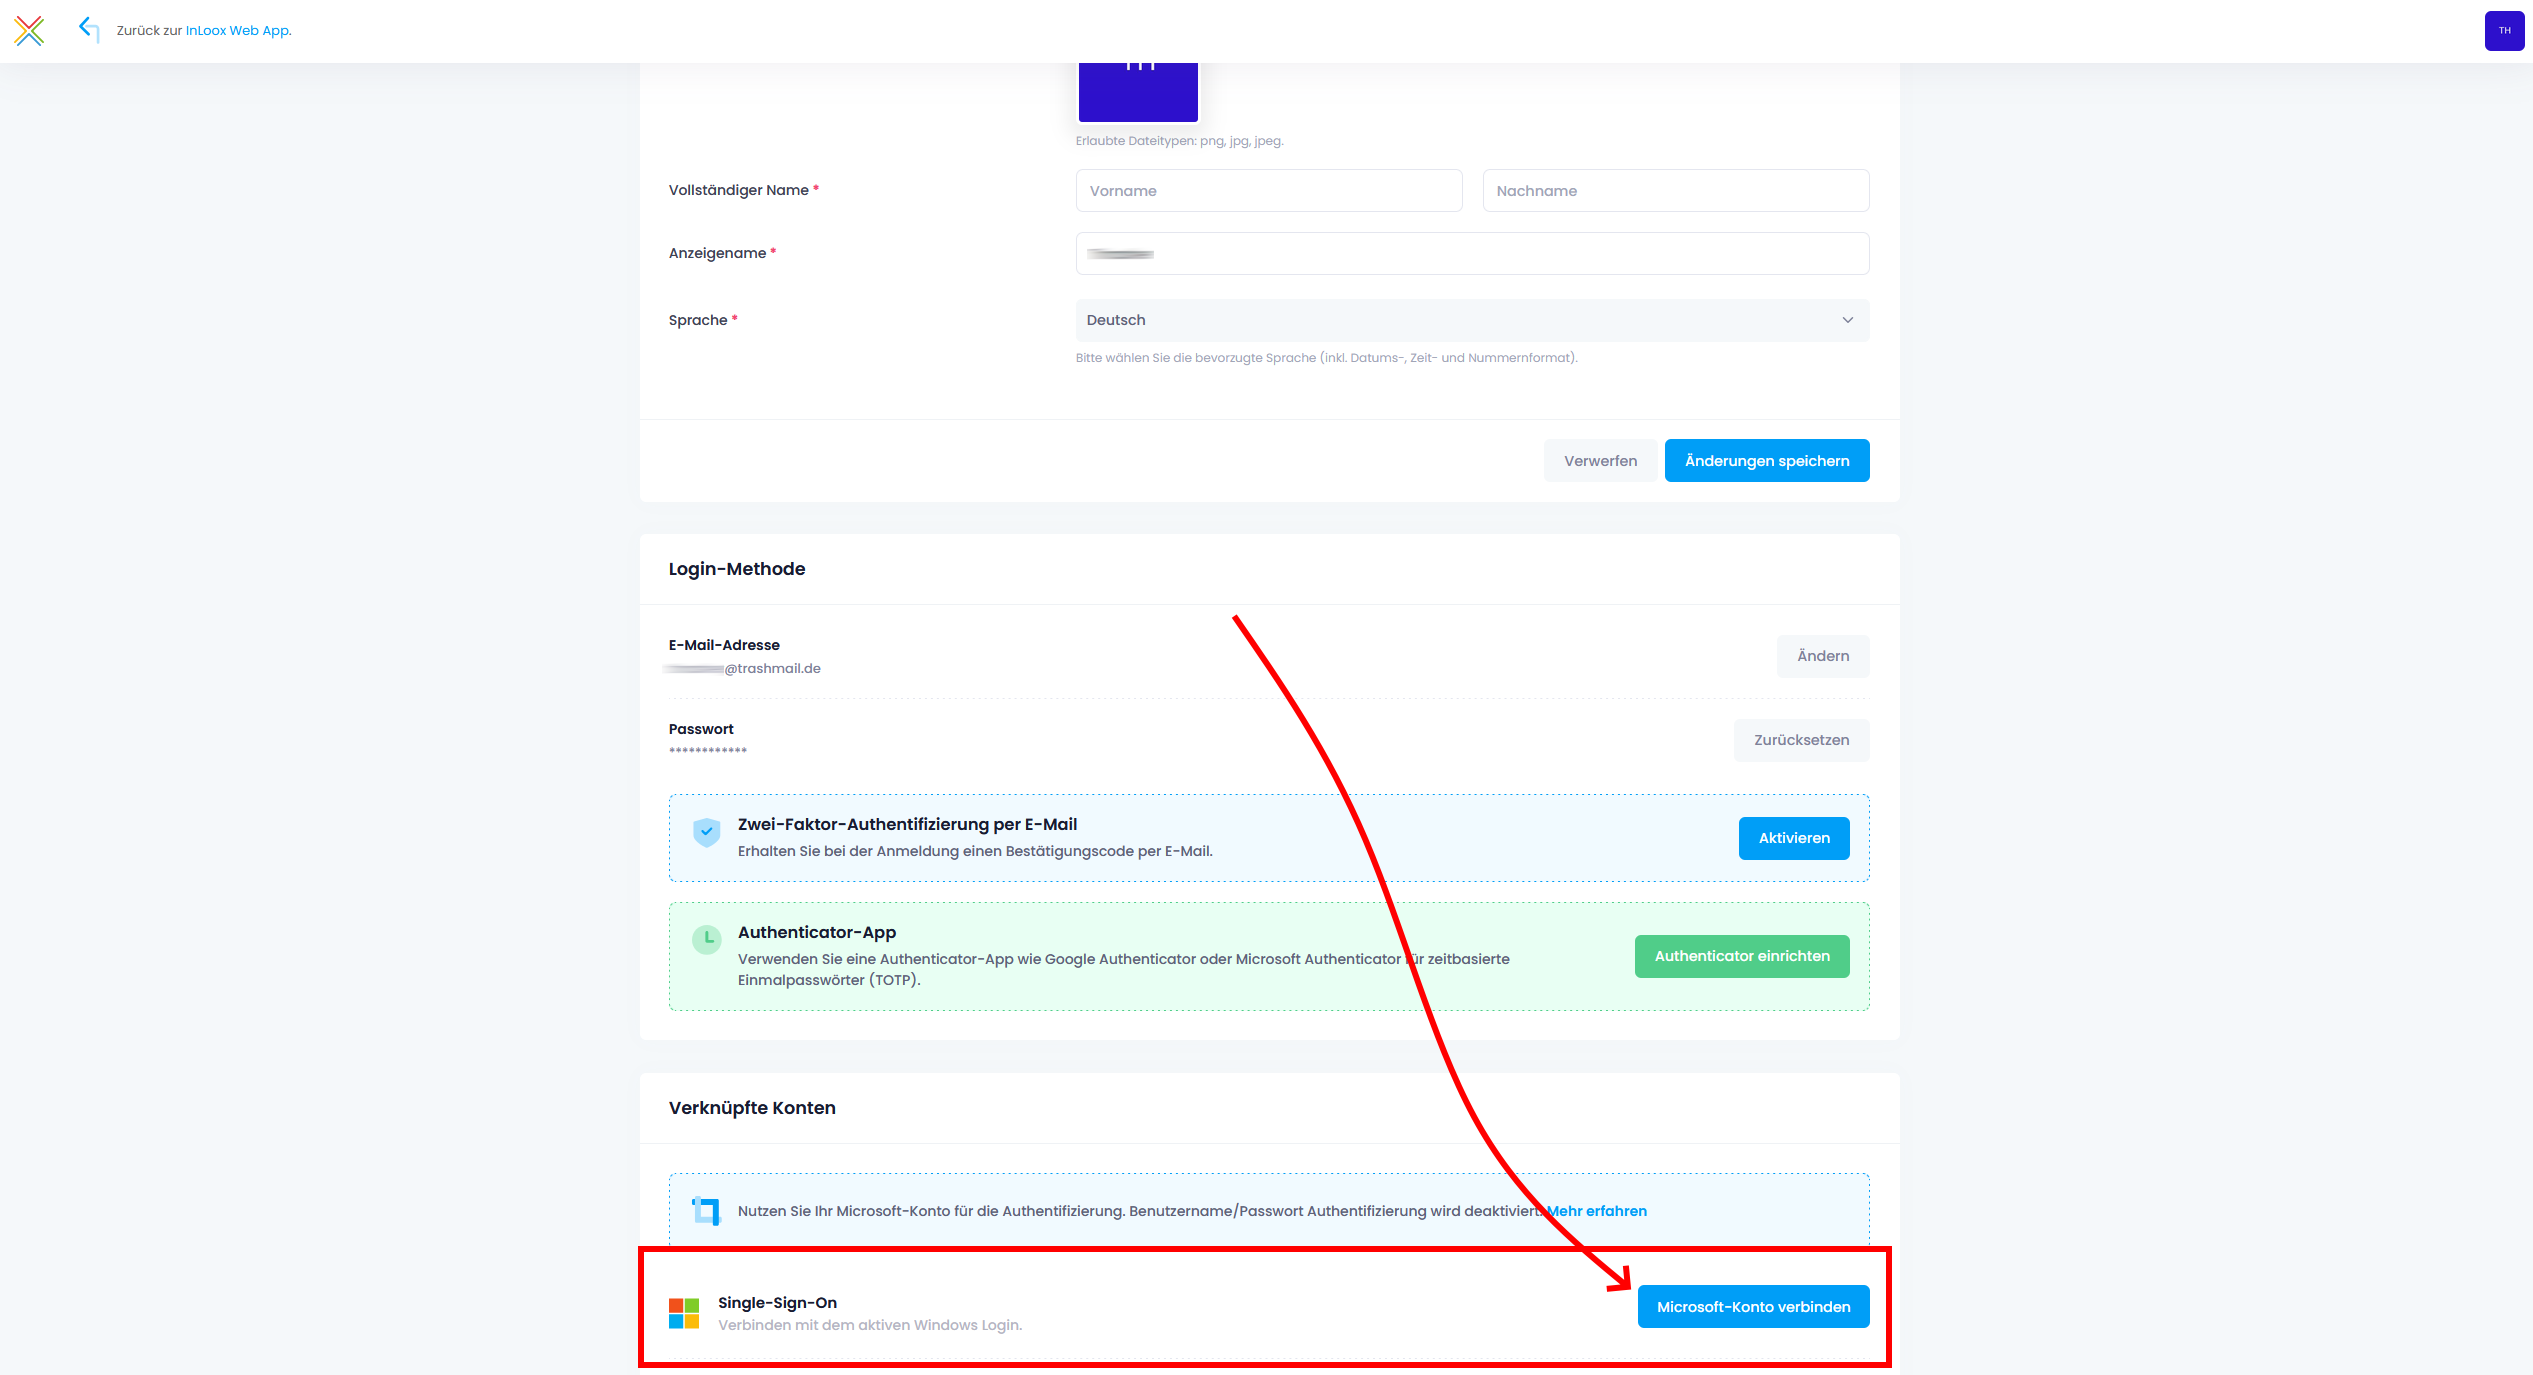
When a Windows account is linked, user name and password authentication is deactivated for that user. From then on, the user signs in with the linked Windows account.
Sign In with Windows Authentication
Once a user has linked their Windows account, they can use Single Sign-On to authenticate. On the InLoox login page, select the Windows login option to sign in with the active Windows account.