Update InLoox Self-Hosted
This guide explains how to update your existing InLoox Self-Hosted Server to the latest version. The update process upgrades all server components and migrates your database to the current schema.
Always create a full backup of your InLoox databases before starting the update. The database migration cannot be reversed.
Prerequisites
- An existing InLoox Self-Hosted installation (version 12.5.1 or later)
- Administrator access to the server
- A current backup of your InLoox databases (
inloox_Accountsandinloox_ProjectSpaceare the default names — your database names may differ depending on the configuration chosen during installation. The installer displays the actual database names before proceeding.) - ASP.NET 10 Hosting Bundle installed on the server — see system requirements for details. We recommend setting up automatic .NET updates.
Upgrade from InLoox 12.5.0 and Older
A direct upgrade to the current version is only supported from version 12.5.1 or later. If you are running version 12.5.0 or older, you must first update to version 12.5.1 before upgrading to a newer release.
Download the Latest Version
Download the latest version of the InLoox Self-Hosted Server:
Run the Update
-
Create a backup of your InLoox databases using SQL Server Management Studio or your preferred backup tool. The default database names are
inloox_Accountsandinloox_ProjectSpace, but yours may differ. The installer displays the actual database names before proceeding. -
Run the downloaded installer file on the server where InLoox is installed.
-
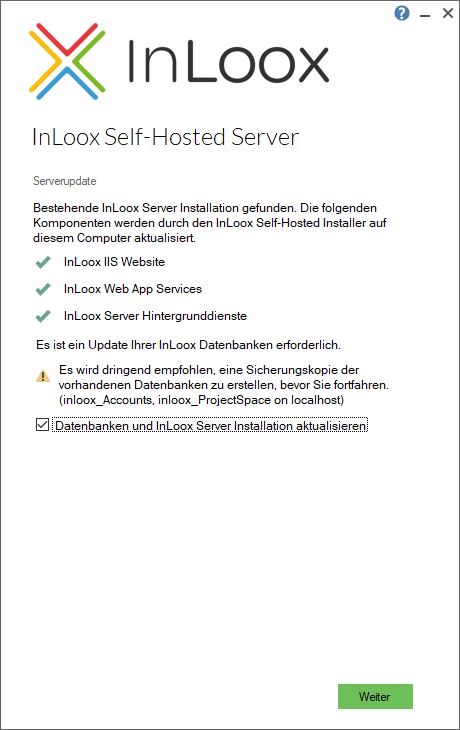
The installer detects the existing InLoox installation and shows the Server Update screen. It lists all components that will be updated:
- InLoox IIS Website
- InLoox Web App Services
- InLoox Server Background Services
The installer also indicates whether a database update is required and recommends creating a backup before proceeding.
-
Check the option Update databases and InLoox Server installation and click Next.
-
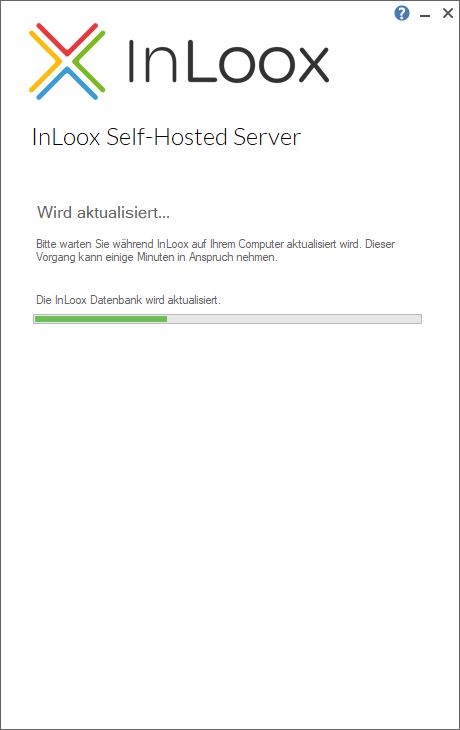
The update process starts. The installer upgrades all components and migrates the database. This may take a few minutes.
-
Once the update is complete, verify that the InLoox Web App is accessible and working as expected.
Troubleshooting
If the update fails with an error, try the following steps in order:
-
Run the installer again — In most cases, the error is caused by a database deadlock during migration. Simply restart the installer to resolve the issue.
-
Restart the server — If running the installer again does not help, restart the server and then run the installer once more. This resolves the issue in the vast majority of cases.
-
Contact support — If the update still fails after a server restart, contact InLoox support at support@inloox.com. Please include the installation log files with your request so we can analyze the issue.
Collecting Installation Log Files
The installation log files are located in the Windows temporary directory (%temp%) or one level above (%temp%\..\), which is common on servers. All relevant log files start with InLoox_*.
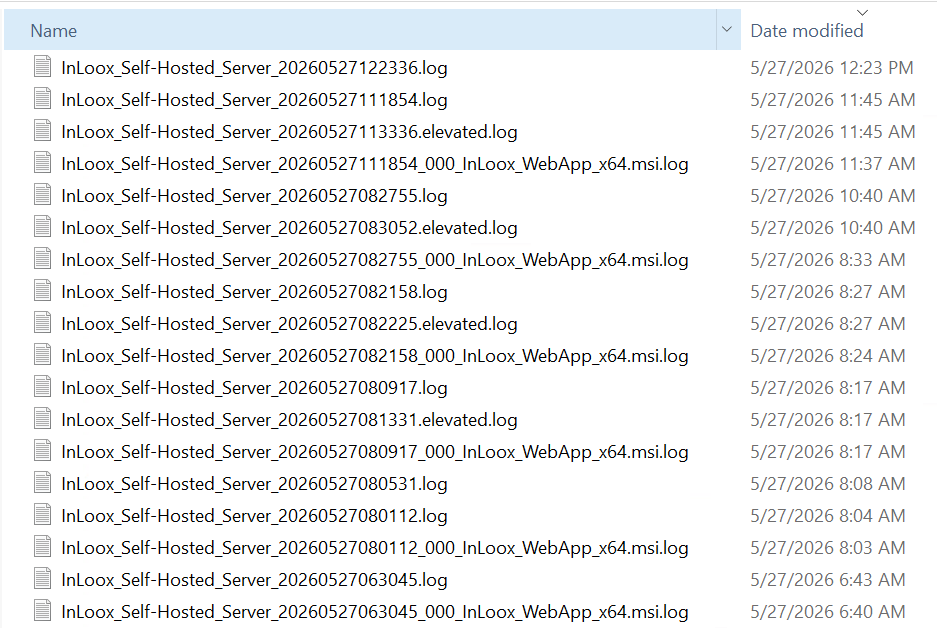
Collect all matching files and send them as a ZIP file to the support team.