InLoox Self-Hosted Installer Configuration Mode
The configuration mode of the InLoox Self-Hosted Server setup allows you to view and modify the current server configuration after the initial installation. You can adjust settings such as the public endpoint, SSL certificates, database connections, SMTP servers, Azure App registration, file storage, and proxy server.
You must have local administrator permissions on the server to use configuration mode.
When running the configuration wizard, expect a brief outage of the InLoox Web App.
Open Configuration Mode
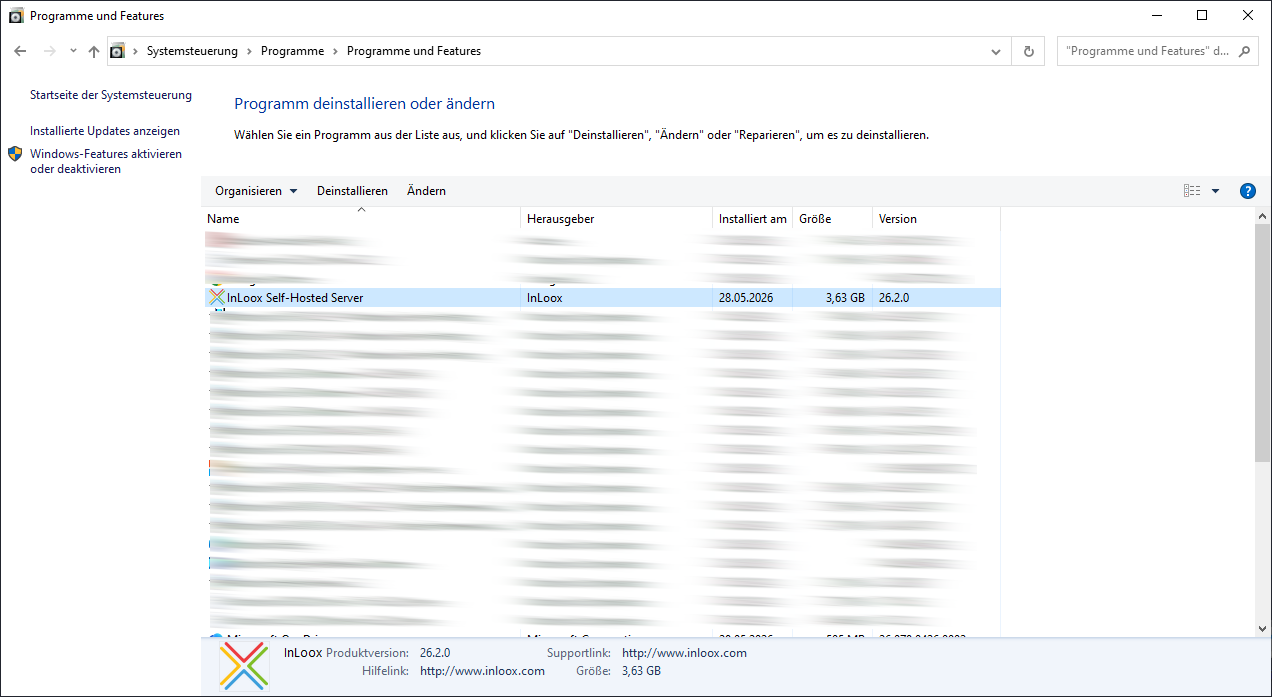
- On the server, open Control Panel.
- Go to Programs → Programs and Features.
- In the list of programs, select InLoox Self-Hosted Server.
- Click Uninstall.
No uninstallation will be performed. This step only launches the setup with elevated administrator privileges, which is required for configuration mode.
- In the setup window, select Update configuration.
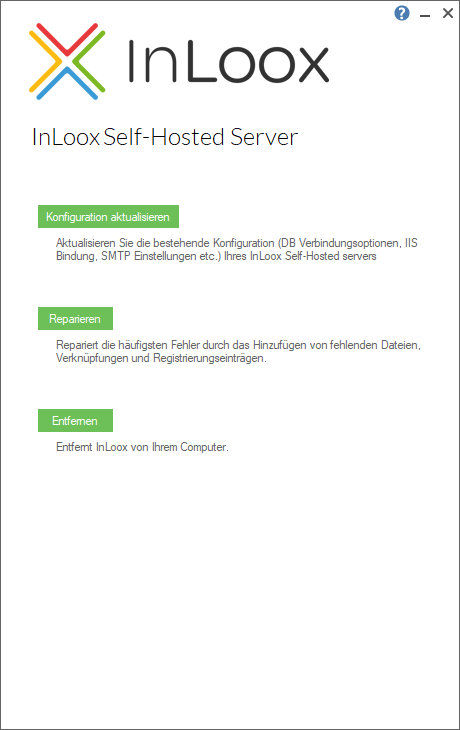
Review and Adjust Settings
You can now navigate through each step of the configuration wizard and review or adjust values as needed.
All values are pre-filled with existing settings.
InLoox Web App
- In the first step, review or adjust the public endpoint, HTTPS/SSL encryption mode, port, and TLS certificate.
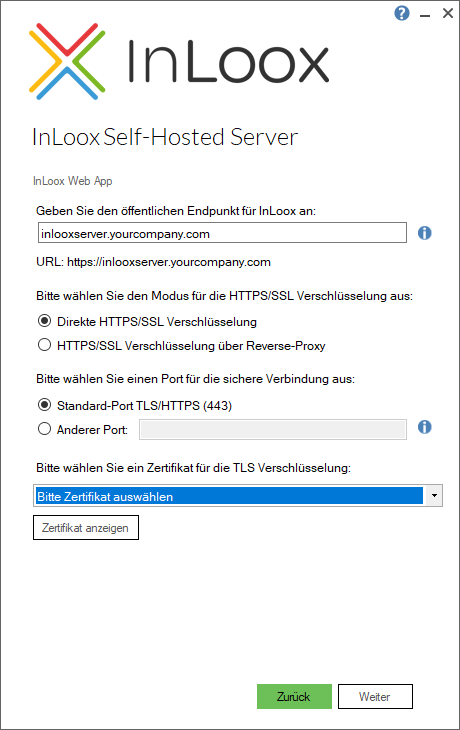
- Public endpoint: The URL at which InLoox is accessible (e.g.,
inlooxserver.yourcompany.com). - HTTPS/SSL encryption mode: Choose between direct HTTPS/SSL encryption or encryption via reverse proxy.
- Port: Select the standard TLS/HTTPS port (443) or specify a custom port.
- TLS certificate: Select a certificate from the dropdown or choose a different one from the store.
Database Connection
- On the next page, review or adjust the SQL Server connection options.
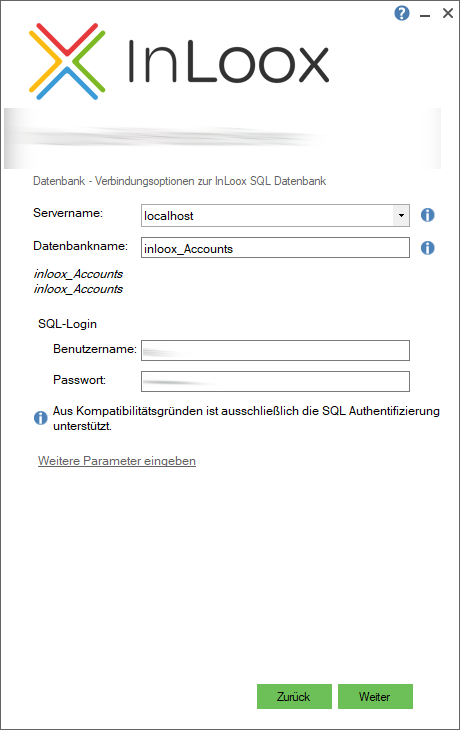
- Server name: The SQL Server instance (e.g.,
localhost). - Database name: The InLoox database name (e.g.,
inloox_Accounts). - SQL Login: Username and password for SQL authentication.
For compatibility reasons, only SQL authentication is supported.
- If no valid certificate is found for the encrypted connection to the SQL Server, a warning dialog appears. You can choose to proceed (not recommended) or cancel.
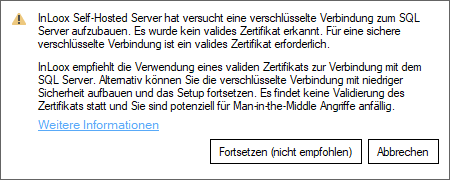
InLoox recommends using a valid certificate for the connection to the SQL Server. Proceeding without certificate validation makes the connection potentially vulnerable to man-in-the-middle attacks.
For instructions on configuring SQL Server encryption, see Configure SQL Server Encryption in the Microsoft documentation.
SMTP Server
- On the next page, review or adjust the email server settings. InLoox requires an SMTP server for sending automated emails.
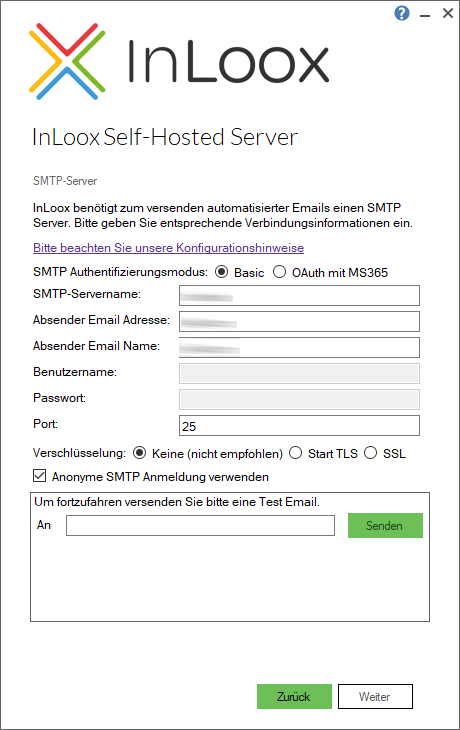
- SMTP authentication mode: Choose between Basic or OAuth with Microsoft 365.
- SMTP server name: The hostname of the SMTP server.
- Sender email address: The email address for outgoing messages.
- Sender email name: The display name for the sender.
- Username / Password: Credentials for SMTP authentication (if applicable).
- Port: The SMTP port (default: 25).
- Encryption: Choose between None (not recommended), Start TLS, or SSL.
- Enter a recipient address in the test email field and click Send to verify the SMTP configuration.
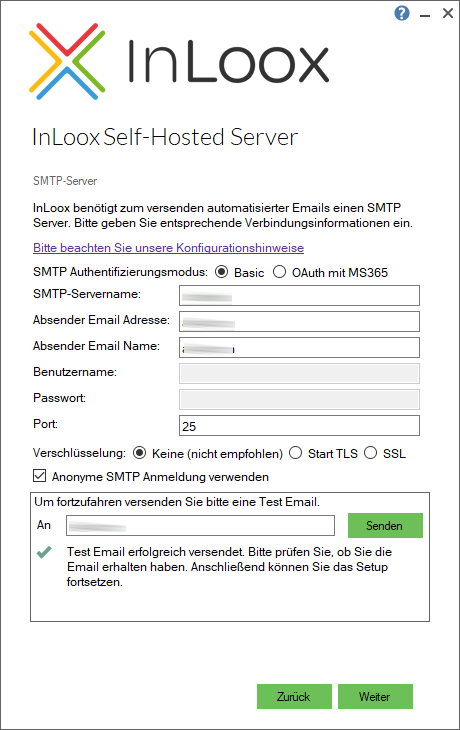
See our configuration guidelines for OAuth and SMTP for detailed setup instructions.
Azure App
- On the next page, configure the optional Azure App registration for Single Sign-On with Microsoft 365.
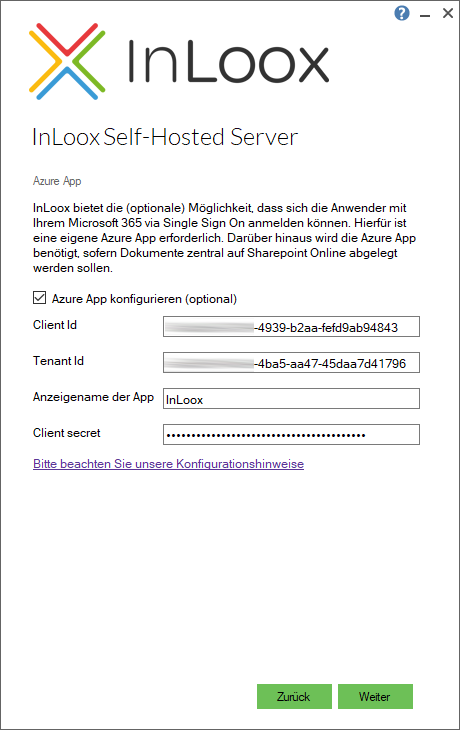
- Check Configure Azure App (optional) to enable SSO.
- Client ID: The application (client) ID from the Azure AD registration.
- Tenant ID: The directory (tenant) ID from Azure AD.
- App display name: The name of the application (e.g.,
InLoox). - Client secret: The client secret generated in Azure AD.
An Azure App registration is required if users should log in via Single Sign-On with Microsoft 365, or if documents are stored centrally on SharePoint Online.
File Storage
- On the next page, select the storage type for project files.
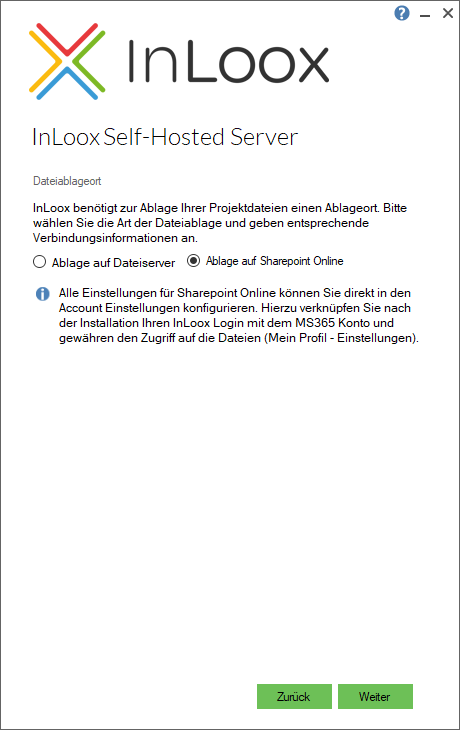
- Local file server: Stores files on the local server.
- SharePoint Online: Stores files on SharePoint Online. All SharePoint Online settings can be configured later in Account Settings by linking your InLoox login with your Microsoft 365 account.
- On the next page, you can configure the Windows user account that InLoox uses to access the local file storage directory (
C:\inetpub\InLooxWebApp\ServerFileBag). By default, the installer creates a local user calledInLooxFileBagUserfor this purpose. For detailed configuration, see Configure a Custom Local Filestore User.
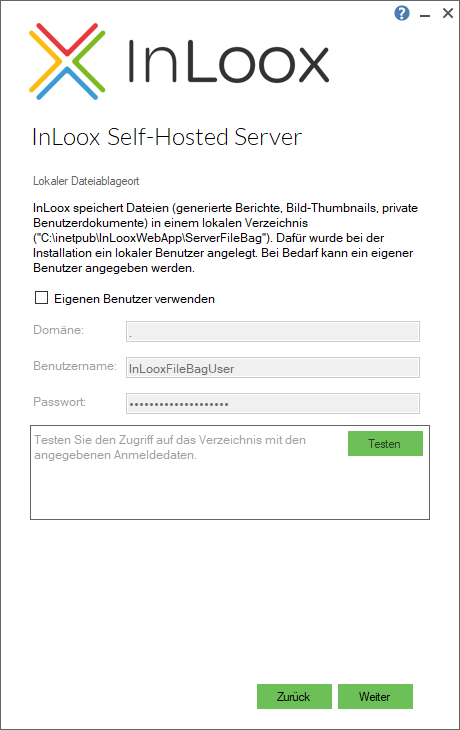
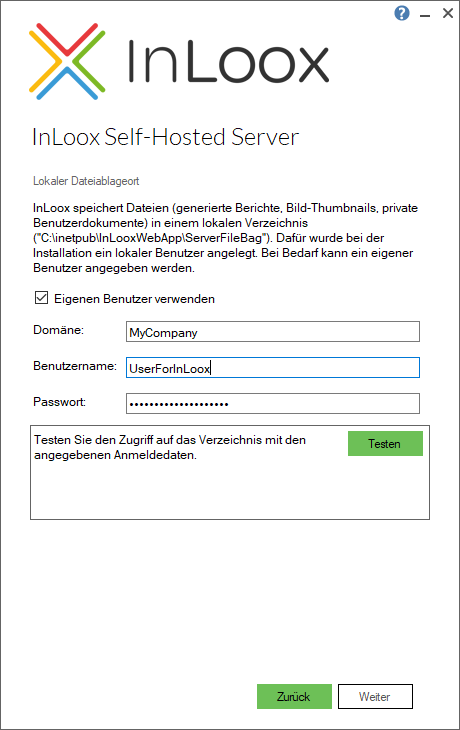
To use a different account, check Use custom user and enter the credentials:
- Domain: The domain of the user account (use '.' for a local user account).
- Username: The Windows username for file storage access.
- Password: The corresponding password.
Click Test to verify that the account has the required permissions on the directory.
Proxy Server
- On the final page, configure proxy settings if the server requires a proxy for internet access.
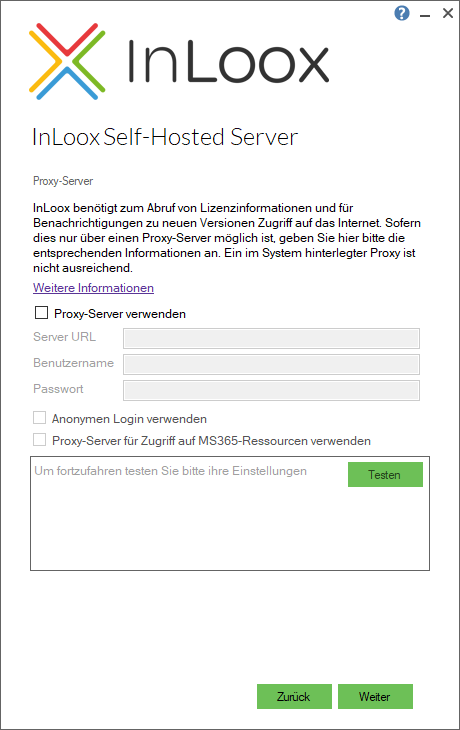
- Check Use proxy server to enable proxy settings.
- Server URL: The proxy server address.
- Username / Password: Proxy authentication credentials (if required).
- Check Use anonymous login if the proxy does not require authentication.
- Check Use proxy server for access to Microsoft 365 resources if Microsoft 365 traffic should also route through the proxy.
- Click Test to verify the proxy settings.
InLoox requires internet access for license information and version update notifications. If your server can only access the internet via a proxy, configure the proxy settings here.
- After reviewing all pages, click Next on each page to confirm and apply the settings.
Restart Web Services
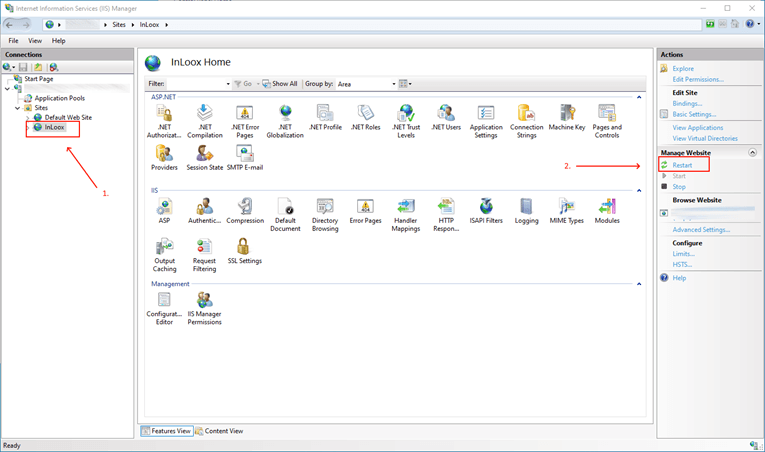
After completing the configuration, restart the InLoox site in IIS:
- Open Internet Information Services (IIS) Manager.
- Select the InLoox site in the left panel.
- Click Restart in the Actions panel on the right.
Use configuration mode whenever you need to update server settings such as database connections, SSL certificates, SMTP servers, Azure App registrations, file storage, or proxy settings — without reinstalling InLoox.