Multi-Project Timeline
You can switch the project list view to a timeline view. This timeline visualizes every project you have a role in, including planning elements (activities, summary activities, and milestones) that have been pinned to the individual project timelines. This gives you a cross-project overview of every important phase and milestone within a customizable time frame.
This view tells you which projects are overlapping, when your next projects start, and when you have some time to breathe because no project is scheduled.
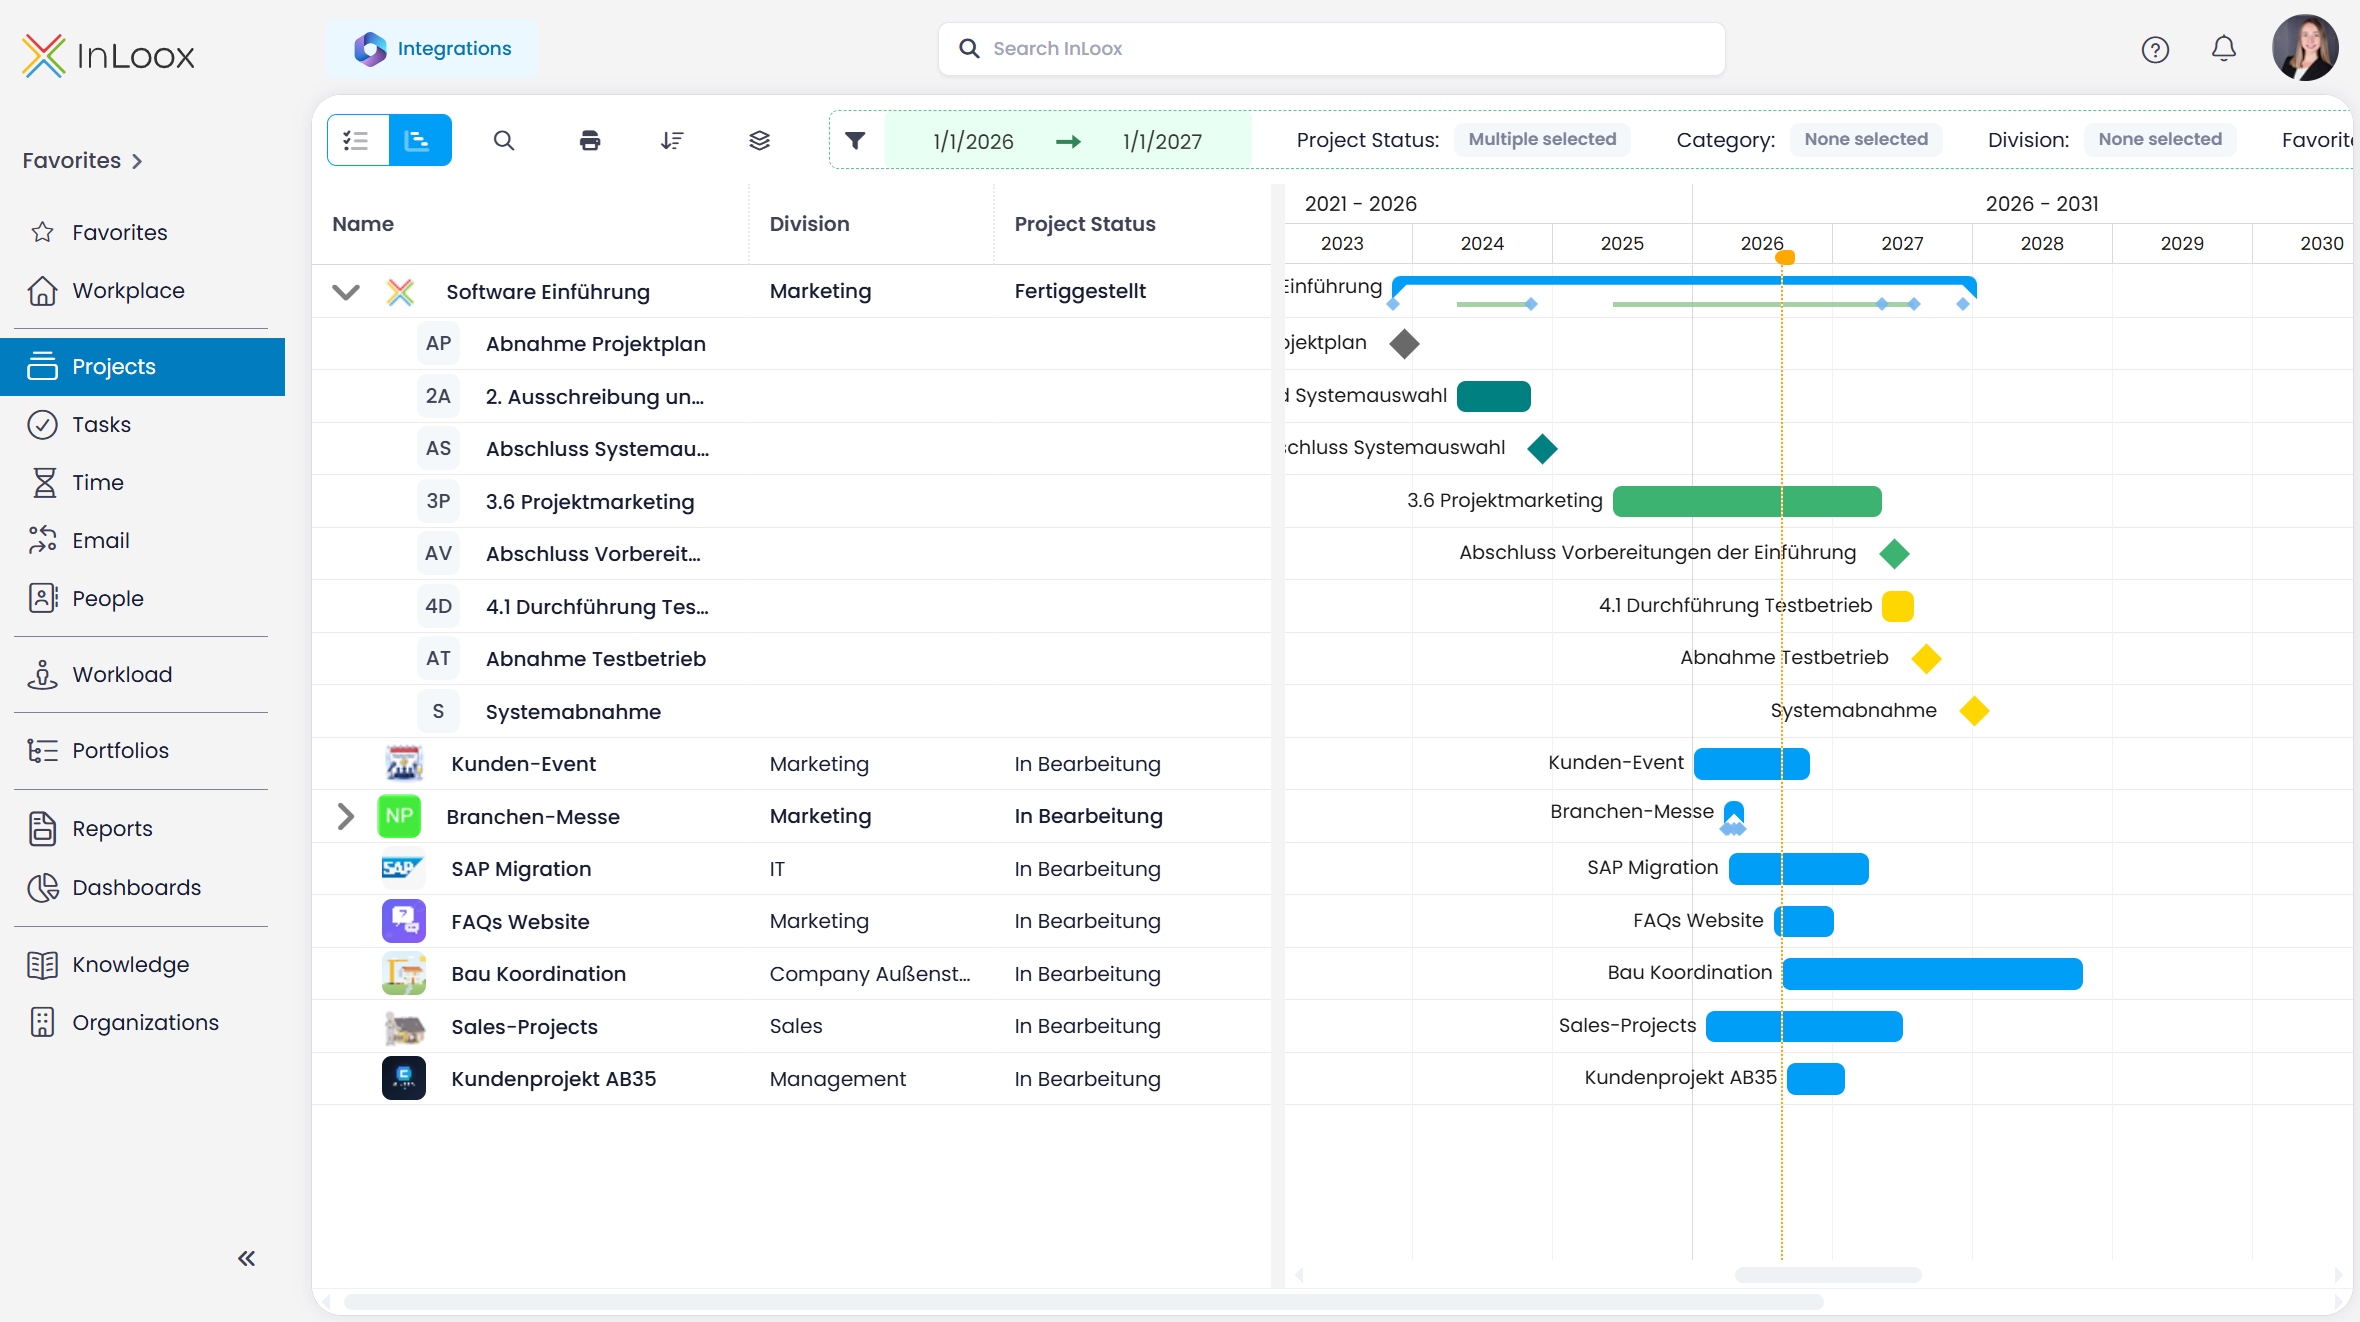
The multi-project timeline visualizes projects and planning elements from the Gantt chart as-is. You cannot edit them in this view. If you need to make changes to projects or the activities and milestones, open the individual projects. Changes are synchronized with the multi-project timeline immediately.
Open the Multi-Project Timeline
In the project list, click Timeline in the toolbar. Click List to switch back to the project list.

With the two zoom icons and , you can zoom in and out of the time frame.

Zooming shows the entire year(s), quarters, months, calendar weeks, days, or even the time of day. Alternatively, hold down Ctrl and turn the mouse wheel.
Filter the Projects
Use the filter bar above the timeline to decide which projects appear. The time frame on the left is the primary filter, followed by the project properties.
Set the Time Frame
When you set a certain time frame, only projects that start and/or end or are ongoing within this time frame are displayed in the timeline. InLoox references the start and end dates of the project, not the planning dates (Gantt plan start). Click the date field in the filter bar to open the time frame menu.
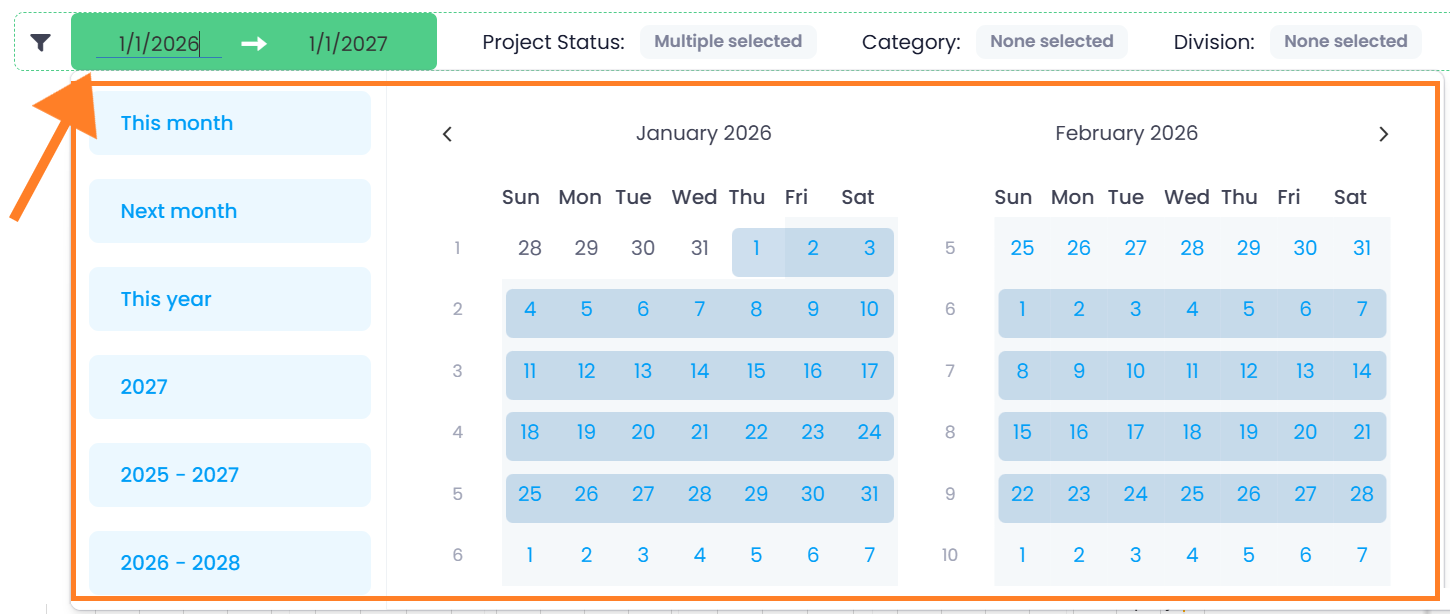
Select one of the preset periods on the left. InLoox labels the last three with the actual years, for example 2027 or 2025 – 2027:
- This month — Shows all projects that start, end, or are ongoing in this month.
- Next month — Shows all projects that start, end, or are ongoing next month.
- This year — Shows all projects that start, end, or are ongoing this year.
- Next year — Shows all projects that start, end, or are ongoing next year.
- Previous year to next year — Shows all projects with start and/or end dates within this three-year span, or that are ongoing during this time frame.
- This year to the year after next — Shows all projects with start and/or end dates within this three-year span, or that are ongoing during this time frame.
For a custom time frame, pick a start and end date directly from the calendar instead.
Filter by Project Properties
Combine the time frame with the remaining filters to narrow down the displayed projects further.

- Project Status — Shows only projects with the selected statuses. You can select several at once.
- Category — Shows only projects that are assigned to at least one of the selected categories.
- Division — Shows only projects that are assigned to one of the selected divisions.
- Favorites Only — Switch on the toggle to show only projects that you marked as favorites.
- Project Managers — Shows only projects where the selected contacts are assigned in the Managers role.
InLoox lets you customize the project status in the settings, so you may find many different statuses in the Project Status filter.
Add Columns to the Timeline View
You can customize the column list on the left side of the multi-project timeline to display additional project information alongside the project name. By default, only the Name column is displayed.
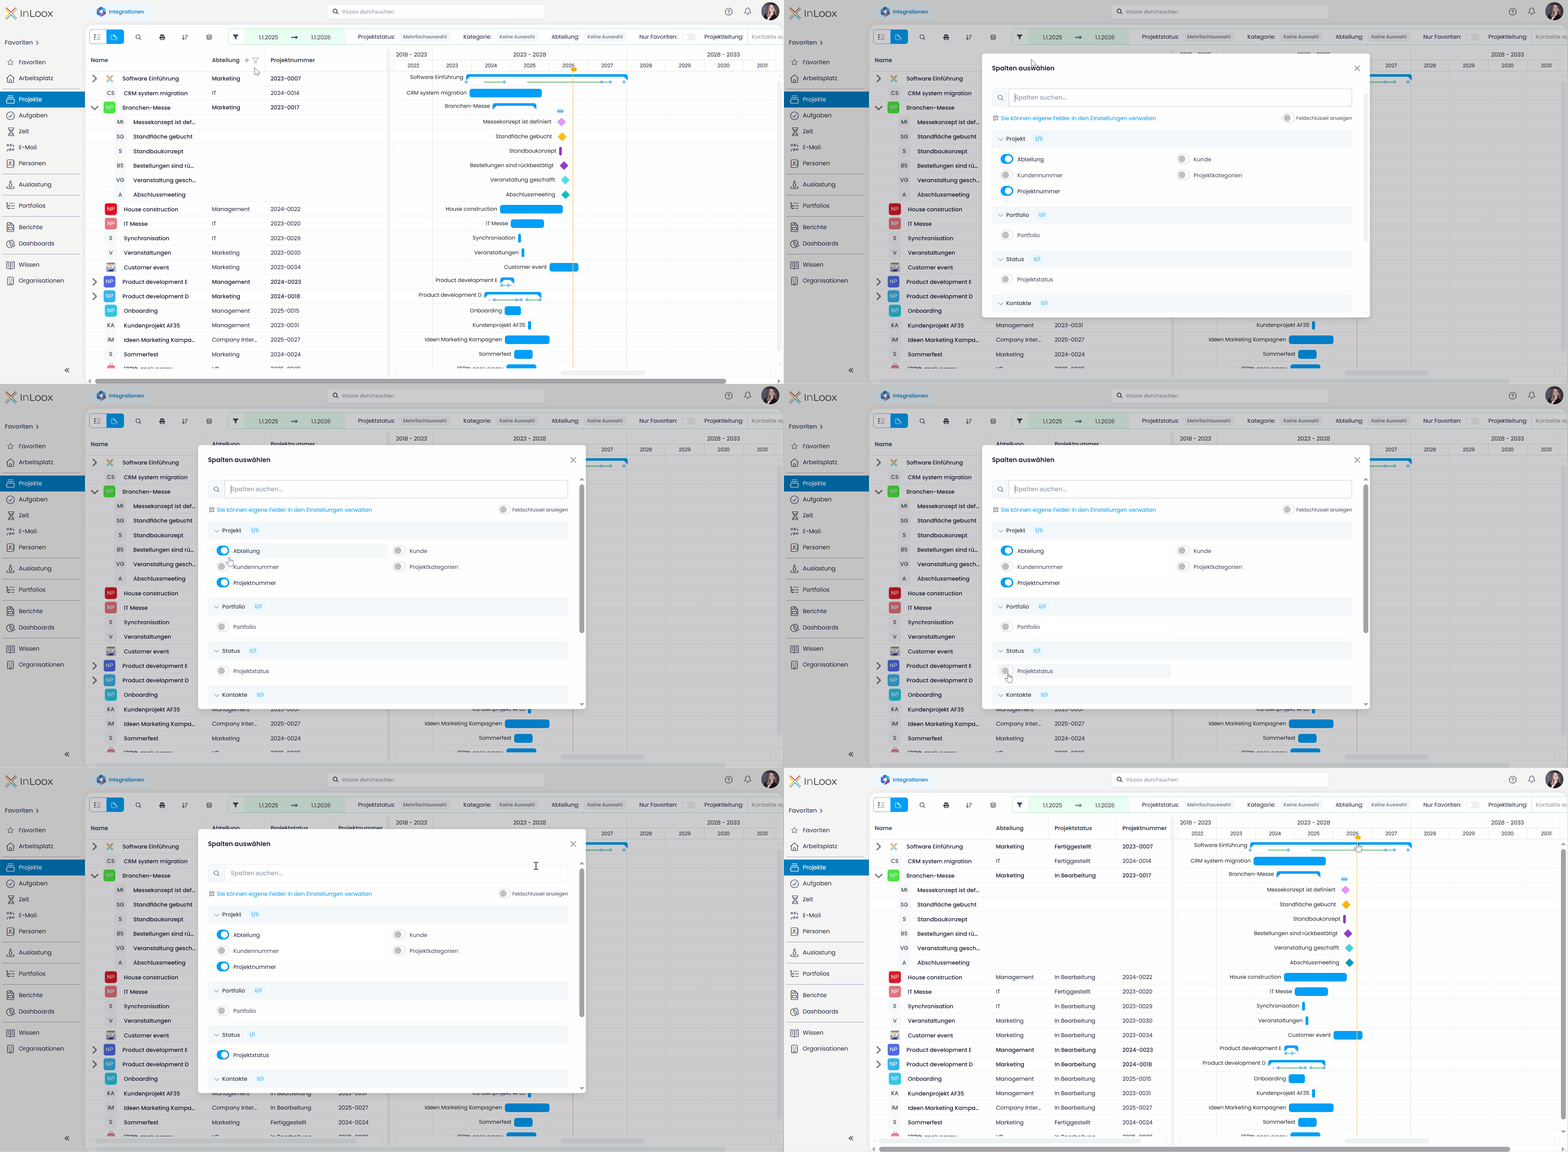
To add columns:
- Hover over a column header — a small plus icon appears.
- Click the plus icon. The Select columns window opens.
- Switch on the toggle for each column you want to display. The columns appear in the list immediately.
- Close the window by clicking the X.
- Adjust the column order using drag and drop by dragging a column to the desired position while holding down the mouse button.
In the Select columns window, the available columns are grouped into sections:
| Section | Column | Description |
|---|---|---|
| Project | Division | The division the project is assigned to |
| Project | Customer | The customer assigned to the project |
| Project | Customer Number | The customer number |
| Project | Project Categories | The categories assigned to the project |
| Project | Project Number | The project number |
| Portfolio | Portfolio | The portfolio the project belongs to |
| Status | Project Status | The current project status |
| Contacts | Project Manager | The name of the primary project manager |
Custom Fields as Columns
If you have defined custom fields for projects, you can display them as additional columns in the timeline view. They are listed in the Custom fields section of the Select columns window.
Only custom fields defined for projects can be displayed as columns in the timeline view. Learn how to create them in the custom fields help article.
Sort and Group the Projects
Sorting and grouping change the order of the rows on the left side of the timeline and, with it, the order of the bars.
Sort by Start Date, End Date, or Name
By default, InLoox lists the projects based on their start dates. Click Sort by in the toolbar to sort the displayed projects.
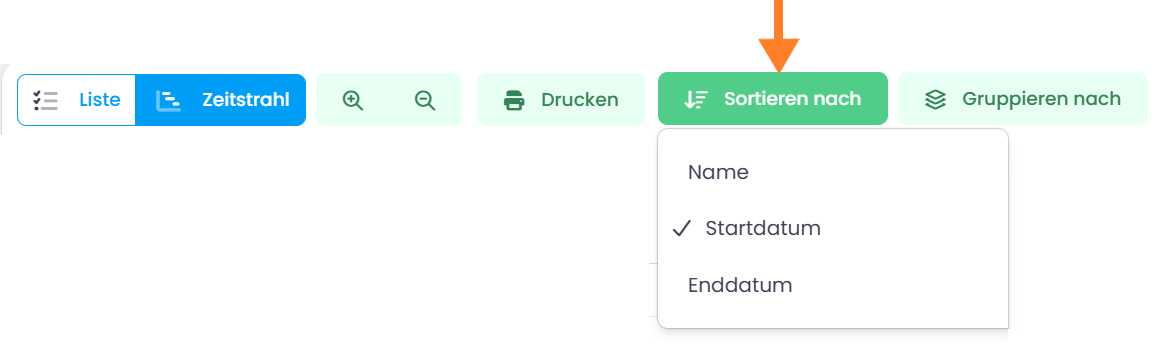
- Name — All projects are displayed in alphabetical order (A–Z).
- Start date — All projects are displayed in chronological order from earliest to latest start.
- End date — All projects are displayed in chronological order from earliest to latest end.
Group by a Project Property
Click Group by in the toolbar to combine the projects into collapsible groups. Each group gets a header row with a summary bar spanning the projects it contains.
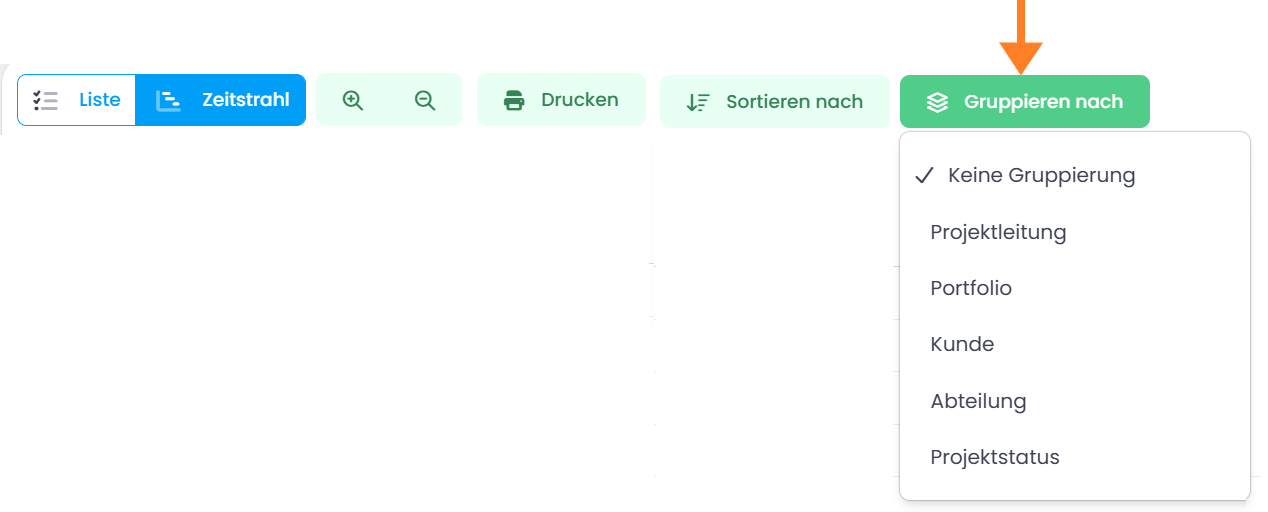
You can group by:
- Project Manager
- Portfolio
- Customer
- Division
- Project Status
Select No grouping to return to the ungrouped list.
Sort and Filter by Columns
Any column you added behaves like a column in other list views: you can sort the projects by its values and filter for the projects that match your criteria. For details on these options, see Group, Filter, and Sort Views.
Combining the three lets you assemble exactly the overview you need — for example all projects of one division, grouped by project status.
Jump to the Planning of a Project
When you need to work on one of the projects from the timeline, click next to the project name. InLoox opens the planning of that project and jumps directly to the corresponding position.
Print the Multi-Project Timeline
You can print the multi-project timeline view directly from the project list.

- Use the time frame, filter, and grouping options to display only the elements you need. Only projects with planning elements marked as displayed on the timeline show these elements — learn more about how to display planning elements on the timeline.
- Click Print to open the printing settings. Depending on your browser and printer settings, the InLoox print settings may be overridden.
- Click Print. Depending on your browser or printer settings, you may need to adjust the printing options again.