Planning Layout
The planning module in InLoox consists of two areas:
- Planning list — On the left side, all planning elements (activities, summary activities, and milestones) are displayed in a structured list.
- Gantt chart — On the right side, the planning elements are visualized in a calendar view as bars (activities) and diamond shapes (milestones).
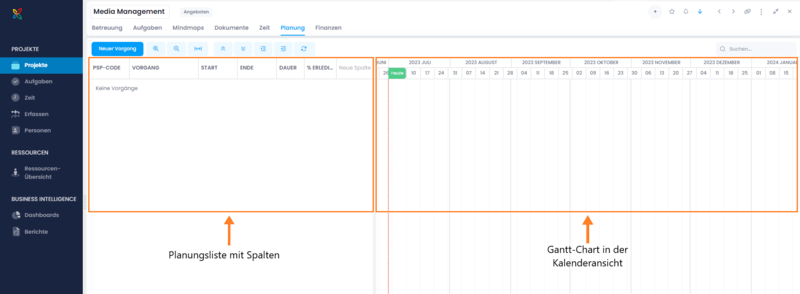
It is recommended to display additional columns in the planning list, such as Start, End, or WBS Code. Learn how in Add Columns to the Planning List.
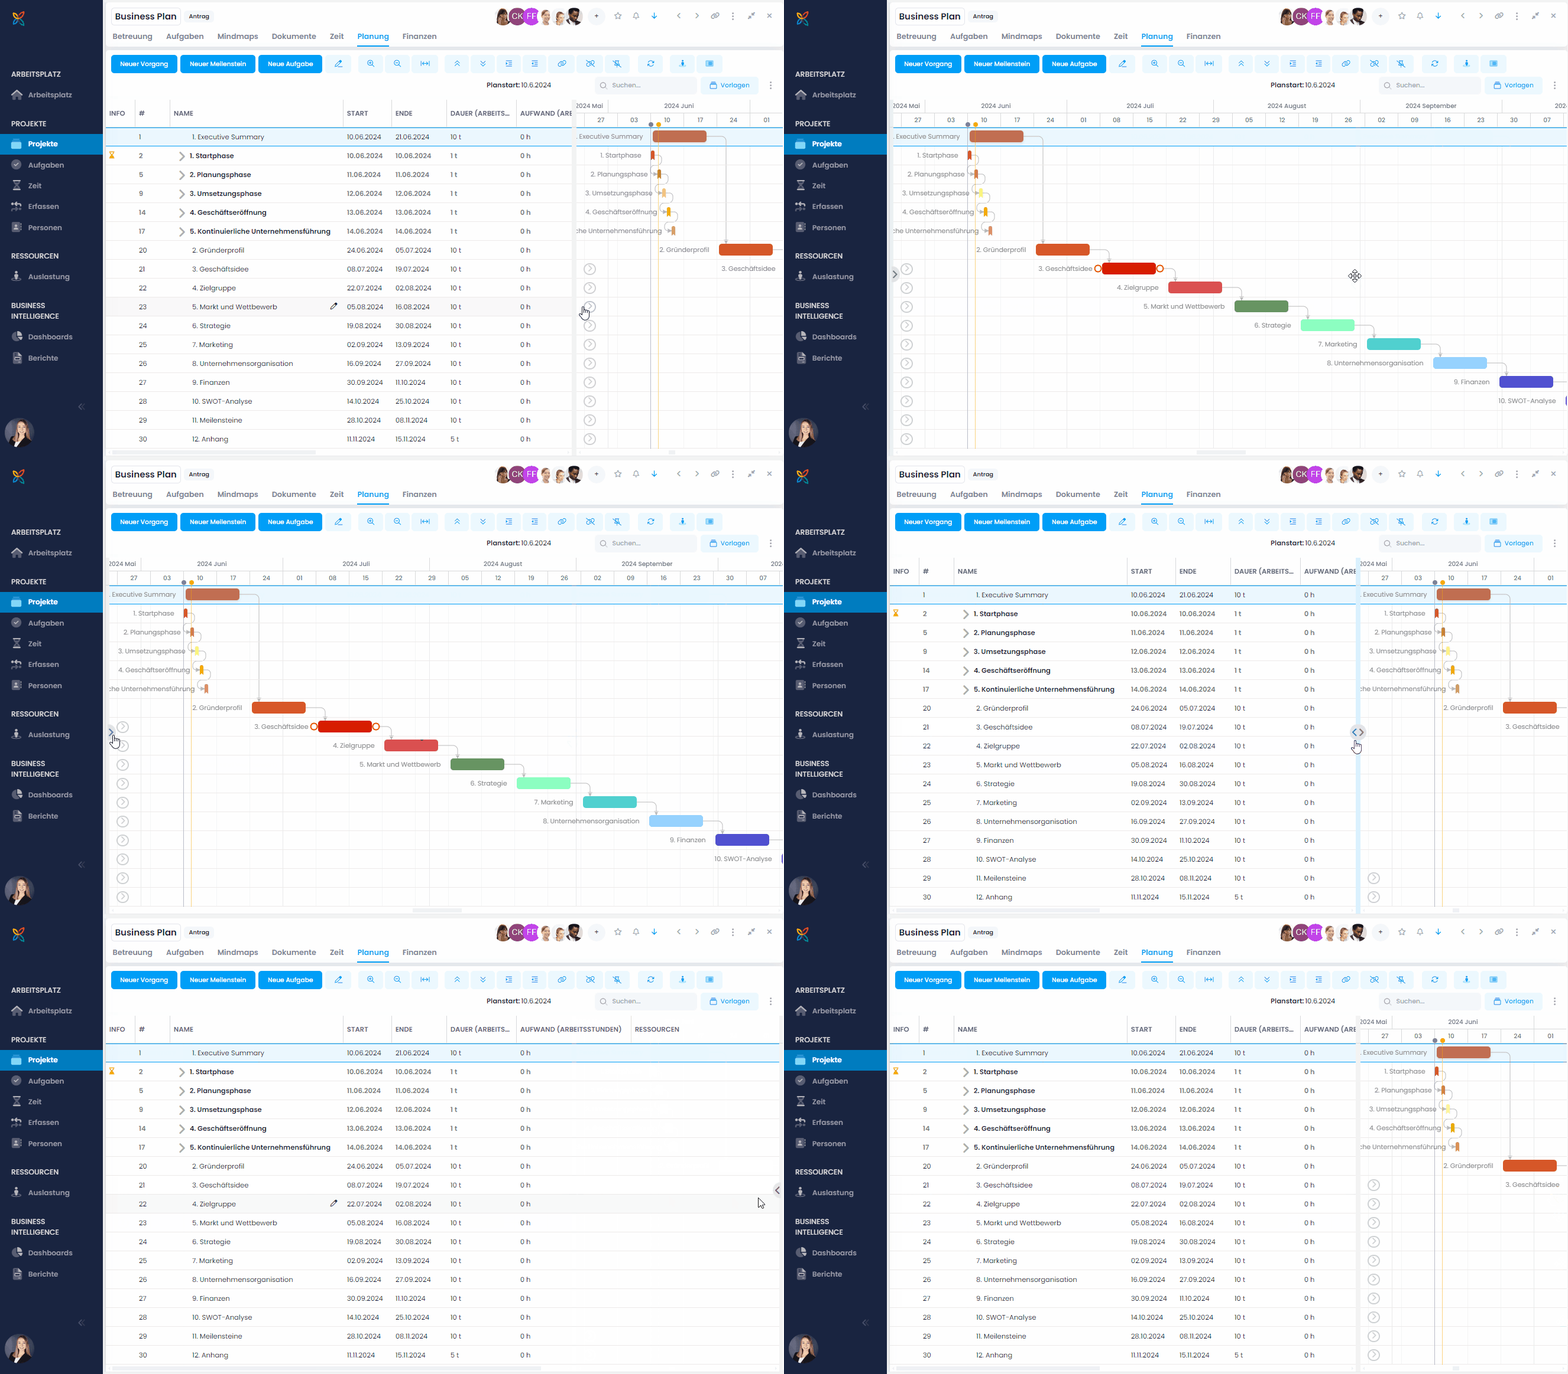
You can show each area in full screen. To do so, click on one of the arrows on the divider line between the two areas.
Plan Start
The plan start is the date on which the planning of a project begins. Planning elements cannot be scheduled before the plan start.
As long as the planning is still empty, the plan start follows the start date of the project — a project you create on August 12 has August 12 as its plan start, and changing the start date on the project's Manage page moves the plan start along with it. The reverse is never true: changing the plan start leaves the start date of the project unchanged.
As soon as you create the first planning element, the plan start is fixed. Changing the start date of the project then no longer affects it — from that point on, you can only change the plan start in the planning itself.
To change the plan start:
- Open a project and click Planning.
- Click in the top-right corner above the Gantt chart.
- In the lower part of the menu, click the date next to Plan Start.
- Select the new date.
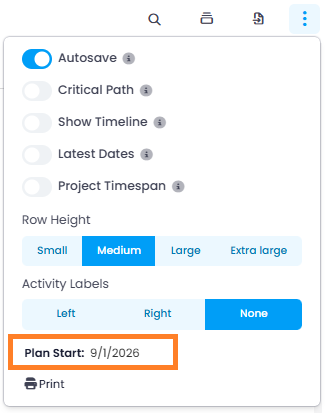
All planning elements move with the plan start by the same amount of time, provided their dependencies and constraints allow it. In concrete terms: elements tied to a fixed date — for example by the constraint Start – On — stay on that date, while elements with the constraint As soon as possible move along accordingly, as long as they do not depend on other fixed dates. So if you postpone the plan start by two weeks, these flexible activities and milestones are scheduled two weeks later as well. This is useful when you set up a project including its planning today, but the project only starts at a later date.
Therefore, check the constraints and dependencies of your planning elements before you change the plan start.
The same applies in the other direction: set an earlier plan start to move the planning forward and schedule activities and milestones on dates that were previously before the plan start — for example when you document a project that has already started.
Default Calendar
The default calendar determines which working time calendar InLoox assigns to new planning elements in a project. New projects use the Standard calendar (Monday to Friday, 9 AM to 5 PM). If your project follows a different schedule — for example continuous operation or shift work — select the matching calendar as the default calendar.
Changing the default calendar only affects planning elements that you create afterwards. Activities and milestones that already exist keep their calendar. Therefore, select the default calendar before you create the first planning elements.
The default calendar does not apply to planning elements that you add from a planning template. Each element from a template keeps the calendar stored in the template.
To change the default calendar:
- Open a project and click Planning.
- Click in the top-right corner above the Gantt chart.
- Under Default Calendar, select the calendar.
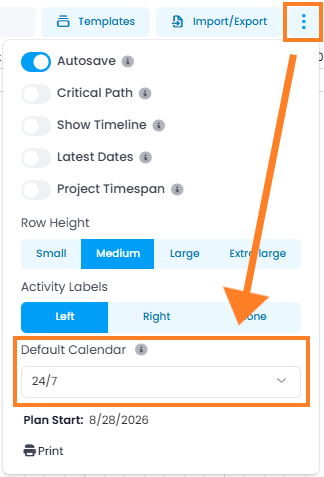
Regardless of the default calendar, you can select a different calendar for each planning element in the side panel under Calendar (see Edit Planning Elements). The available calendars — the built-in calendars 24/7, Standard, and Weekend as well as your own — are managed by administrators under Working Hours and Calendars.