Create, Edit, and Delete Planning Elements - Activities and Milestones
In InLoox, a project plan consists of activities (shown as bars in the Gantt chart) and milestones (shown as diamond shapes). Multiple activities can be grouped into summary activities.
Types of Planning Elements
- Activity — A time-defined phase with a defined start date, end date, and duration. An activity typically contains multiple tasks that must be completed within its set time frame. Activities are displayed as bars in the Gantt chart.
- Summary Activity — A parent element that groups multiple activities together. Its duration is automatically calculated from the child elements.
- Milestone — A significant event or checkpoint in the project schedule. Milestones have only a date and no duration. Milestones are displayed as diamond shapes in the Gantt chart.
Create Activities and Milestones
- Open InLoox and navigate to your project.
- Click on the Planning tab — the planning list appears on the left and the Gantt chart on the right.
- To add an activity, click New Activity (or Alt + A). To add a milestone, click New Milestone (or Alt + M).

- Enter a title for the new element. If you don't set start or end dates, InLoox schedules the element based on the project's creation date. Activities default to a one-day duration (8 work hours).
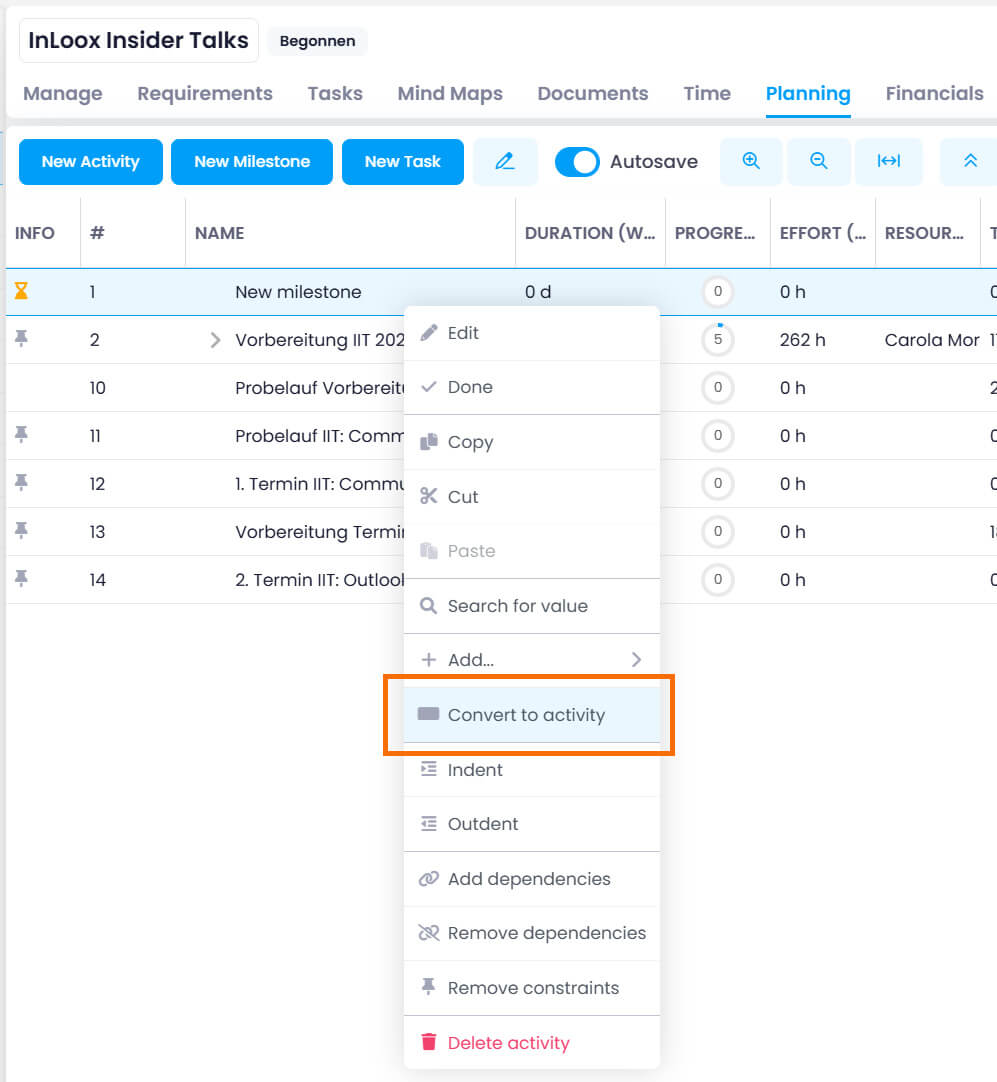
You can also convert an activity into a milestone (and vice versa) by right-clicking the element and selecting Convert to Milestone or Convert to Activity in the context menu. Summary activities cannot be converted.
Edit Planning Elements
To edit an activity or milestone:
- Click the element in the planning list or Gantt chart.
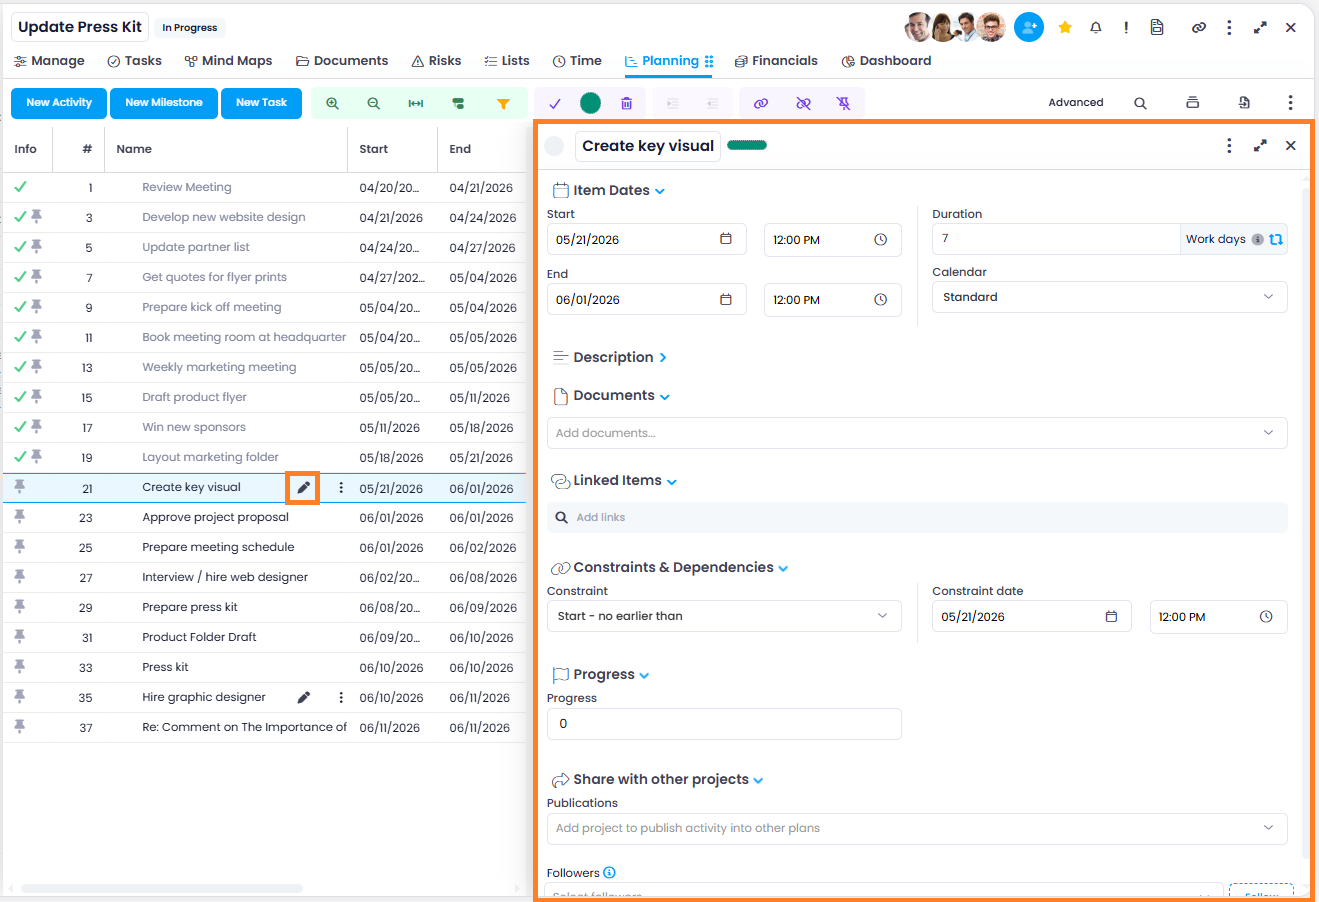
- Click the pencil icon next to the element name, or right-click and select Edit.
- A side panel opens where you can change the properties of the element:
- Name – Change the display name.
- Color – Select or change the color of the planning element.
- Start Date and End Date – Adjust the time frame.
- Duration – Set the duration of the activity.
- Calendar – Select the applicable work schedule calendar.
- Description – Add a description or notes to the planning element.
- Documents – Attach documents to the planning element.
- Linked Items – Link the planning element to other InLoox elements.
- Constraints & Dependencies – Define scheduling constraints and dependencies for the element.
- Progress – Track the completion status of the planning element.
- Publications – Share the planning element with other projects.
Create Summary Activities
Summary activities group several related activities together:
- Create the individual activities first.

- Select the activities you want to group (hold Ctrl to select multiple).

- Use the Indent button in the toolbar (or right-click and select Indent) to nest the selected activities under a parent element, which becomes the summary activity.

The summary activity is now displayed as a summary bar in the Gantt chart.
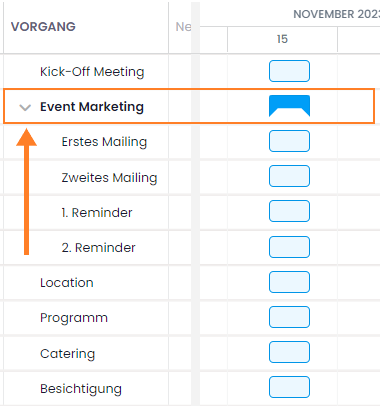 The summary activity’s duration is automatically calculated from its child activities — it spans from the earliest start date to the latest end date. Whenever a child activity’s duration changes, the summary activity’s duration adjusts automatically.
Create Sub-Activities
To create a sub-activity within a summary activity:
- Select the summary activity under which you want to add a child element.
- Click New Activity.
- The new activity is added as a child element of the selected summary activity.
Change the Order of Planning Elements
You can reorder planning elements using drag and drop in the planning list. Simply click and drag an element to its new position.
Use the Indent and Outdent buttons in the toolbar to change the hierarchy level of planning elements.

Delete Planning Elements
To delete planning elements:
- Select one or more activities or milestones (hold Ctrl to select multiple).
- Right-click and choose Delete.
Deleting a summary activity also deletes all of its subordinate activities. This action cannot be undone if auto-save is enabled.
Color-Code Planning Elements
To visually highlight important planning elements, you can assign colors:
- Select one or more planning elements.
- Click the round Change Color button in the toolbar.
- Choose one of the predefined colors. To create custom colors, click Manage Colors.
Alternatively, you can change the color directly in the side panel of a planning element: Open the element and select the desired color in the top-right corner next to the name.
Color-coded elements are displayed with the chosen color in both the planning list and the Gantt chart, making important activities immediately recognizable.