Installation
There are several ways to install the InLoox for Outlook Modern Add-in. Choose the method that matches your environment and role. Before installing, make sure your environment meets the system requirements.
- Self-Installation via Microsoft AppSource — for users of InLoox Cloud editions with Microsoft Exchange Online
- Installation by the Microsoft 365 Administrator — for InLoox Cloud and Self-Hosted with Microsoft Exchange Online
- Installation by the Microsoft Exchange Administrator — for InLoox Cloud and Self-Hosted with Microsoft Exchange Server
Self-Installation via Microsoft AppSource
This method is available for InLoox Cloud editions (InLoox Professional, InLoox Enterprise, or InLoox Enterprise Plus) with Microsoft Exchange Online.
As a user of one of the Cloud editions, you can install the InLoox for Outlook add-in yourself from the Microsoft Store:
- Visit https://appsource.microsoft.com/en-us/product/office/WA200006590. Alternatively, search for InLoox for Outlook manually in the Microsoft Store.
- Follow the installation instructions.
- After successful installation, you will find an Open InLoox Add-in button in the Home tab of your Microsoft Outlook menu.
Installation by the Microsoft 365 Administrator
This method is available for InLoox Cloud editions and InLoox Self-Hosted, each with Microsoft Exchange Online.
- Log in to Microsoft 365 with your administrator account.
- Select the app launcher icon at the top left and click Admin. Alternatively, open https://admin.microsoft.com/.
- In the sidebar, click Show all.
- In the Admin Center, go to Settings > Integrated apps.
- Depending on your InLoox edition, proceed as follows:
For InLoox Self-Hosted
-
Select Upload custom apps.
-
In the App type field, select Office Add-in.
-
Activate the checkbox Upload manifest file (.xml) from device.
-
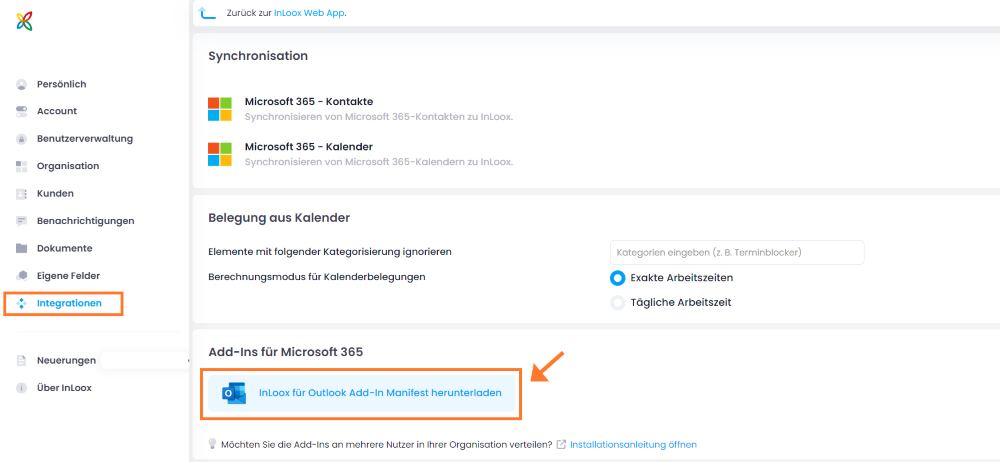
Click Choose File to select the manifest file for the InLoox for Outlook add-in. This file can be downloaded from your InLoox Account under Account Settings > Integrations > Download InLoox for Outlook Add-in Manifest.
-
Click Next.
For InLoox Cloud
- Select Get apps.
- Search for InLoox for Outlook.
- Click Get It Now, then click Get It Now again.
Assign Users
- In the Deployment method section, select an option to specify how the add-in will be deployed to users.
- In the Assign users section, select one of the following options:
- Entire organization — Deploy the add-in to everyone.
- Specific users/groups — Deploy the add-in to selected users or user groups only. Use the search option to find the desired users or groups.
- Just me — Make the add-in available only to yourself.
- Click Next, then click Next again.
- Click Finish deployment. A green checkmark is displayed when the add-in deployment was successful. Deployment on all devices can take up to 24 hours.
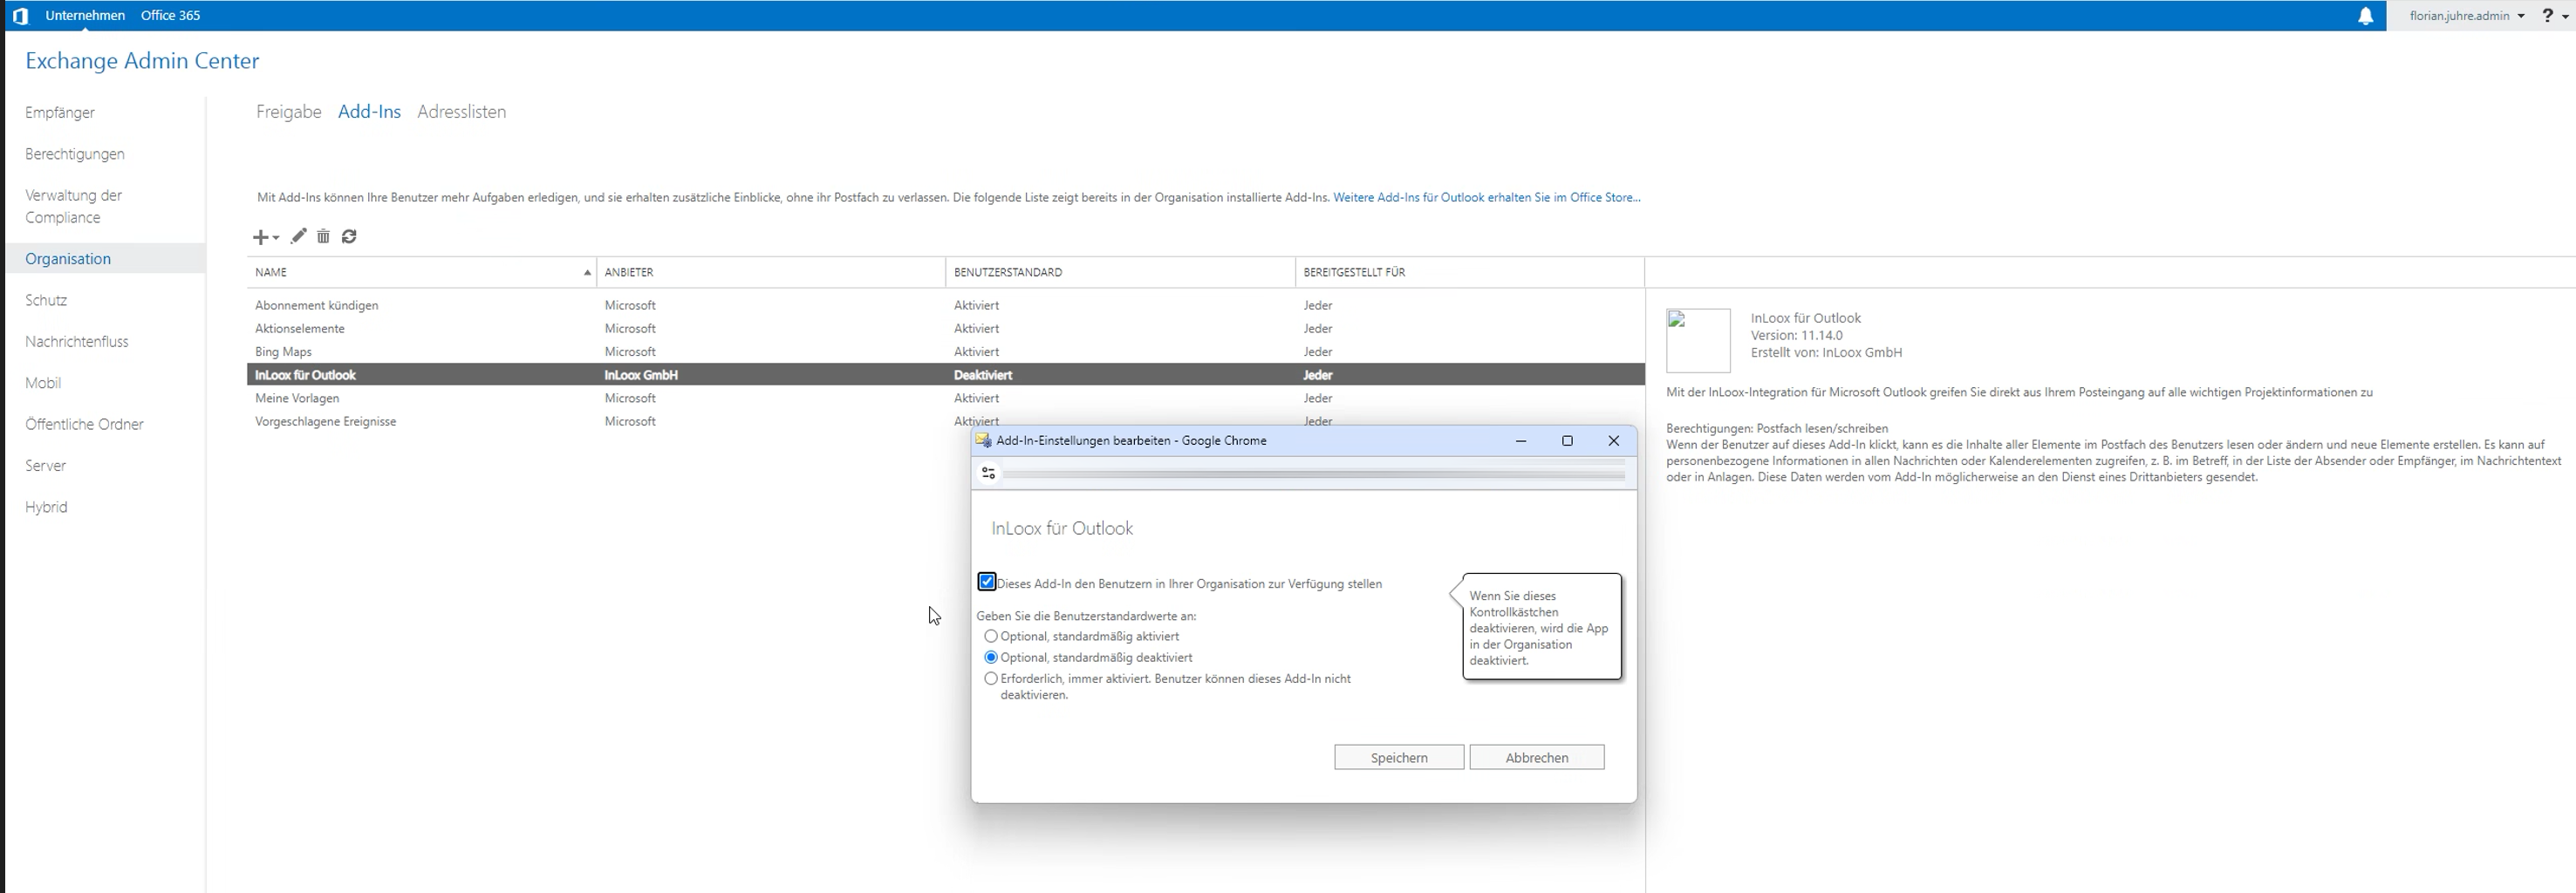
Installation by the Microsoft Exchange Administrator
This method is available for InLoox Cloud editions and InLoox Self-Hosted, each with Microsoft Exchange Server 2016 or 2019. With this option, you may only be able to use the Modern Add-in in restricted mode (without access to email attachments), depending on the Microsoft Outlook client used.
-
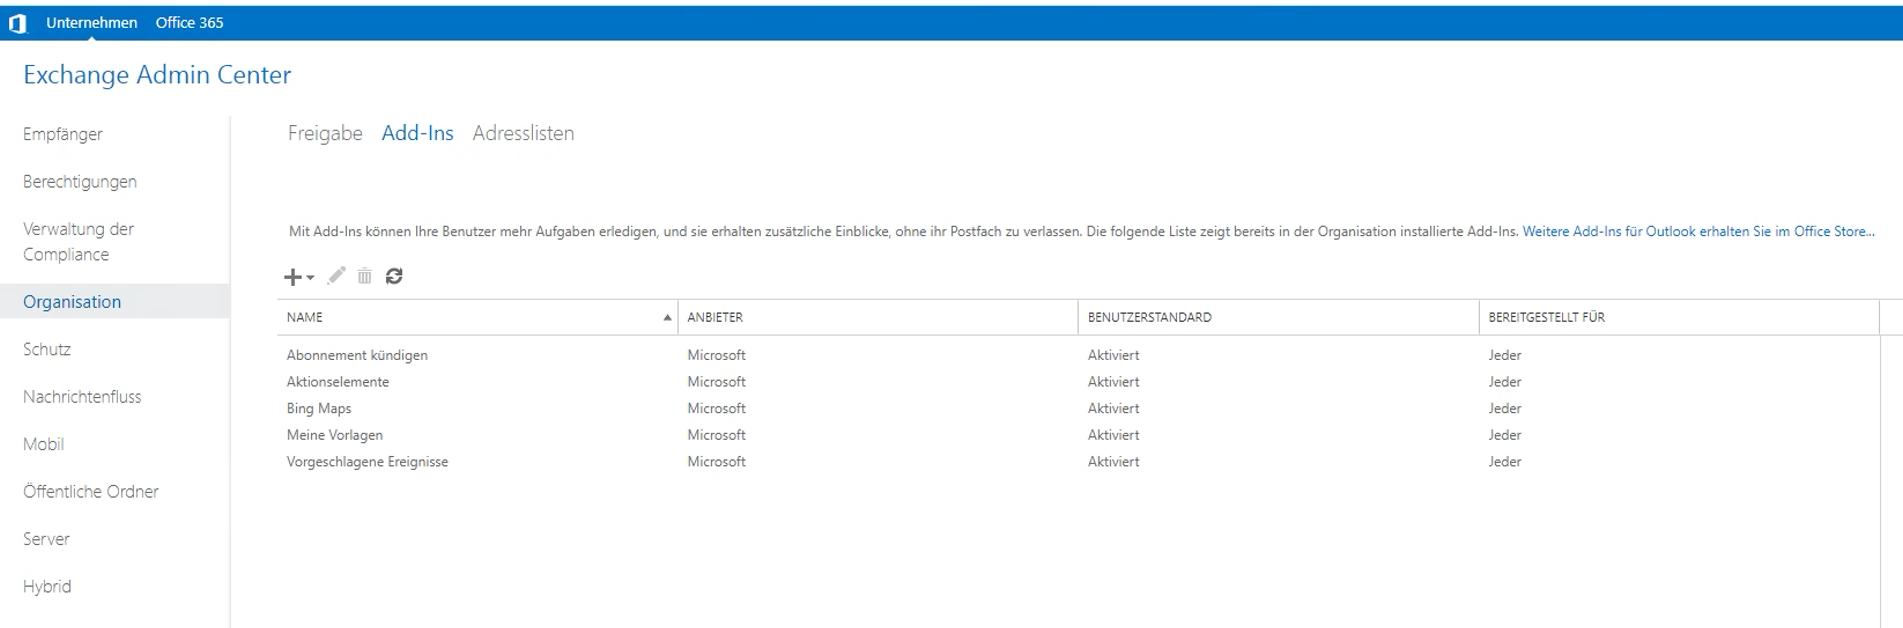
Open the MS Exchange Admin Center (EAC). Instructions on accessing the EAC can be found in the Microsoft documentation.
-
In the Exchange Admin Center, go to Organization > Add-Ins.
-
Add the InLoox for Outlook add-in:
-
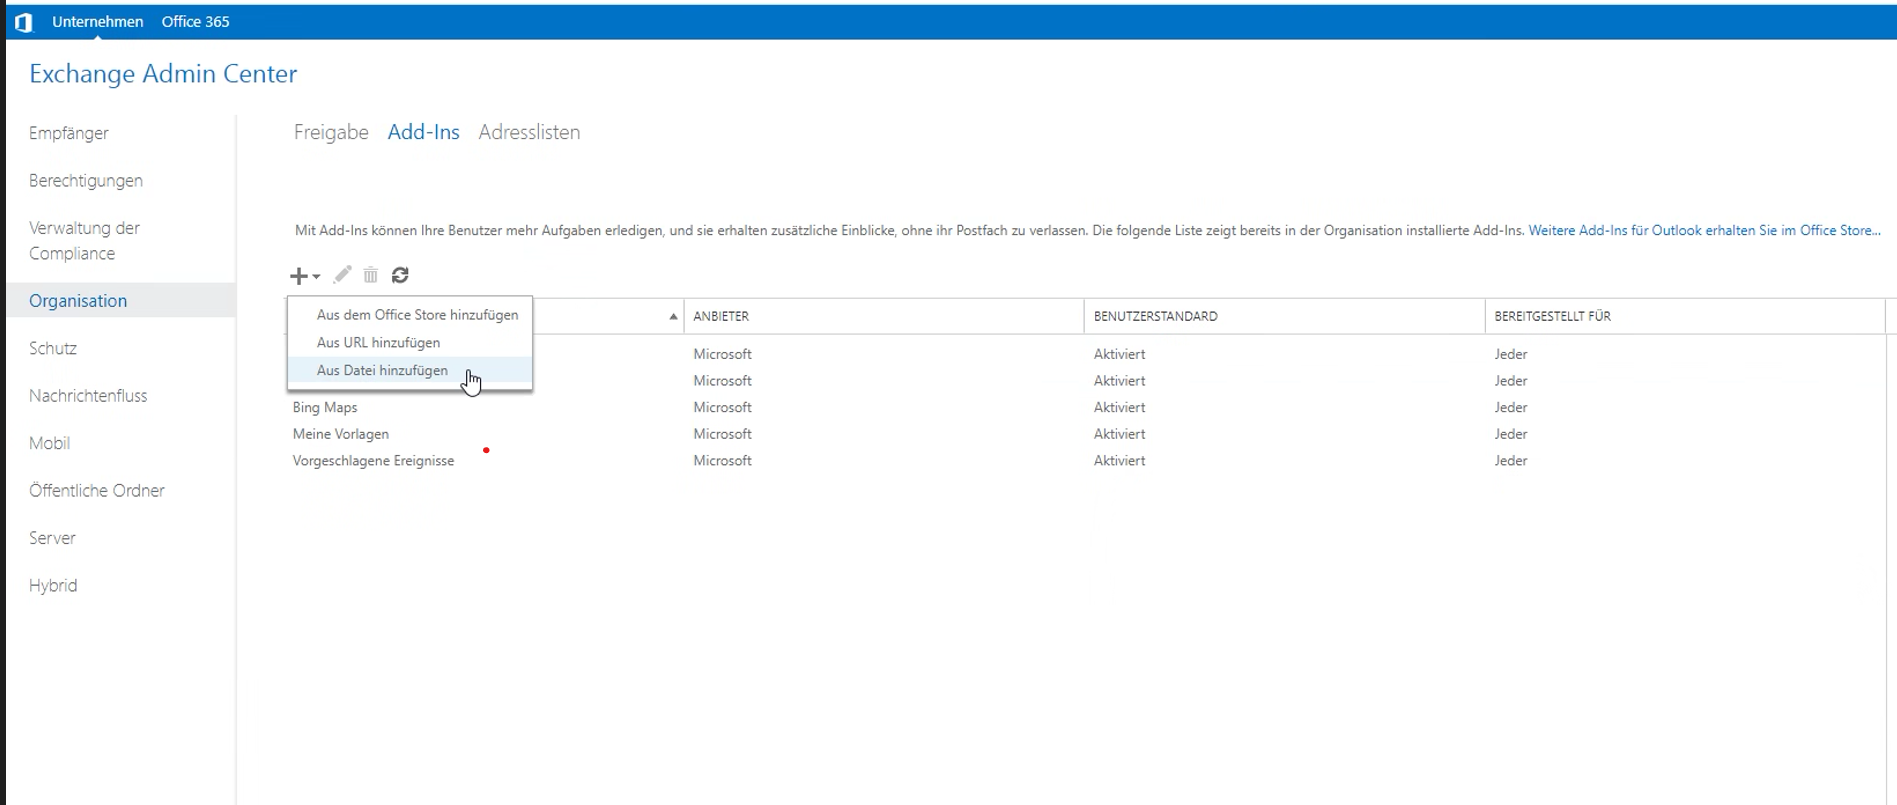
Click the + button (Add):
- If you use an InLoox Cloud edition, select Add from Office Store and follow the instructions. Then proceed with step 4 of this guide.
- If you use InLoox Self-Hosted, select Add from file.
-
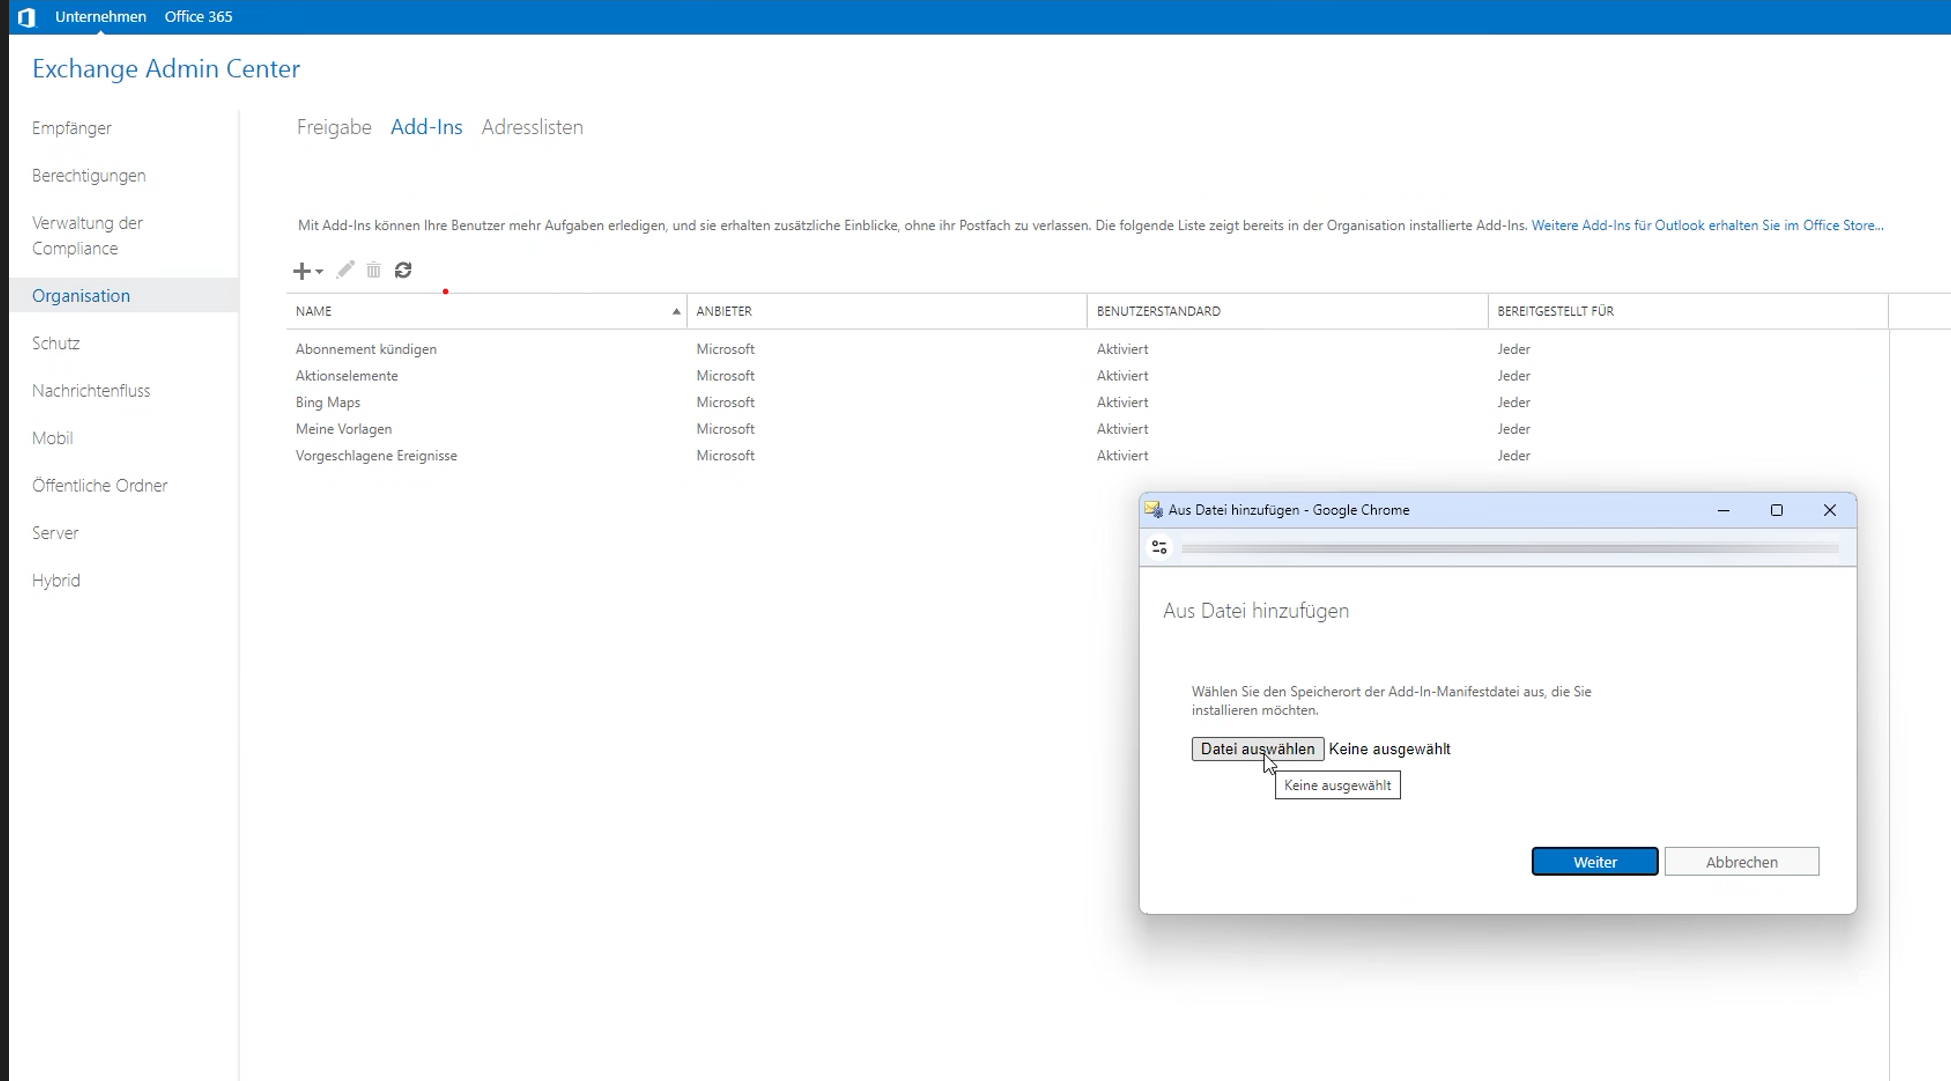
For InLoox Self-Hosted only: Upload the InLoox for Outlook manifest file that you previously downloaded in the InLoox settings under Integrations.
-
The InLoox for Outlook add-in is now displayed in the list of available apps.
-
-
Make the add-in available for users:
-
Double-click the InLoox for Outlook add-in to open the add-in settings.
-
Activate the checkbox Make this add-in available to users in your organization.
-
Select one of the following options:
- Optional, enabled by default — The add-in is enabled by default but can be disabled by users.
- Optional, disabled by default — The add-in is disabled by default; users can enable it if required.
- Mandatory, always enabled — The add-in is always enabled; users cannot disable it.
-
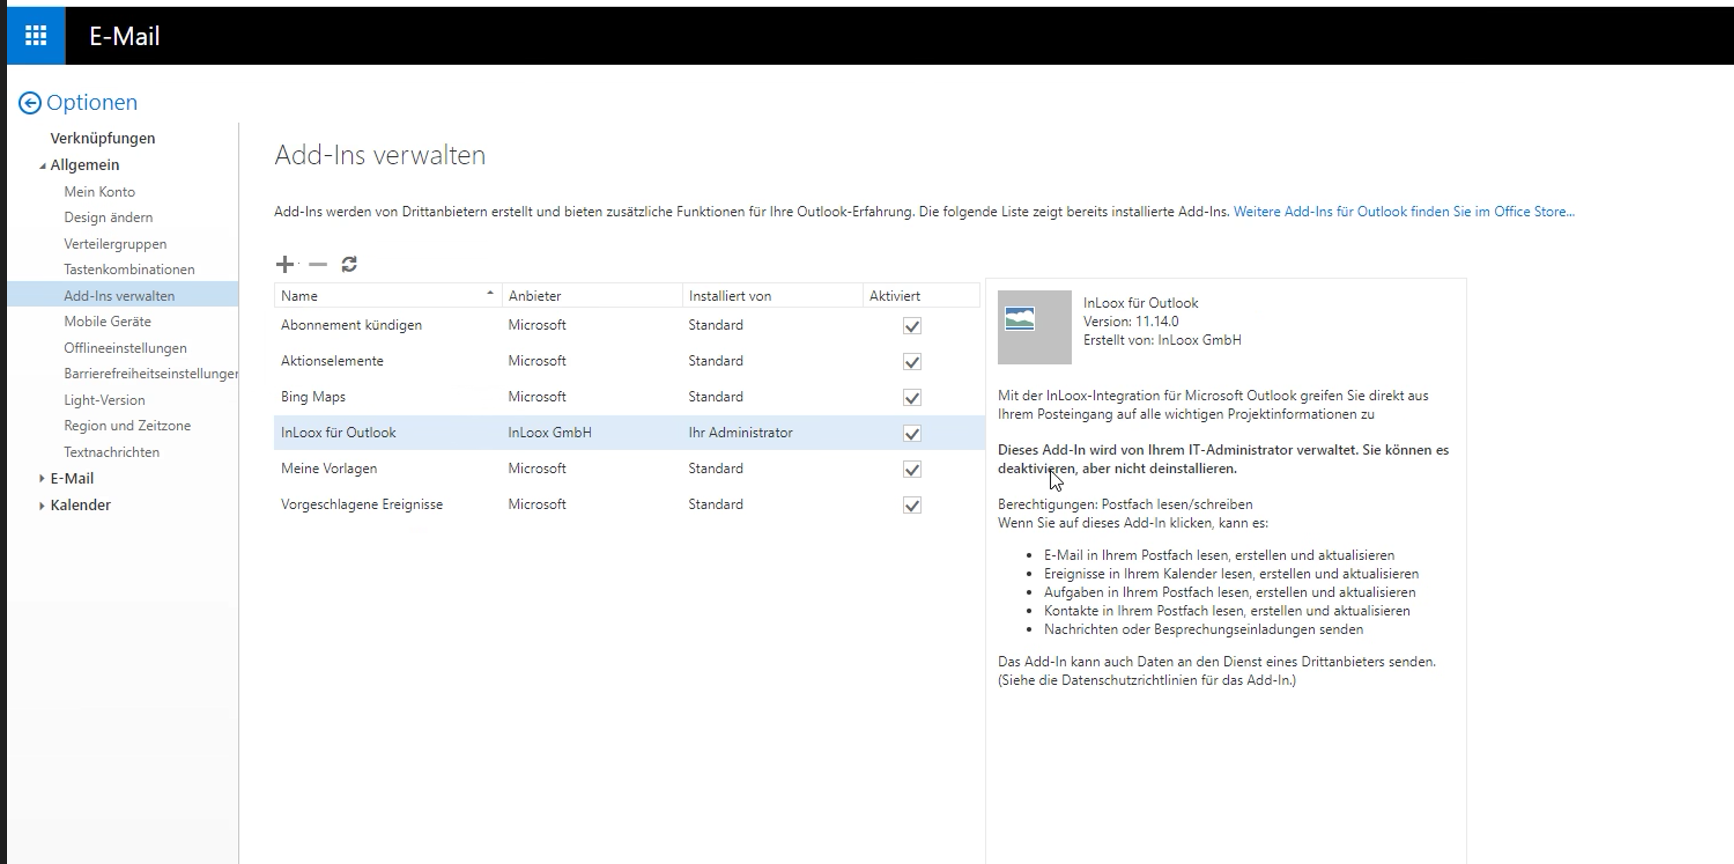
Click Save. If you selected Optional, disabled by default, users must activate the add-in themselves by navigating to Options within Microsoft Outlook and enabling the checkbox for the InLoox for Outlook add-in under Manage add-ins.
-
-
Restart Microsoft Outlook and verify that the InLoox for Outlook add-in is displayed in the Home tab for the users. Deployment on all devices should be available immediately.