Tasks
The InLoox Mobile App gives you a complete overview of your tasks — what needs to be done, who is responsible, and which deadlines are approaching. After logging in, the app displays the My Tasks view by default.
View Tasks
My Tasks view
The My Tasks view is the default view displayed after logging into the InLoox Mobile App. It shows your own pending and due tasks — including private tasks without project assignment and project tasks where you are listed as the responsible resource.
Delegated Tasks view
You can also display tasks that you have assigned to other people. To do so:
- Tap the burger menu in the upper left corner.
- Select one of the following views:
- My Tasks — The default view showing tasks assigned to you.
- Delegated Tasks — Tasks that you have assigned to other team members.
View project tasks from favorites
Below the view selection in the burger menu, you will see a list of your project favorites.
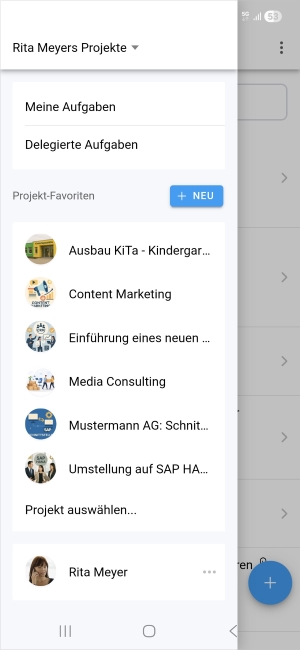
- Tap a project to display all tasks within that project.
- If you have many project favorites, tap Select project... to open a dialog where you can search for a project by name.
Filter and sort the task list
You can filter and sort the task list using the three-dot menu in the upper right corner.
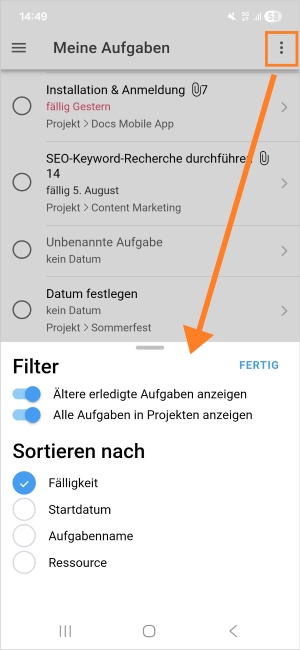
- Tap the three-dot menu in the upper right corner.
- Activate one or more of the following filters using the toggle switches:
- Show older completed tasks — Displays tasks that have already been completed.
- Show all tasks in projects — Shows all tasks within projects, not only those assigned to you.
- Sort the list by one of the following options:
- Due date
- Start date
- Task name
- Resource
- Tap DONE to confirm your selection.
Add a new task
To add a new task, follow these steps:
- In any task list, tap the Add task field at the top.
- Enter the task name directly.
- Confirm by pressing Enter (iOS) or tapping OK (Android).
If you are in the My Tasks view, this will initially create a private task without project assignment. You can then open the task, edit it, and assign it to a project.
Edit task details
Tap a task in the list to open it.
The appearance of the task detail view may vary depending on your smartphone and operating system (iOS vs. Android).

Changes are saved automatically — there is no Save button. When you are done editing, simply tap the back arrow in the top-left corner to return to the task list. Your changes will be applied immediately.
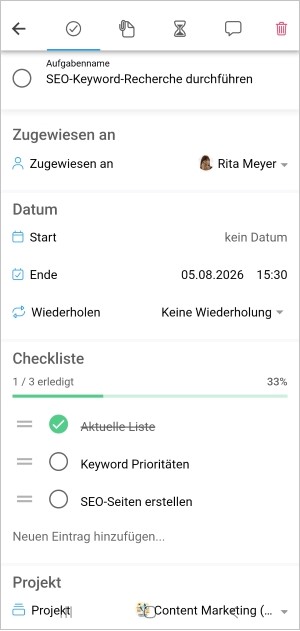
You can edit the following fields:
- Name — Change the task name.
- Assigned to — Enter or change the assigned resource.
- Date — Select start and end dates.
- Repeat — Configure whether the task has no recurrence or should repeat. Options:
- None
- Daily
- Monday to Friday
- Weekly
- Biweekly
- Monthly
- Quarterly
- Yearly
- Checklist — Add new checklist entries.
- Project — The currently selected project. You can also change the project assignment here.
- Status — The current task status (e.g., Not Started, In Progress, Done). Available task statuses depend on the task status configuration in your InLoox account. See Task Statuses for details.
- Custom Fields — If your account has custom fields configured for tasks, you can edit them here. See Custom Fields for details.
- Description — A free-text field for describing the task in detail.
Additional tabs within a task
At the top of the task detail view, you will find additional tabs for:
- Documents — Upload documents such as images or PDFs directly from your smartphone to the task. See Documents & Photos for details.
- Time Entries — Track the time spent working on tasks and create time entries. See Time Tracking for details.
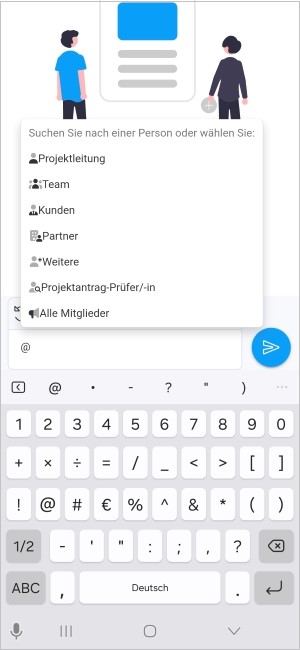
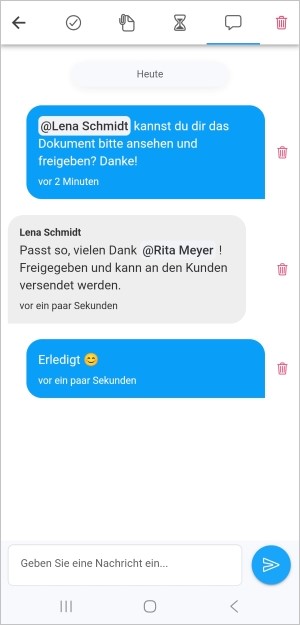
- Comments — Leave comments on the task. To add a comment, tap the comment input field. You can also tag entire groups or individual people in your comments by typing an
@symbol.
Delete a task
To delete a task, follow these steps:
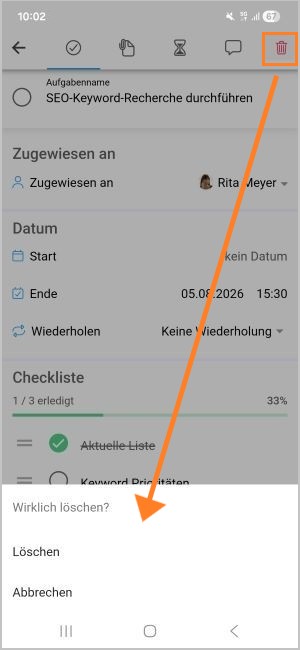
- Open the task you want to delete.
- Tap the trash can icon in the upper right corner of the toolbar.
- InLoox will ask for confirmation: Really delete?
- Tap Delete to confirm or Cancel to abort.
Deleting a task cannot be undone. Make sure you have selected the correct task before confirming.
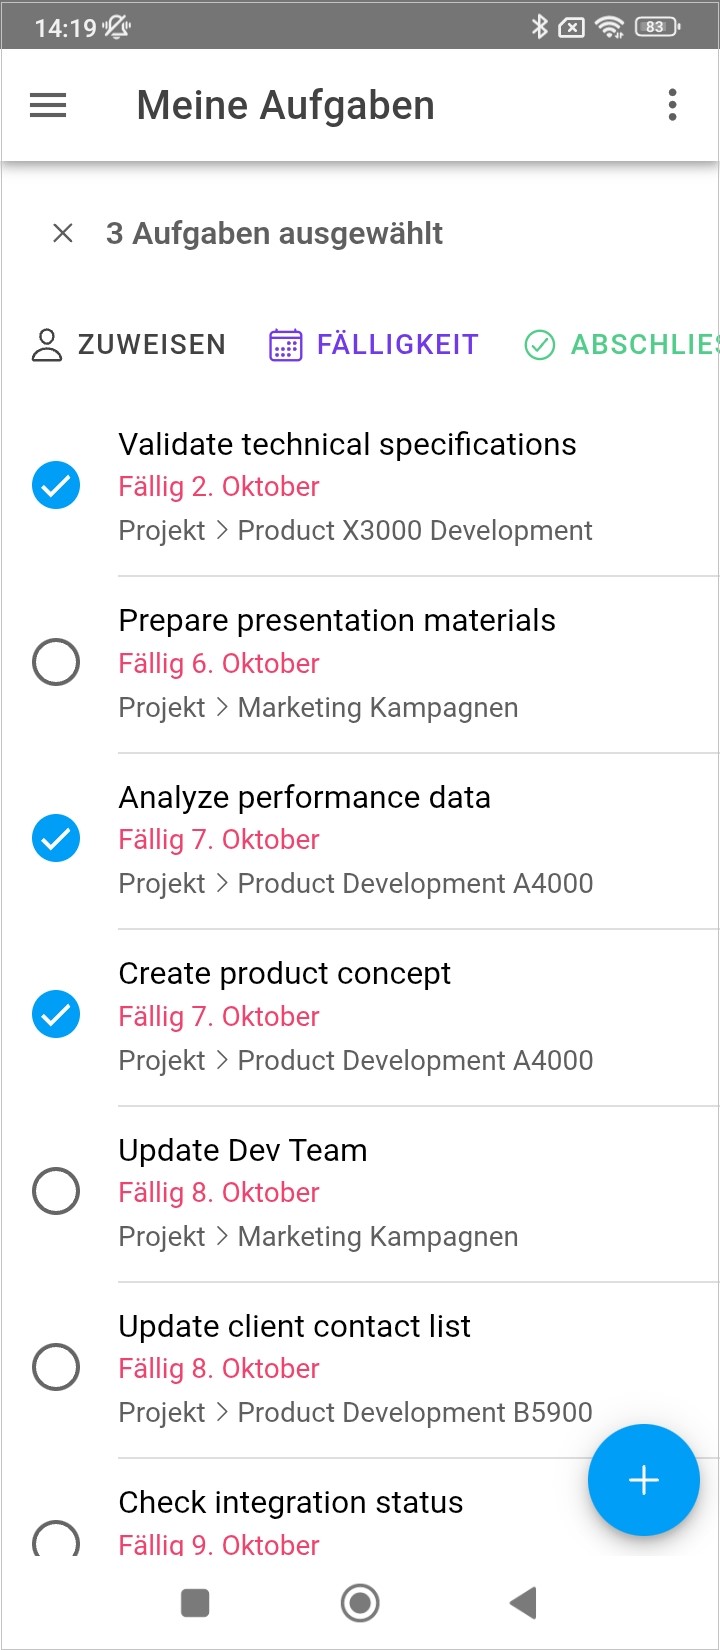
Multi-editing tasks
Save time by making changes to multiple tasks at once.
- Tap and hold a task until selection mode activates.
- Tap additional tasks to add them to the selection.
- Tap one of the buttons in the multi-edit toolbar:
- Assign — Assign a resource to all selected tasks.
- Due Date — Set or change the due date for all selected tasks.
- Done — Mark all selected tasks as done.