Import from Microsoft Planner
The Planner Import feature lets you import plans from Microsoft Planner into InLoox. Once enabled, you can launch the import wizard directly from your user menu and bring your existing Planner tasks and boards into InLoox as project tasks.

You must be connected to Microsoft 365 in the Integration Center before you can use the Planner import. If you have not connected your account yet, follow the steps in Integrations first.
Enable Planner Import in the Integration Center
- Click Integrations in the main navigation. The Integration Center opens.
- Locate the Planner Import section.
- Click Activate to grant InLoox access to your Planner data.
- If prompted, sign in with your Microsoft 365 account and confirm the requested permissions.
InLoox requires the following Microsoft Graph permissions for Planner Import:
Tasks.Read— to read your Planner tasks and task lists.Group.Read.All— to list the Microsoft 365 groups and their associated Planner boards.
See Microsoft Graph Permissions for a full reference of all permissions InLoox may request.
Import a Planner Plan
Once Planner Import is enabled:
- Click your profile picture in the top-right corner of InLoox.
- Select Import from Microsoft Planner.
- In the import wizard, select the plan or multiple plans you want to import. Then click Import.
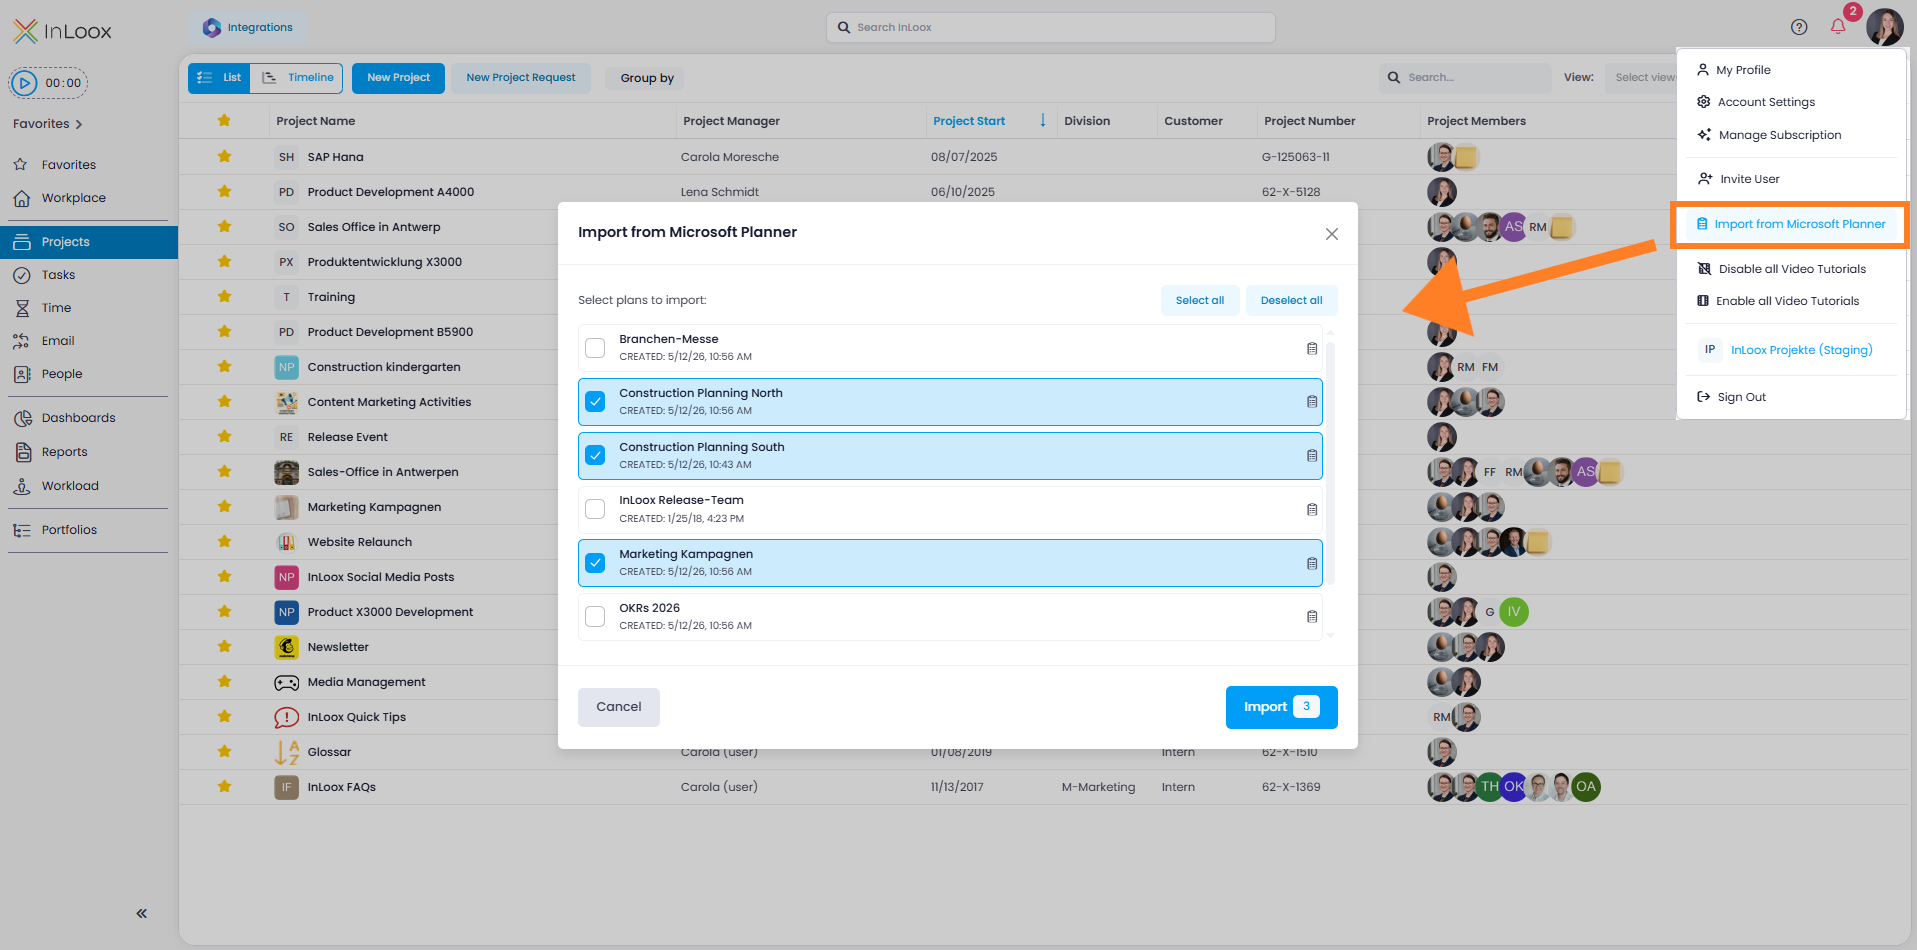
InLoox creates the plans as new projects and also imports the project tasks from the selected Planner board.
Disable Planner Import
To revoke Planner access:
- Click Integrations in the main navigation.
- Locate the Planner Import section.
- Click Deactivate.
InLoox will no longer have access to your Planner data, and the Import from Planner option is removed from your user menu.