Your First Project
Now that your account is set up and your team is invited, it is time to create your first project.
Create a project
- Click the blue New Project button in the toolbar at the top left.

- The new project appears in the project list with the default name New Project. Click on it to open it.
- Adjust the project name at the top.
- Set the start and end dates for your project.
- Add a short description on the Manage tab to give your team context.
For more details, see Create a New Project.
Add project members
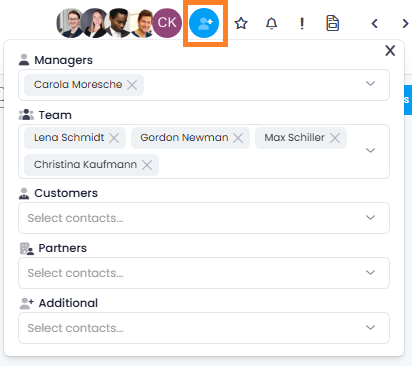
- In the project, click the plus icon in the upper-right corner next to the profile pictures.
- Add team members to the appropriate roles:
- Managers — Project leads with full project permissions
- Team — Team members working on the project
- Customers, Partners, Additional — External stakeholders with limited access
For more details, see Project Members.
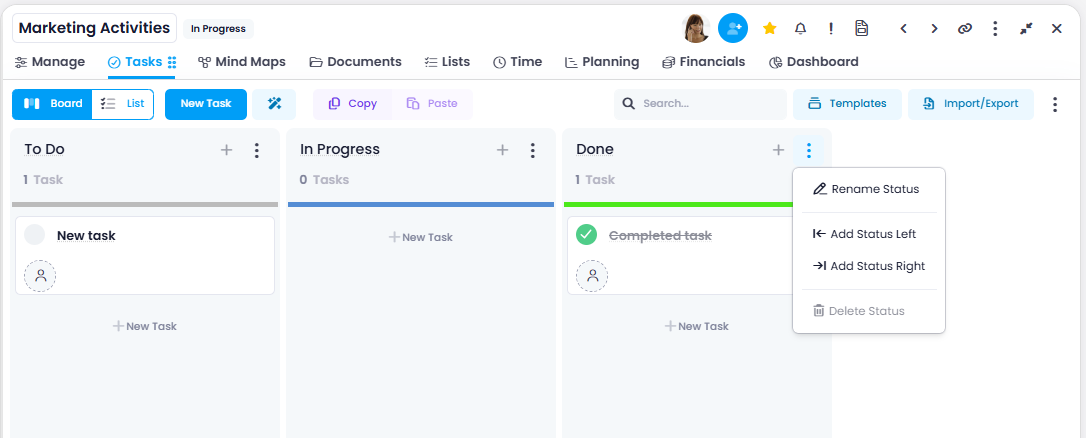
Create your first tasks
- Click the Tasks tab to open the Kanban board.
- Click New Task to create a task. It appears in the leftmost column.
- Give the task a name, assign a resource (team member), and set a due date.
- Drag tasks between columns to update their status (e.g., from To Do to In Progress).
tip
You can also use the AI Task Assistant to generate tasks based on your project description (available in InLoox Enterprise and Enterprise Plus).
For more details, see Create Tasks and Team Task Management with Kanban.
What to explore next
Now that your project is up and running, explore these areas to get the most out of InLoox:
- Project Planning with Gantt Charts — Plan activities, milestones, and dependencies
- Time Tracking — Track working hours on tasks and projects
- Financials — Manage budgets, costs, and revenues
- Customize the InLoox UI — Personalize your interface to match your workflow
- Video Tutorials — Watch step-by-step tutorials to learn more features