Creating a rule
In this section, we will create an automation rule together using a practical example, so you can learn the process and the individual parts of a rule.
Our example: Whenever a new project with "Release" in the name is created, an email should be sent to you automatically.
You need the Edit automations permission. If you don't see the Automation button, ask your administrator to grant it.
Step 1 - Opening the editor
Example:
- Open the project list (InLoox → Projects).
- Click the Automation button.
- Choose New automation.
The area you start from sets the default entity for the rule. In Create new automation, use Applies to to keep that entity or switch to another one. The selected entity determines which triggers, condition fields, actions, and tokens are available. If you switch the entity, existing trigger, conditions, and actions are reset. When you edit an existing rule, the entity is fixed.
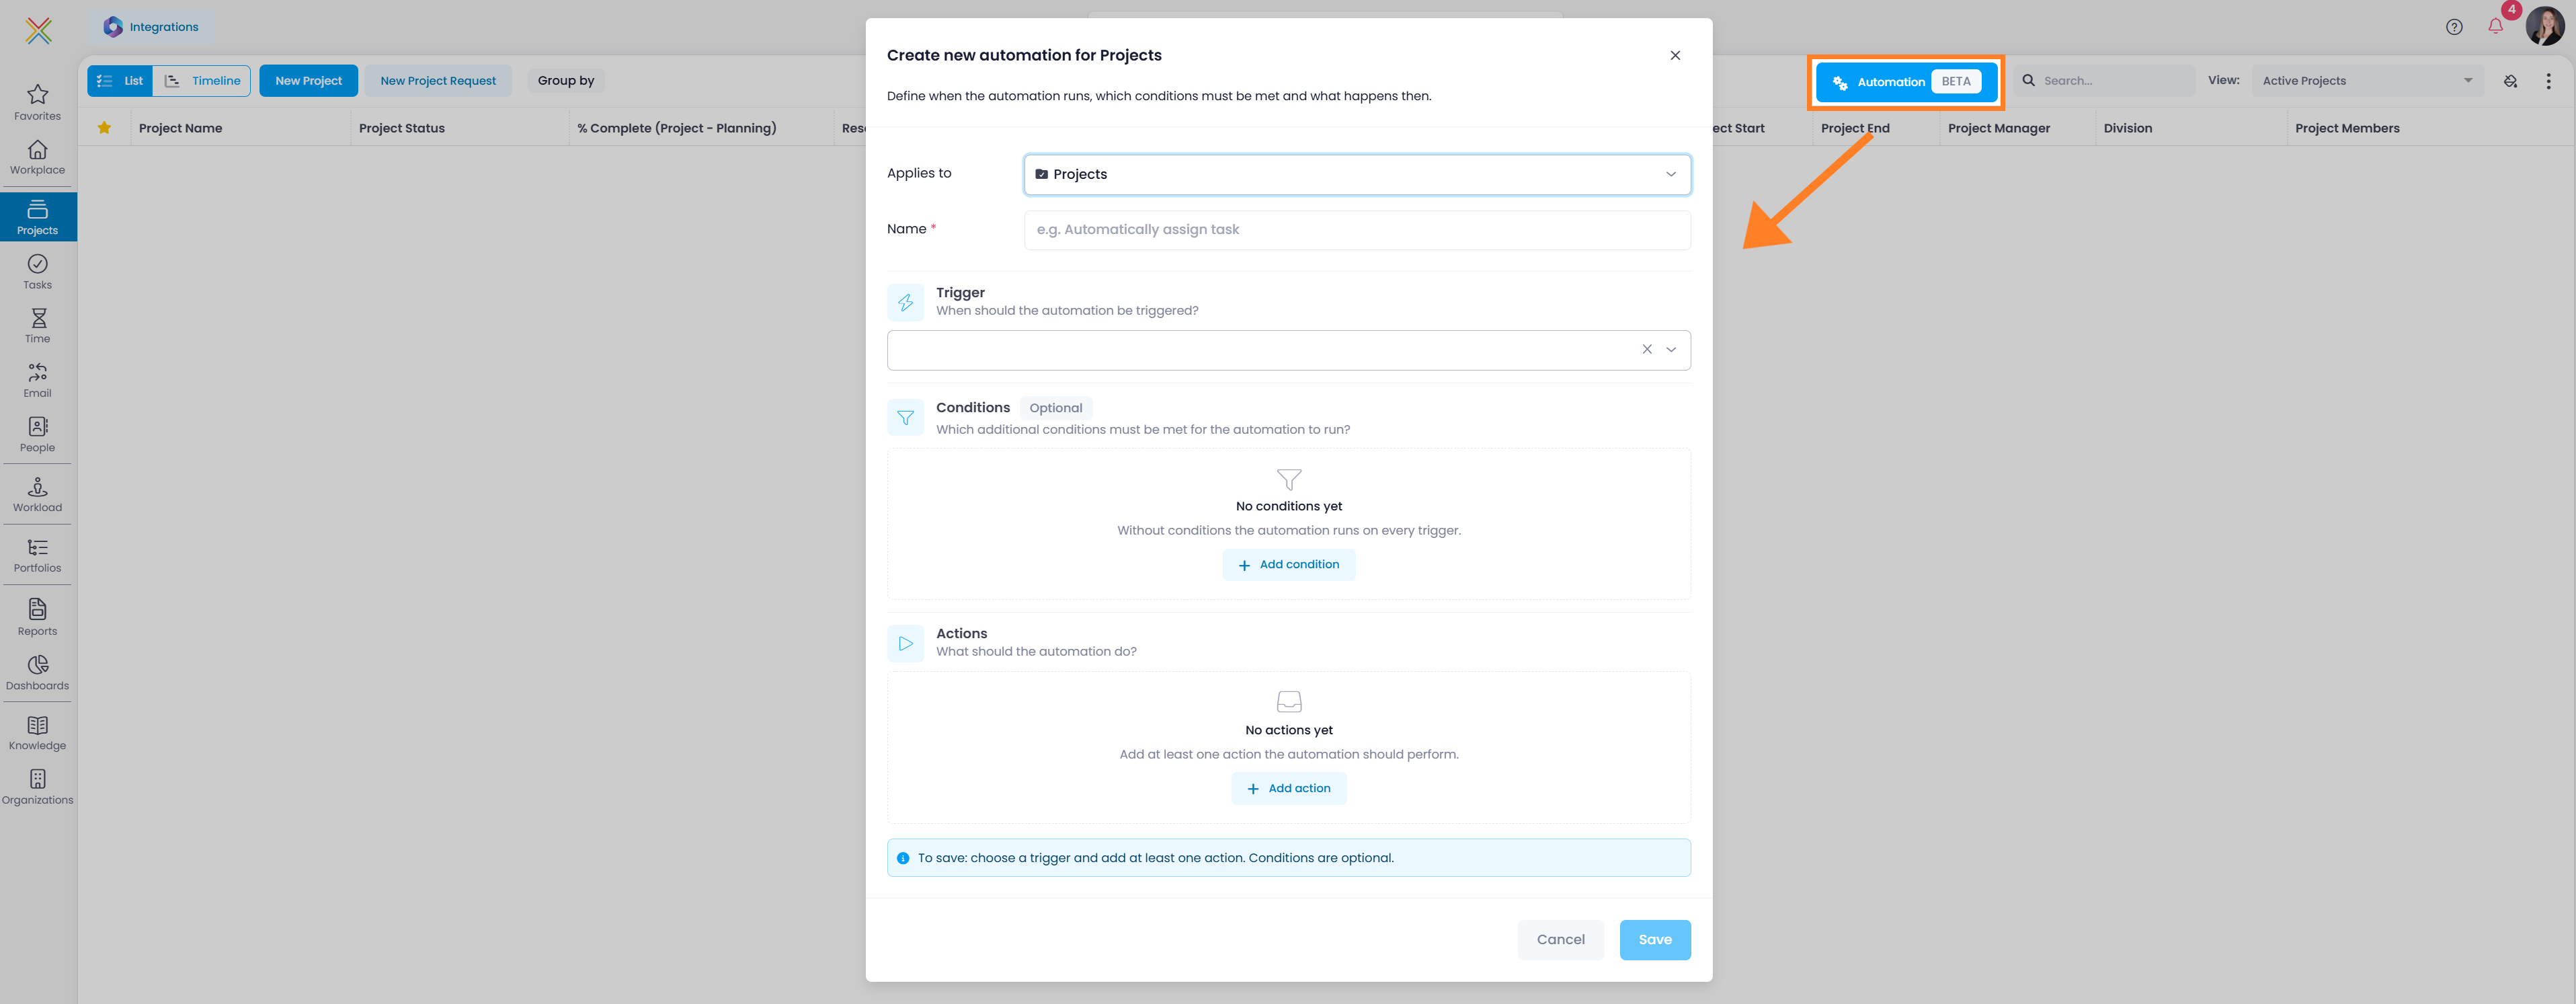
The Create new automation dialog opens. It combines two basic fields (Applies to and Name) with three guided sections: Trigger, optional Conditions, and Actions.
Step 2 - Applies to
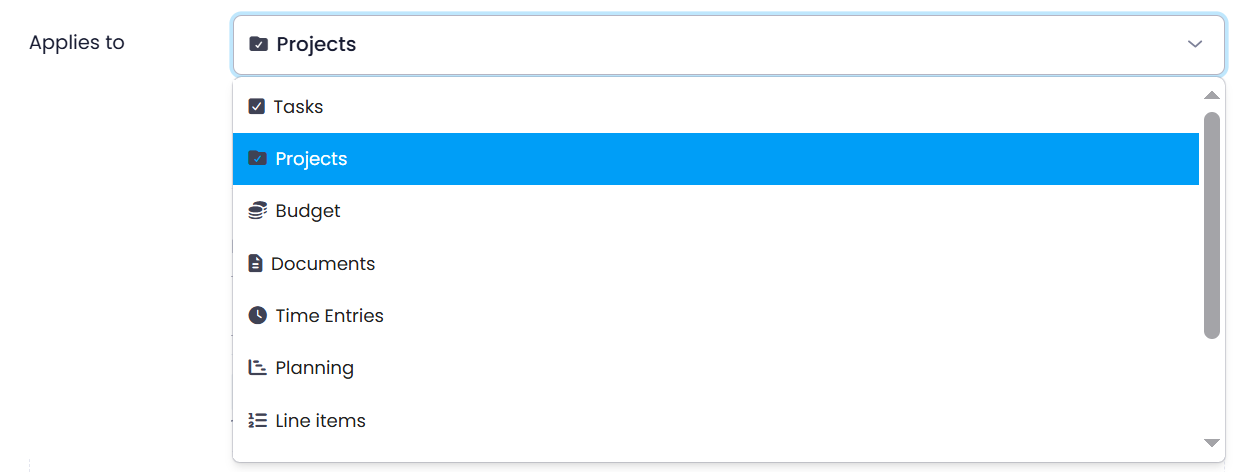
Applies to sets the entity the rule reacts to. Keep the default from the area you started in, or select another one.
Example: Because you started from the project list, Projects is already selected. Leave the selection unchanged.
Step 3 - Name
Give the rule a clear, unique name so you can recognize it later in the automation list.
Example: Name the rule Notify me when a Release project is created.

Step 4 - Trigger
The Trigger defines when the rule runs. A rule has exactly one trigger.
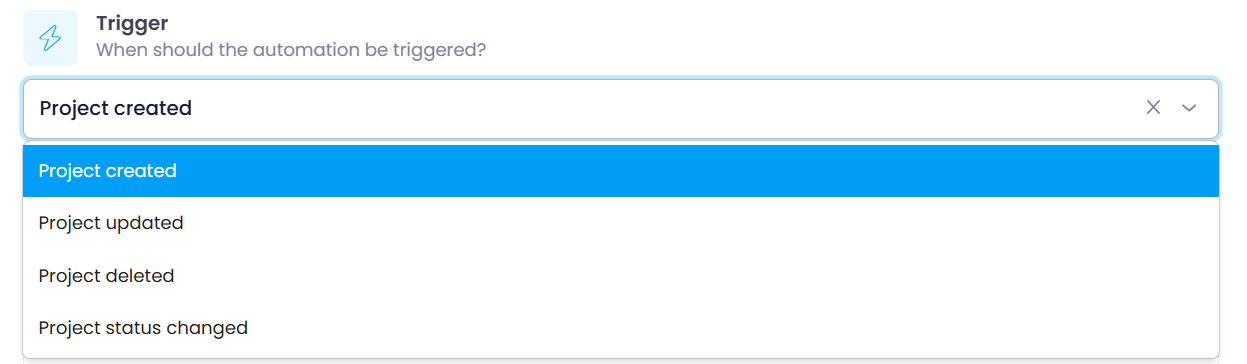
In the Trigger section, click the trigger field and choose a trigger from the grouped dropdown list. Depending on the area, you can choose manual and event-based triggers (see Triggers).
Because you opened the rule from the project list, the available triggers relate to projects:
| Trigger | Fires when… |
|---|---|
| Project created | A new project is created |
| Project updated | A project is changed |
| Project deleted | A project is deleted |
| Project status changed | A project's status changes |
| Started manually | You start the automation from the Automation menu |
Example: Select Project created as the trigger.
Step 5 - Conditions
Conditions are optional and let the rule run only in specific cases. In Conditions, click Add condition and define three parts:
- Field — the property to check (for example Project name, Status, Start date).
- Operator — how to compare (for example Equals, Contains, Is empty).
- Value — the value to compare against. Some operators (Is empty, Is not empty) need no value.
You can add several conditions. All of them must be true for the rule to run (logical AND). If you leave this section empty, the rule will run for every occurrence of the trigger.
Example: Click Add condition, then choose Project name Contains Release. This way the rule only fires for projects whose name includes "Release". Leave this step out to run the rule for every new project.

For the …updated trigger, additional "before change" operators are available. They let you react to how a value changed — for example, only run when a project's status changed away from a specific value. See Conditions for the full list.
Step 6 - Actions
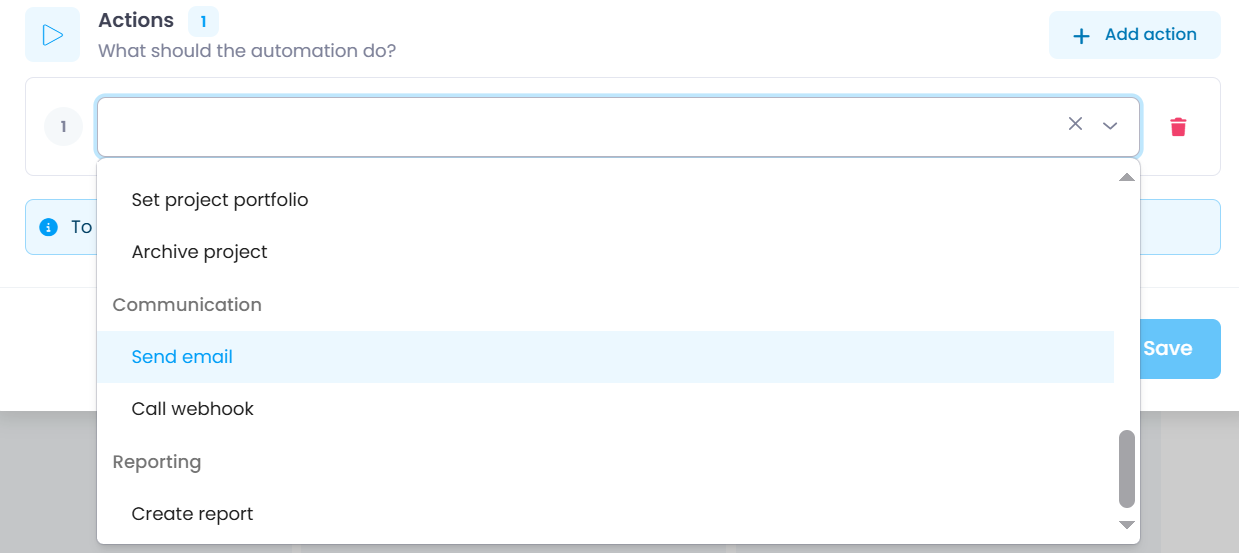
Actions define what the rule does. In Actions, click Add action and pick an action from the grouped list. Then fill in the action's fields.
- A rule needs at least one action.
- You can add several actions; they run in the order shown by the numbered action cards.
- Use the Insert token button next to a text field to add live values from the triggering record — see Tokens.
Example: Click Add action and select Send email from the Communication group.
Fill in the fields:
- Recipient — the email address that should receive the message.
- Subject and Message body — the content of the email.
- To include the actual project name, for example, click the button with the curly braces Insert token and pick
{{Project.Name}}. When the rule runs, InLoox replaces the token with the actual value.
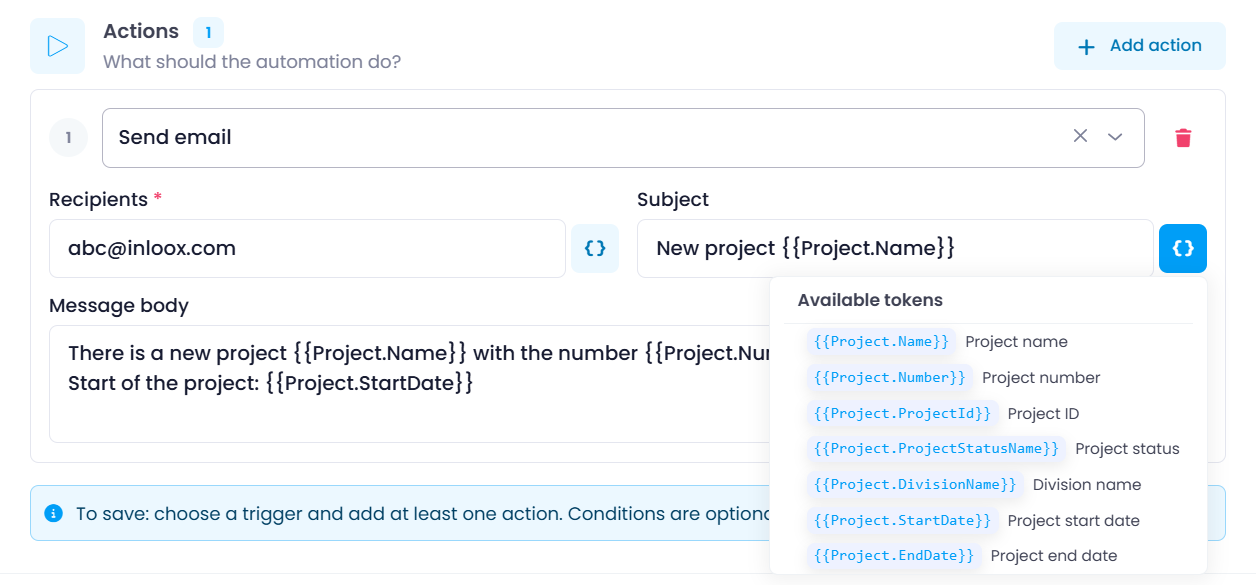
As you configure the rule, InLoox shows a live summary in the form When … · If … · Then … so you can quickly verify the logic.
Line breaks you type in the message body are kept in the email. For anything beyond that, write HTML tags directly into the text: <strong>Text</strong> makes text bold, <em>Text</em> makes it italic, and <ul><li>Entry</li></ul> creates a bulleted list. Links and simple tables work as well.
Only simple formatting like this is supported. Styling with attributes such as style or class is always removed.
For the complete list of actions per area, see Actions.
Step 7 - Saving and activating
Here is what your finished rule might look like:
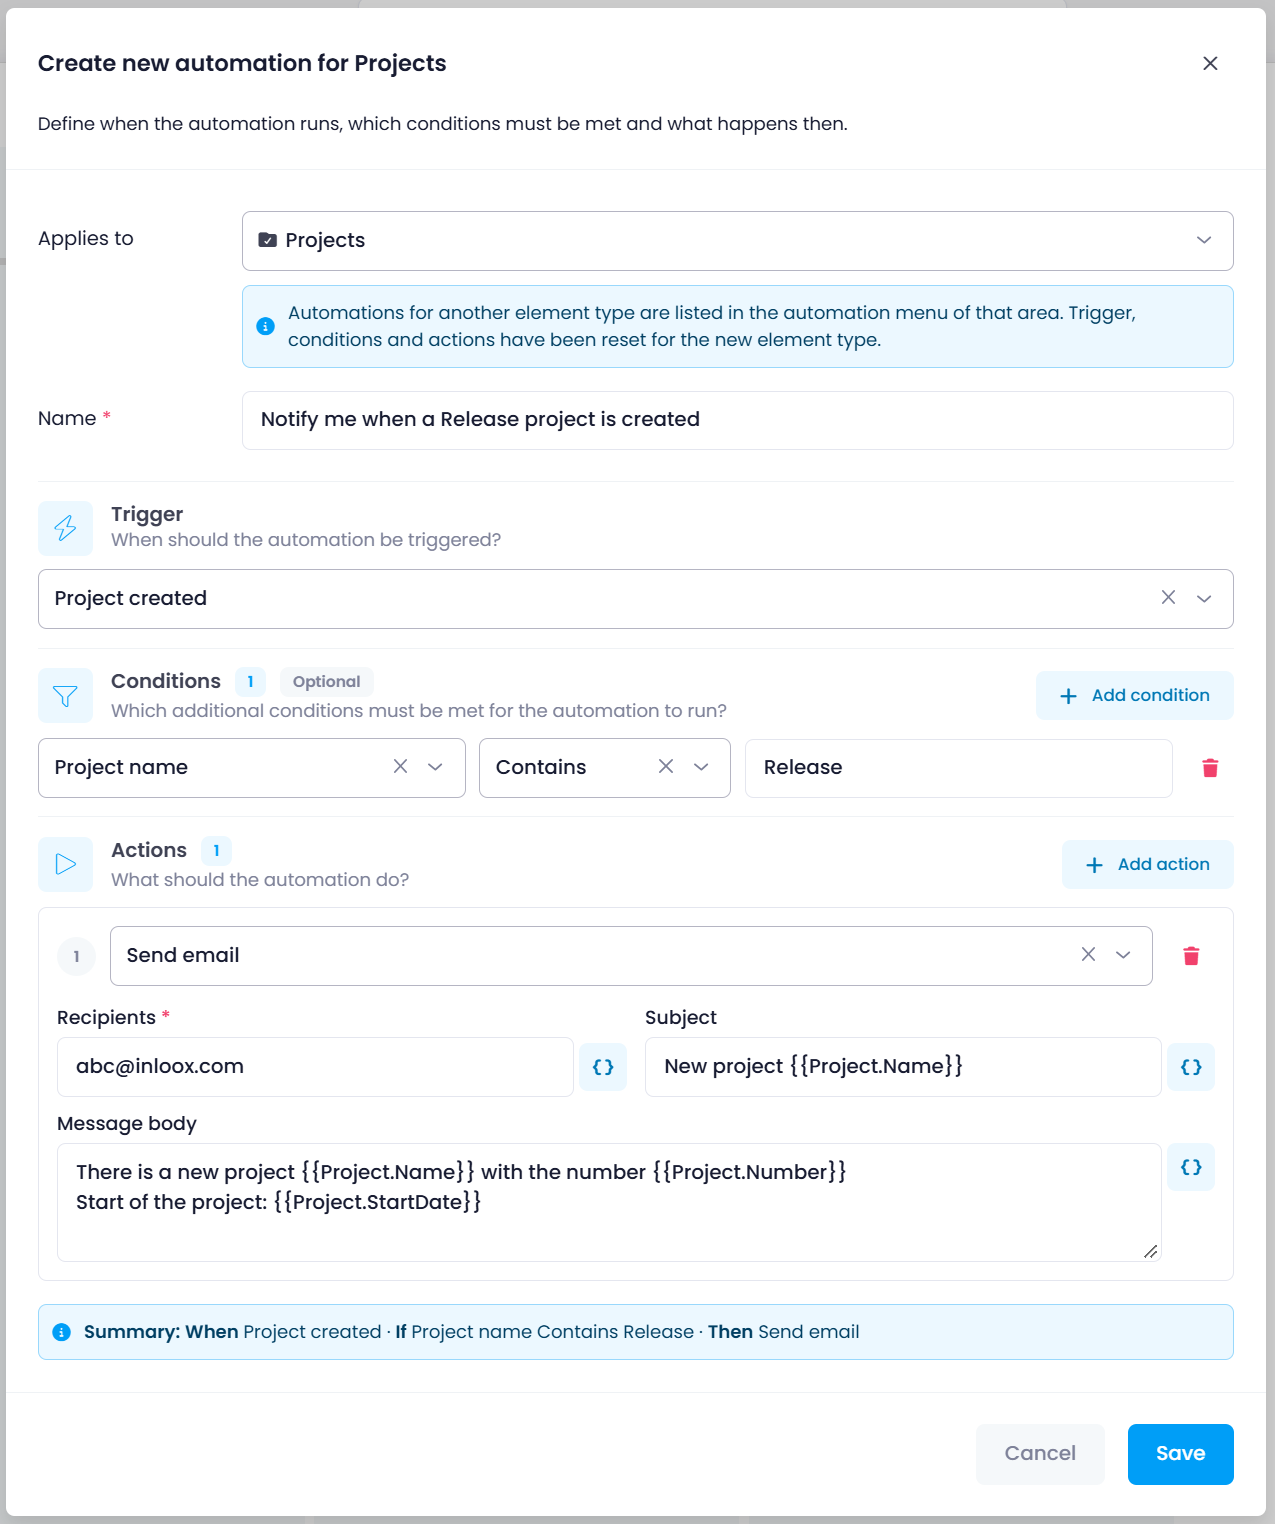
Click Save. The rule becomes active immediately and runs automatically from then on. Save stays disabled until the rule has a trigger and at least one action; if something is still missing, InLoox points it out in the dialog.
Example: Because you added the condition Project name Contains Release, InLoox will only send you an email when a project with "Release" in the name is created. If you had left the condition empty, you would receive an email for every new project.
To pause a rule without deleting it, disable it — see Managing rules.