UI Profiles
UI profiles define the default layout of the InLoox main menu and of the project tabs. You decide as an administrator which menu items and which tabs a group of users sees pinned, and in which order. Everything that is not pinned stays available in the More menu.
To open the UI profile settings and to change them, you need administrator rights for your InLoox account.
A UI profile is the starting point for every user it applies to. Users can still adjust the main menu, the project tabs, and the detail panels for themselves — see Customize InLoox UI. Personal changes take precedence over the UI profile.
How to open the UI profile settings
- In InLoox, click on your profile picture in the upper-right corner.
- Click on Account Settings.
- Click on UI Profiles in the menu of the settings.
How to create a UI profile
- Open the UI profile settings.
- Click New Profile.
- Enter a Name and a Description for the profile.
- Set up the layout in the Main Menu and Project Tabs tabs.
- Assign the users in the People tab.
InLoox saves every change immediately.
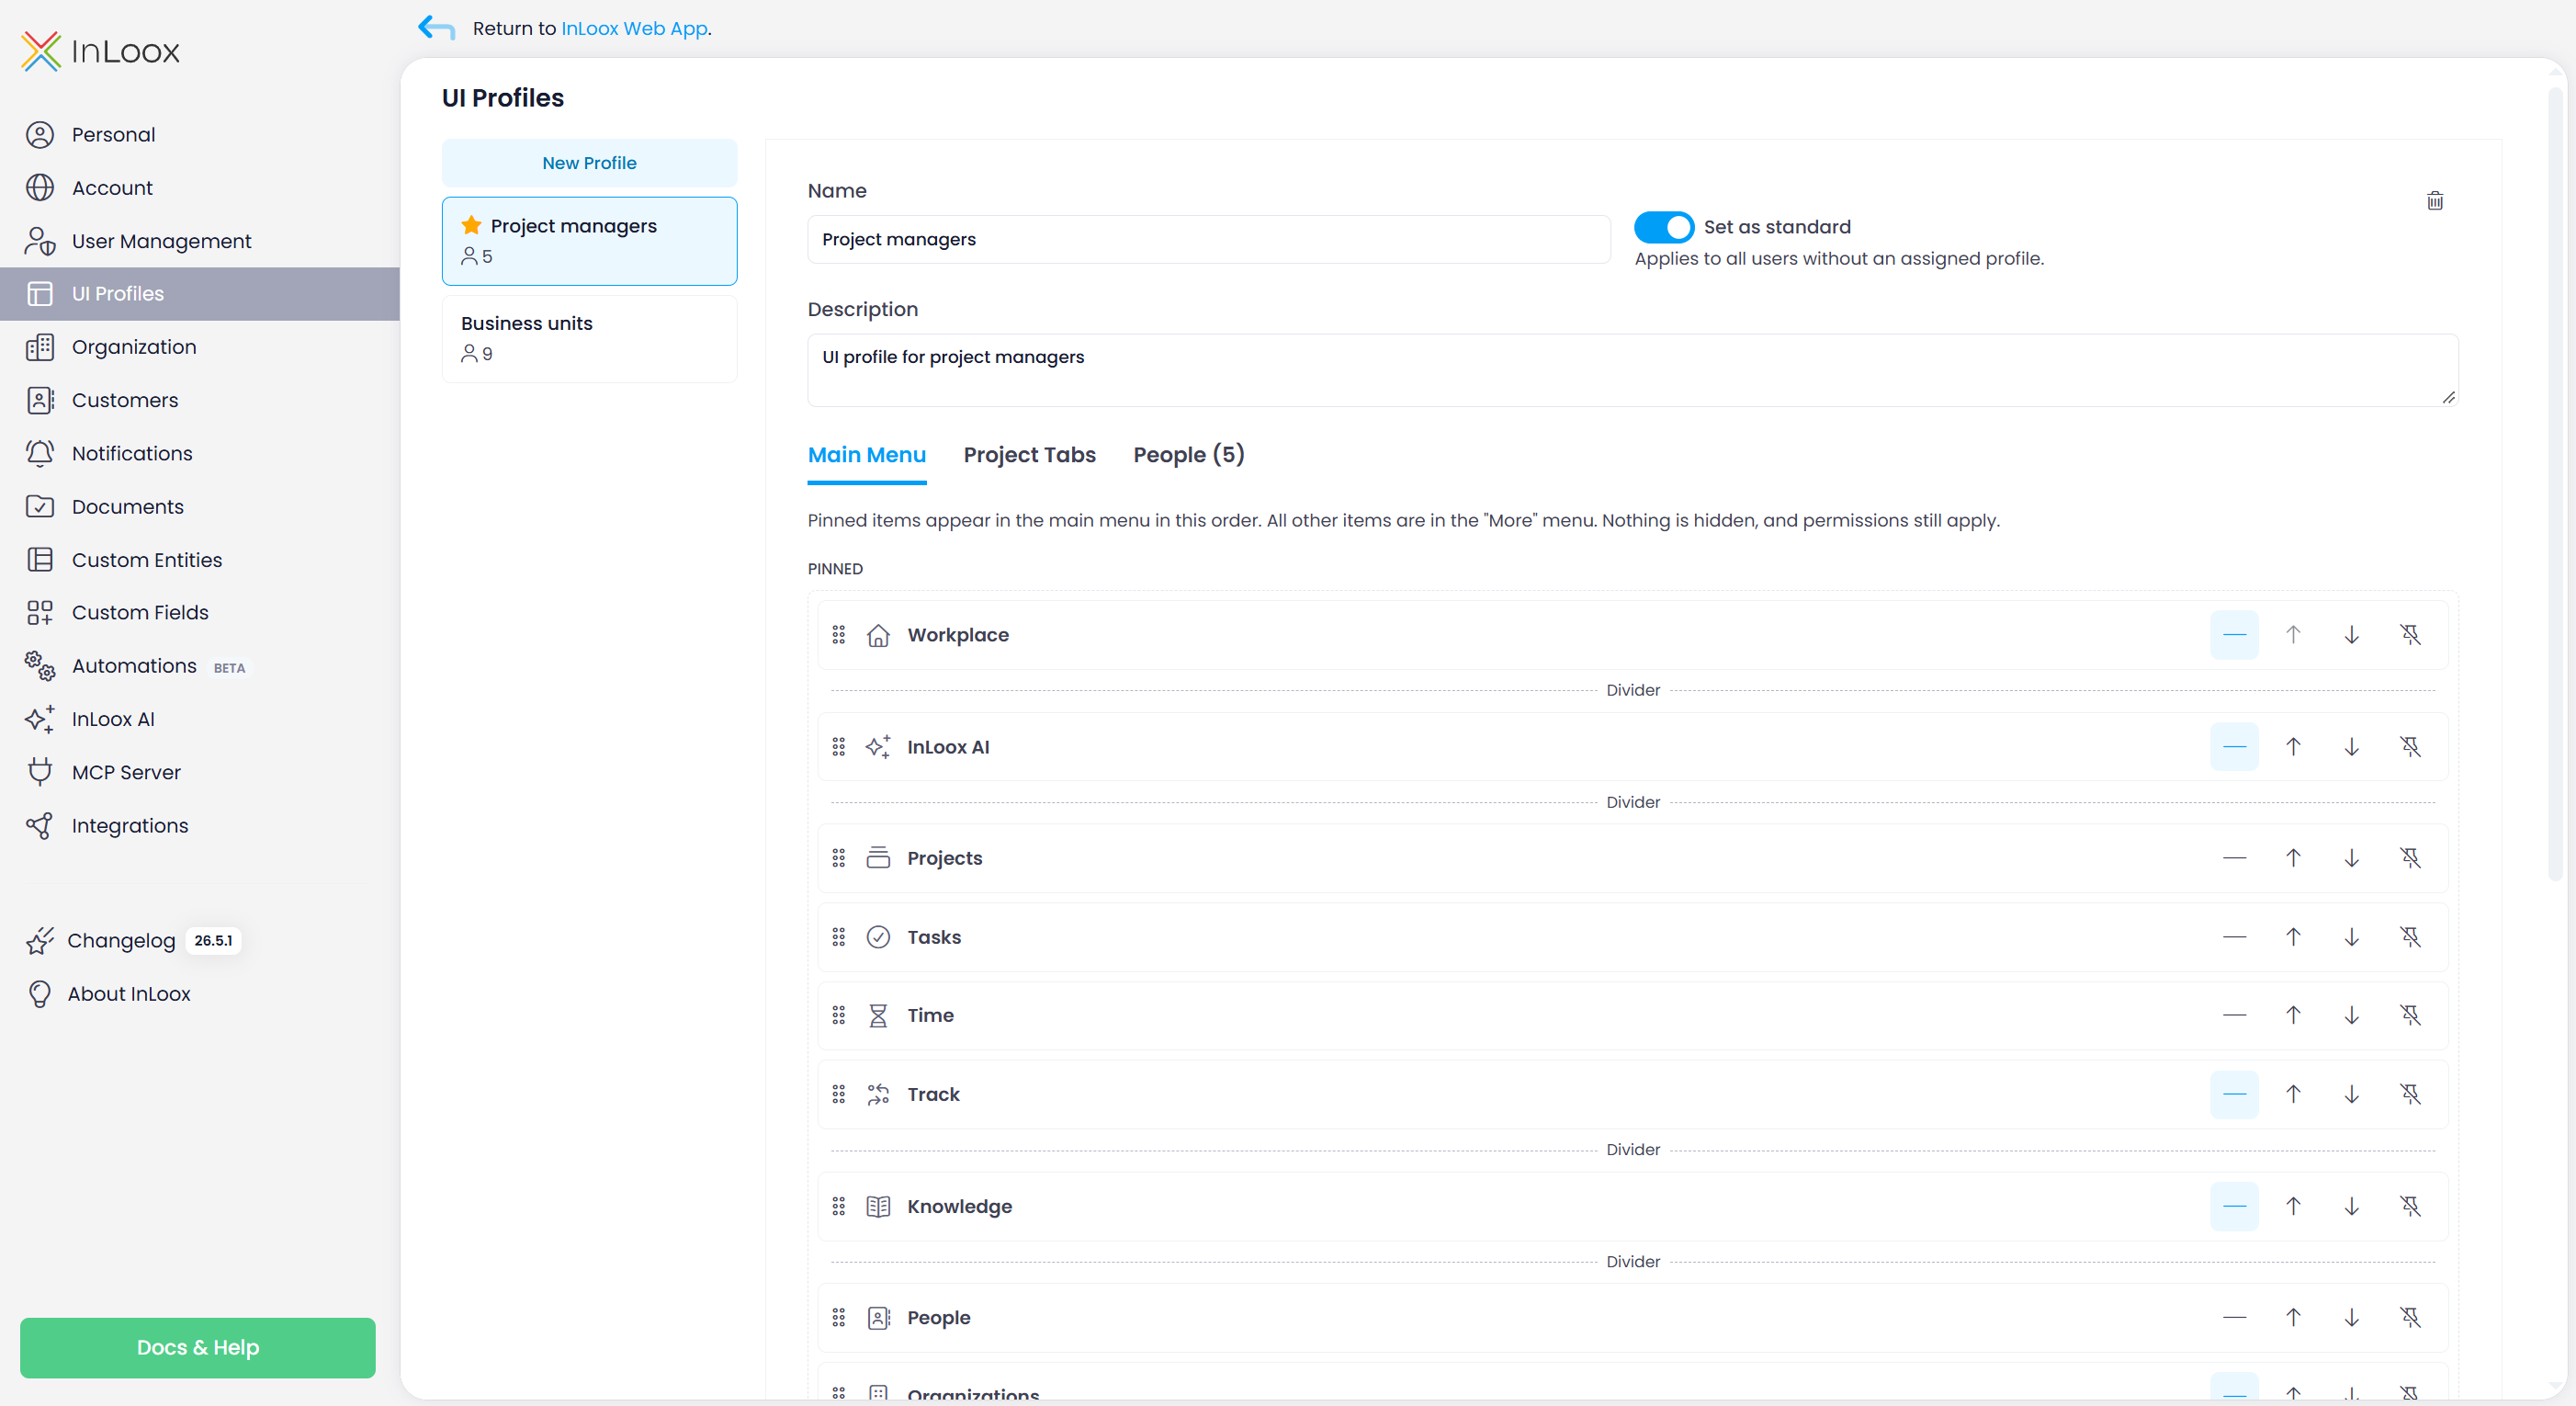
The standard profile
The standard profile applies to all users who have no UI profile assigned. InLoox marks it with a star in the profile list.
- To define a standard profile, select a profile and activate Set as standard.
- If no profile is marked as standard, users without an assignment see the default layout of InLoox.
How to define the layout of the main menu
- Select a UI profile and switch to the Main Menu tab.
- Arrange the entries in the two areas of the tab:
- Pinned — these items appear in the main menu of your users, in this order.
- In "More" menu — these items appear in the More menu of the main menu.
- To reorder an entry, move it by drag and drop: click the entry, hold down the mouse button, drag the entry to the new position, and release the mouse button. Alternatively, click Move Up or Move Down.
- To move an entry between the two areas, click (Move to "More" menu) or (Pin).
- To group menu items, click (Add Divider) below a pinned entry.
- Click Reset to code default to restore the layout of the selected tab.
Nothing is hidden: every area stays accessible, either in the main menu or in the More menu. Permissions still apply — your users only ever see the areas that they have reading or writing permissions for.
How to define the layout of the project tabs
- Select a UI profile and switch to the Project Tabs tab.
- Arrange the tabs in the Pinned and In "More" menu areas as described for the main menu. Dividers are not available for project tabs.
Pinned tabs appear in the project in this order. All other tabs are collected in the More menu at the end of the tab bar.
How to assign users to a UI profile
You assign users either in the UI profile itself or in User Management.
In the UI profile
- Select a UI profile and switch to the People tab.
- Click in the selection field and select the users. You can search by name and by email address.
- To remove users from the profile, select them and click Remove from profile.
In User Management
- In the settings of your InLoox account, go to User Management.
- Select a user.
- Select the profile under UI profile.
- To remove the assignment, select No profile (standard applies).
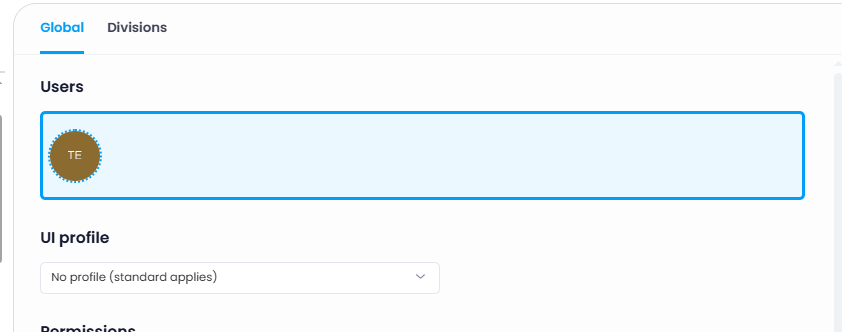
If you select several users with different UI profiles, the UI profile field shows Different profiles.
Users who are assigned to a profile, or removed from one, receive the new layout automatically. They do not have to log out first.
How to delete a UI profile
- Select the UI profile.
- Click (Delete profile).
- Confirm the message with Delete.
The users of the deleted profile receive the standard layout. If you delete the profile that is marked as standard, users without an assigned profile see the default layout of InLoox.