Permissions
General information
Reading and editing permissions are defined in the InLoox Account Settings under User Management. InLoox uses three types of permissions: global user permissions, role permissions, and division permissions (division permissions are not available in the InLoox Professional edition).
All permissions assigned to a person are cumulative. This means that each person receives their global user permissions as a baseline, which are then extended by any role permissions and division permissions that apply. The different permission types complement each other and are never restrictive — a permission granted at any level cannot be revoked by another level.
Sections in InLoox for which a person has no reading or editing permissions are automatically hidden from that person. This ensures a clean and focused user experience.
With the exception of the Managers role, role names can be changed to match your organization’s terminology. Roles can also be hidden to control which roles people can take on in projects — for example, you can hide the Customers role if it is not relevant for your organization. Existing project role assignments remain intact, and their permissions continue to apply.
Renaming and hiding roles is not available in the InLoox Professional edition.
User permissions - global
Global permissions give a person reading and editing rights across all areas and projects. Keep global editing permissions minimal. At minimum, assign:
- Create projects — allows the person to create projects and automatically become project manager, or
- Create project requests — allows the person to submit a project request for approval.
For the project request workflow to function, at least one other person must have the Edit project requests permission to approve requests.
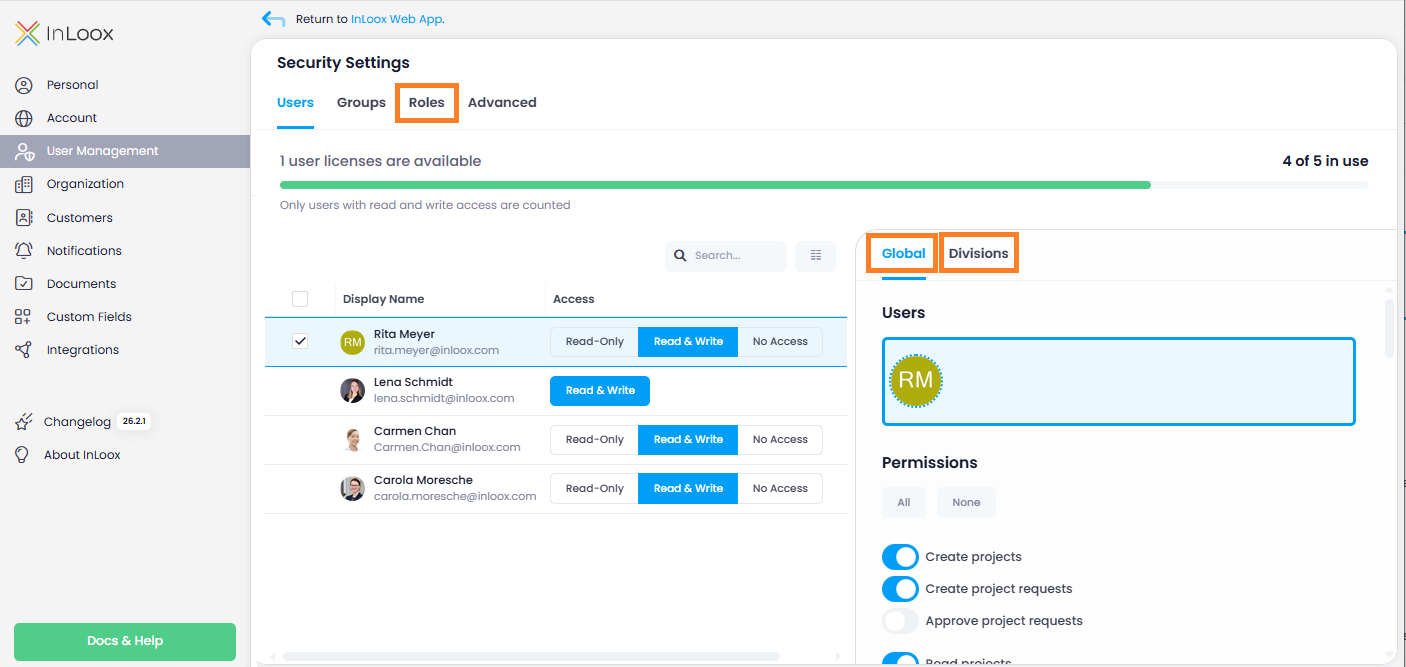
Assigning global user permissions
- In InLoox, click on your profile picture in the upper-right corner.
- Click Account Settings.
- Click User Management on the left.
- Search for a person by name or email address and select them (multi-select is available).
- Under the Global tab, activate the desired reading and editing permissions.
User permissions - divisions
People can receive additional permissions based on the project division. This allows members from other divisions to gain reading permissions without needing a role assignment in the project.
For division permissions to work:
- Create divisions in the InLoox settings.
- Assign each project to a division on the project's manage page.
- Assign permissions to users for individual divisions.
Division permissions are based on the project's assigned division, not on the person's own division affiliation. A project can only be assigned to one division.
Assigning division permissions
- In InLoox, click your profile picture in the upper-right corner.
- Click Account Settings.
- Click User Management on the left.
- Search for a person by name or email address and select them.
- Under the Divisions tab, select a division from the drop-down menu.
- Activate the desired permissions for the selected division.
- Remove the division and select another to assign different permissions per division.
Role-based permissions
Each person gains additional permissions through role assignments in projects. You can define the permissions for each project role according to your needs. The default roles are: Managers, Team, Customers, Partners, and Additional.
Assigning role permissions
- In InLoox, click on your profile picture in the upper-right corner.
- Click Account Settings.
- Click User Management on the left.
- Click on the Roles tab.
- Select a role (e.g., Managers).
- Activate the desired permissions for that role.
Role permissions apply to all projects in your InLoox account.
Additional custom roles
For InLoox Enterprise Plus and InLoox Self-Hosted accounts, admins can define up to 5 additional project roles:
- Click on your profile picture and then on Account Settings.
- Click on User Management. In Security Settings, click the Roles tab.
- Select one of the five More roles and configure it by:
- Making it visible (only visible roles can be used in projects)
- Giving it a new name
- Assigning reading and editing permissions

Best practice recommendations
- Managers — Should have full read and edit rights. Consider restricting the following permissions:
- Delete project comments — We recommend disabling this to ensure the integrity of your project comments (project diary) in case of an audit.
- Allow backdating in times — We recommend disabling this for project roles. If needed, grant this as a global user permission to a specific person responsible for billing corrections.
- Edit financials — Disable this if project budgets are managed by a central office or a specific person.
- Delete projects — We recommend archiving projects instead of deleting them. Only grant this permission in coordination with your quality management.
- Team — Recommended read and edit permissions for project members:
- Read: projects, project comments, lists, mind maps, tasks
- Edit: project comments (add and delete own), lists, mind maps, tasks, own time entries, documents
- Customers — We recommend giving customers — both internal and external — read-only permissions. Useful read permissions include: projects, tasks, planning, and financials.
- Partners — Partners may need limited editing permissions, for example to report back on assigned tasks or comment on tasks. Useful permissions include: read projects, read project comments, read tasks, add project comments, delete own project comments, edit tasks.
- More — Use this role for department heads or middle/higher management.
InLoox permissions - an example
Rita Meyer is the head of the marketing department and responsible for all marketing projects. She also collaborates with sales and needs visibility into IT product development projects. Her employer generally prohibits the deletion of projects and project comments — therefore, the permissions Delete project comments, Delete own project comments, and Delete projects are deactivated across all permission levels.
Her permissions are structured as follows:
- Global user permissions: Limited — she can create projects, edit existing reports, and generate reports.
- Division permissions: Since Rita Meyer heads the Marketing department, she receives full reading and editing permissions for all projects assigned to the Marketing division — regardless of whether she holds a role in those projects. She also receives reading permissions for Sales projects (comments, lists, mindmaps, tasks, planning, documents) and IT projects (planning only).
- Role permissions:
- As Managers: She receives full editing rights for financials, manage page, lists, mindmaps, tasks, planning, time tracking, and documents. She can add project comments and lock the project for editing.
- As Team member: She can read, edit, and create project tasks; read planning and documents.
User groups for projects
You can create user groups to quickly assign multiple people to project roles at once. User groups simplify managing permissions for teams of people who frequently work together. When a group is assigned to a project as a resource, the individual user permissions of each group member remain in effect and are extended by the role permissions of the assigned project role.
User groups are only available in the InLoox Enterprise, InLoox Enterprise Plus, and InLoox Self-Hosted editions.
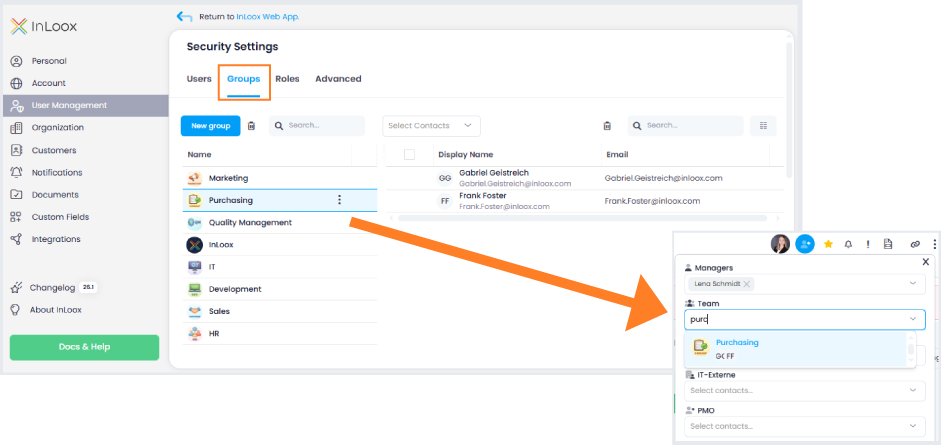
Creating a user group
- Click on your profile picture and then on Account Settings.
- Under User Management, click on the Groups tab.
- Click New Group. InLoox creates a new group in the list.
- Click in the name field and enter a name for the group.
- Click Select Contacts at the top and search for or scroll through the list of people. The people you add must be InLoox users in order to have at least read access to project data.
The group can now be assigned to roles within projects. Open a project and click the Add People icon in the upper-right corner.
Editing a user group
- Select the group from the list.
- To remove a person, select them in the list and click the trash can icon in the upper-right corner.
- To add a person, click Select Contacts at the top, search for the person, and select them.
InLoox automatically synchronizes group changes. If the group already has a role in a project, newly added members automatically receive the corresponding role permissions. You do not need to reassign the group. Removed members are also updated automatically.
Deleting a user group
Select the group and click the trash can icon, the three-dot menu, or right-click the group and select Delete Group. Confirm the deletion.
When you delete a group, it is also removed from all projects where it has been assigned to a role.