Microsoft Outlook Settings
The following settings only take effect if your InLoox account is connected to Microsoft 365. The connection is established in the Integration Center. There, you can connect your Microsoft 365 account and manage access to Microsoft Outlook, calendar, and other Microsoft 365 services.
For details on what you can do with the Microsoft Outlook integration, see Emails and Calendar. If you use the InLoox Outlook Add-in, see the InLoox for Outlook documentation.
To use the Microsoft Outlook settings, you must first connect InLoox to Microsoft 365 in the Integration Center.
Mark Microsoft Outlook emails - add a category
When you file a Microsoft Outlook email in InLoox as a task, document, or time tracking entry, a new Microsoft Outlook category is created as a marker. The email gets the category "InLoox".
This way, you can see in Microsoft Outlook at a glance which email you have already filed in InLoox.
- In InLoox, click on your profile picture in the upper-right corner.
- Click on Account Settings.
- Click on Organization.
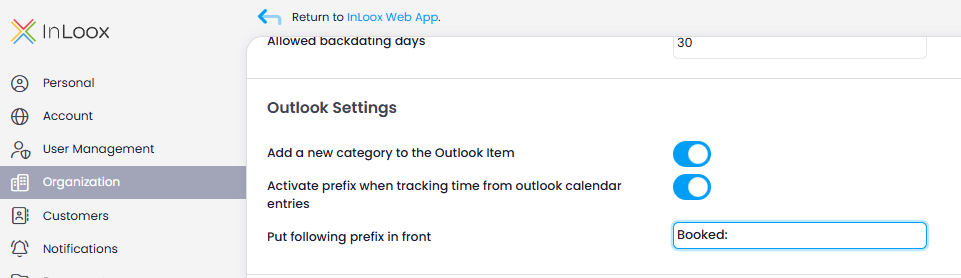
- Under the General tab, activate the slider at Add new category to the Outlook item under Outlook settings.
- After you have filed an email in InLoox, the category will now appear in Microsoft Outlook above the email and in the preview.
- In Microsoft Outlook, click Categorize in the menu under Categories and then click All categories.
- Now you can set the color of the "InLoox" category.
These settings apply to all users of the InLoox account.
You can also manage this setting per user in the Integration Center under Emails with the Set category on processed emails toggle.
Mark Microsoft Outlook items - prefix for tracked calendar entries
If you track a Microsoft Outlook calendar item for time tracking in InLoox, you can specify that a prefix is automatically created in the Microsoft Outlook calendar item.
This way, you can immediately recognize in Microsoft Outlook which calendar items are already tracked in InLoox Time Tracking.
- In InLoox, click on your profile picture in the upper-right corner.
- Click on Account Settings.
- Click on Organization.
- Under the General tab, activate the slider at Activate prefix when tracking time from Outlook calendar entries under Outlook settings.
- Enter the character or word to be used in the field next to Put following prefix in front.
- As soon as you have booked a calendar appointment as a time tracking entry in InLoox, this prefix will now be placed in front of the subject of the calendar entry in Microsoft Outlook.
These settings apply to all users of the InLoox account.
You can also manage the category marking for calendar entries per user in the Integration Center under Calendar with the Mark calendar entries with category after booking toggle.