Create, Edit and Use Groups
Groups are used to sort tasks, time tracking entries, and budget items into specific categories with predefined purchase and sales prices. Groups allow you to better structure data and help you keep an overview of your income and expenses across different groups.
The purchase and sales prices defined in each group are also used by the automatically created budgets and financial plans Expenditures (Plan, Resources) and Expenses (Actual, Time Tracking).
Changes to the groups take effect immediately and are also applied to existing projects!
Add group
- In InLoox, click on your profile picture in the upper-right corner.
- Click on Account Settings.
- Click on Organization.
- Under the General tab, click New on the right under Groups to add a new group.
- In the Add group window, enter the new name in the Group name field.
- Click Save.
- Now you can set the purchase and sales price. Click in the number field and enter the value.
Edit group
- In InLoox, click on your profile picture in the upper-right corner.
- Click on Account Settings.
- Click on Organization.
- Under the General tab, click in the name field of a group under Groups and enter the new name.
- Change the values of the group's purchase and sales prices by clicking in the respective number field and entering the new value.
- Click Enter to confirm the entry.
Delete group
- In InLoox, click on your profile picture in the upper-right corner.
- Click on Account Settings.
- Click on Organization.
- Under the General tab, click the red trash can to the right of the group you want to delete under Groups.
- Confirm the deletion by clicking Yes.
If you delete a group from the settings, this will immediately be implemented in all affected tasks and budget items. This means that you will have to reassign these tasks and items to another group. Also, the group and associated amounts will no longer be displayed in the budget item.
Set a default group for time entries in a project
You can set a default group for time entries for a specific project. This is particularly helpful when an entire project's tracked time entries are billed with the same monetary values.
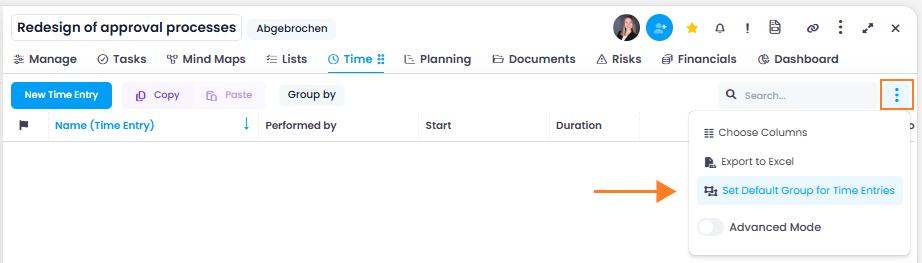
- Open a project and click on Time.
- Click on the three-dot menu on the right and select Set Default Group for Time Entries.
- In the window, select the billing group for the project.
InLoox will now automatically use this group when a time entry is created. The user may still change the group on individual time entries.